Chalk Paint® on Velvet (Vintage Horse Carriage)

The Purple Painted Lady has been a passionate retailer for Chalk Paint® decorative paint by Annie Sloan for almost 8 years now, and I am still amazed daily by the transformations all of you create using this very special paint!

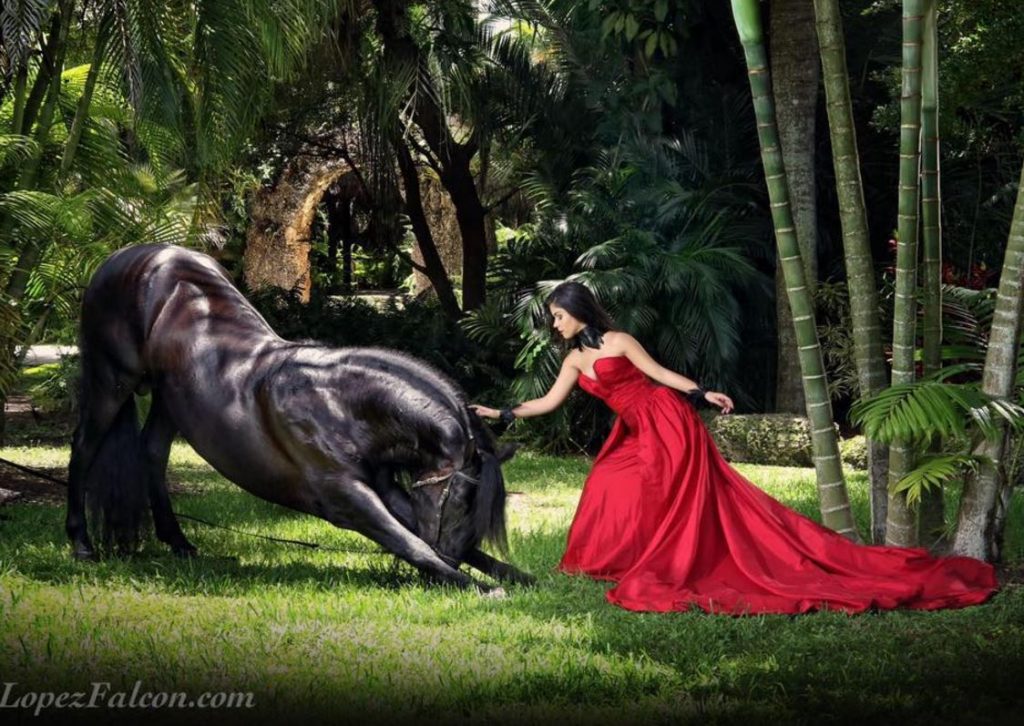
I would like to introduce our customer Alexandra who has a beautiful farm called El Portal Andaluz.  They are a small and private equestrian farm to magnificent stallions that are available for photo shoots.   I have worked with Alexandra and the attention to detail at El Portal Andaluz is so finite…every single aspect will amaze you!  

The farm has (PRE) Andalusian horses at Stud. Outstanding conformations, excellent manners & a heart of gold. They request that you contact them for your next sire or video/photo rentals.  Here is an example by what I mean in regards to impressive and breath taking!:

Okay- it is hard to follow something so magnificent like these horses, but I did start this post to share Alexandra’s transformation using Burgundy Chalk Paint®.  

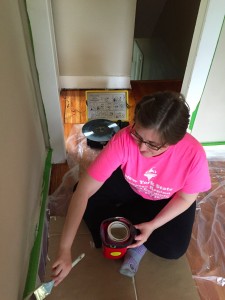
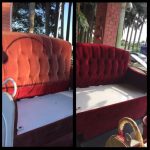
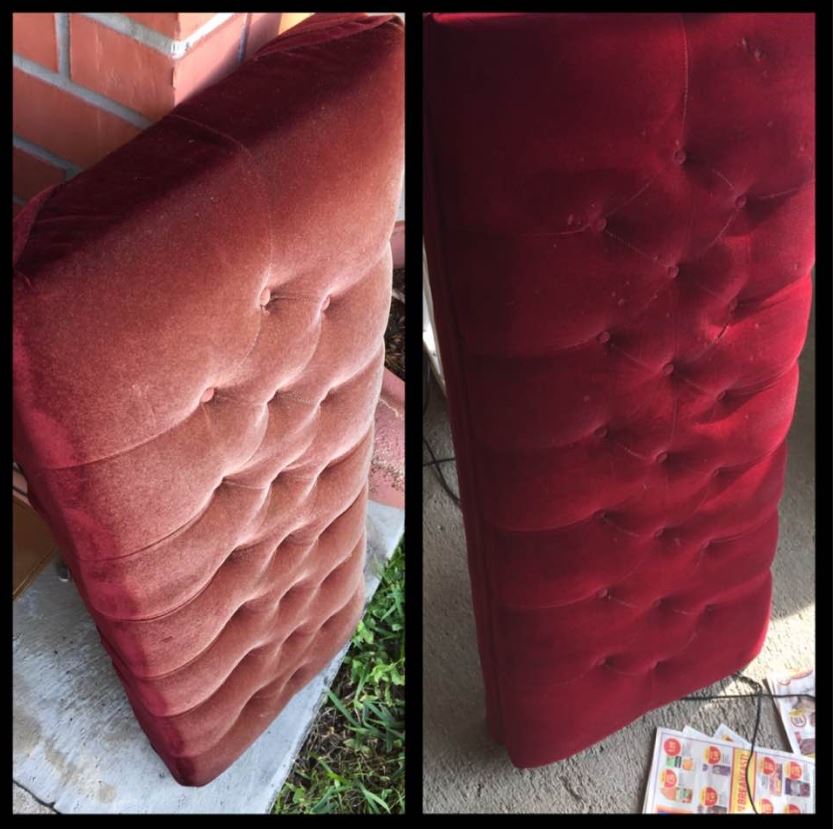
Aleaxandra has a vintage horse carriage where the velvet seats have faded and lacking in color.  Using the Burgundy Chalk Paint® she truly resurrected the seats and is extremely happy with her results.  What do you think?

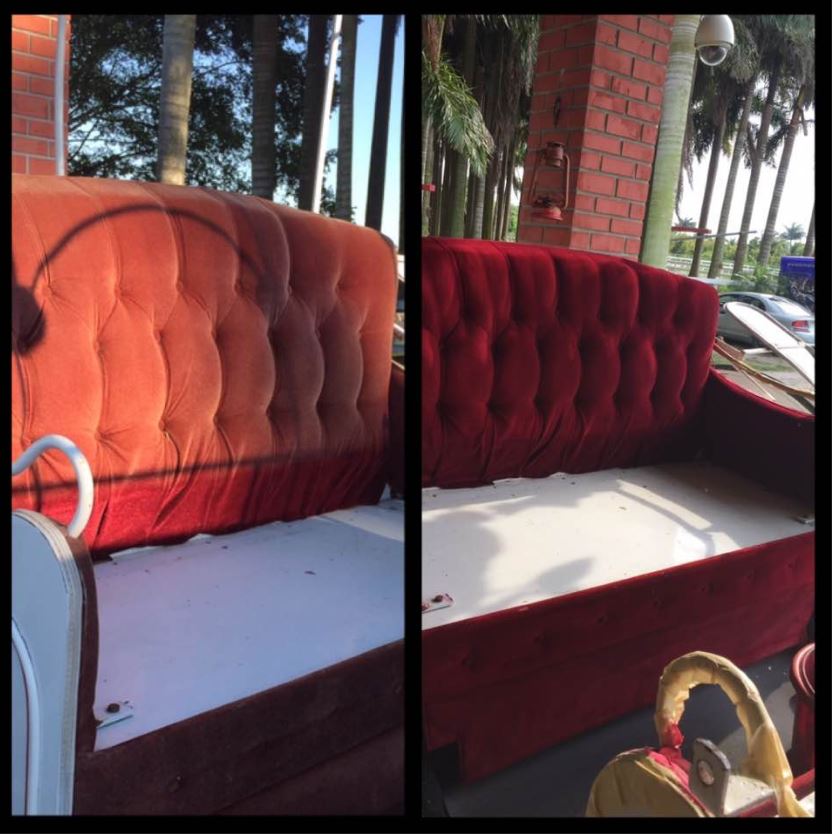
Impressive?  Heck, yes!

Okay- now on to the technical side of it all.

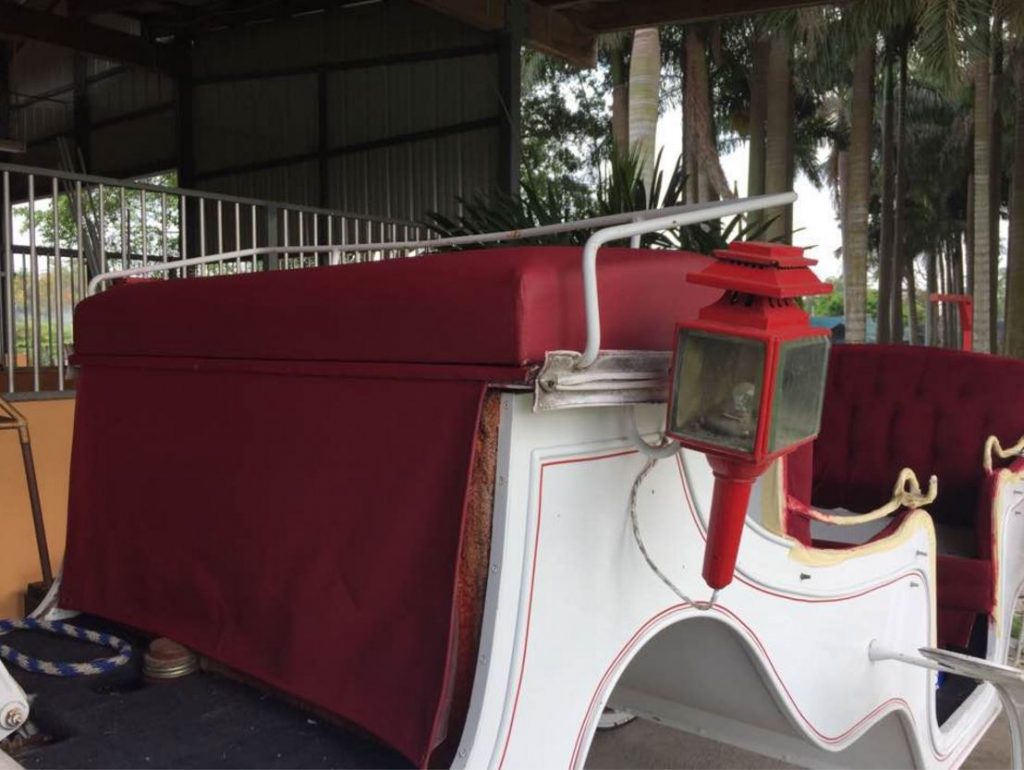
Chalk Paint® is both an interior and exterior grade paint.  For outside uses, we do not recommend the wax.  This carriage will be sitting under a portico also…not that it has to, but being that it is vintage- it does.

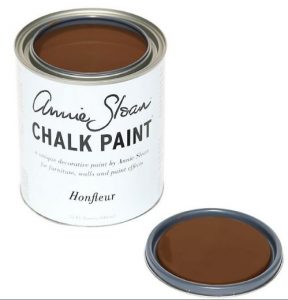
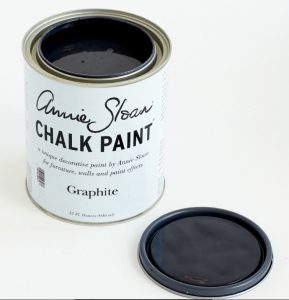
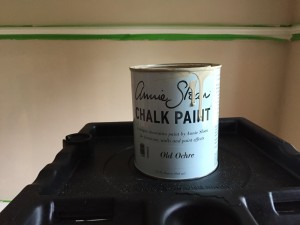
DESCRIPTION OF BURGUNDY CHALK PAINT®:

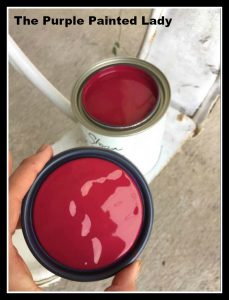
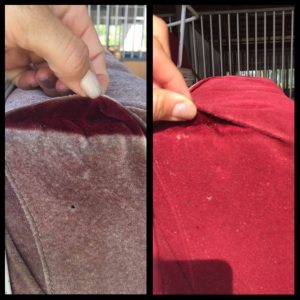
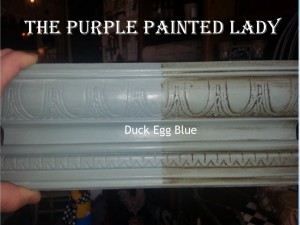
As you can see by the above photos, the existing velvet was faded but still in good condition.  Alexandra chose Burgundy Chalk Paint® to resurrect the cushions.  Annie Sloan defines this color as a rich deep warm red the color of dark cherries. Most of Annie’s colors are 18th and 20th century inspired but this one comes from the 19th century when the discovery of Alizarin Crimson made this color possible for the first time to a large number of people. It is now one of the classic colors used in particular for neo-classical painted furniture.

The Purple Painted Lady has found Burgundy to be interesting, in that the color appears to almost be like a bright berry color when wet. But once dry, it deepens and is a significantly richer color.

MATERIALS NEEDED:

Burgundy Chalk Paint® by Annie Sloan

Annie Sloan Small Paint Brush

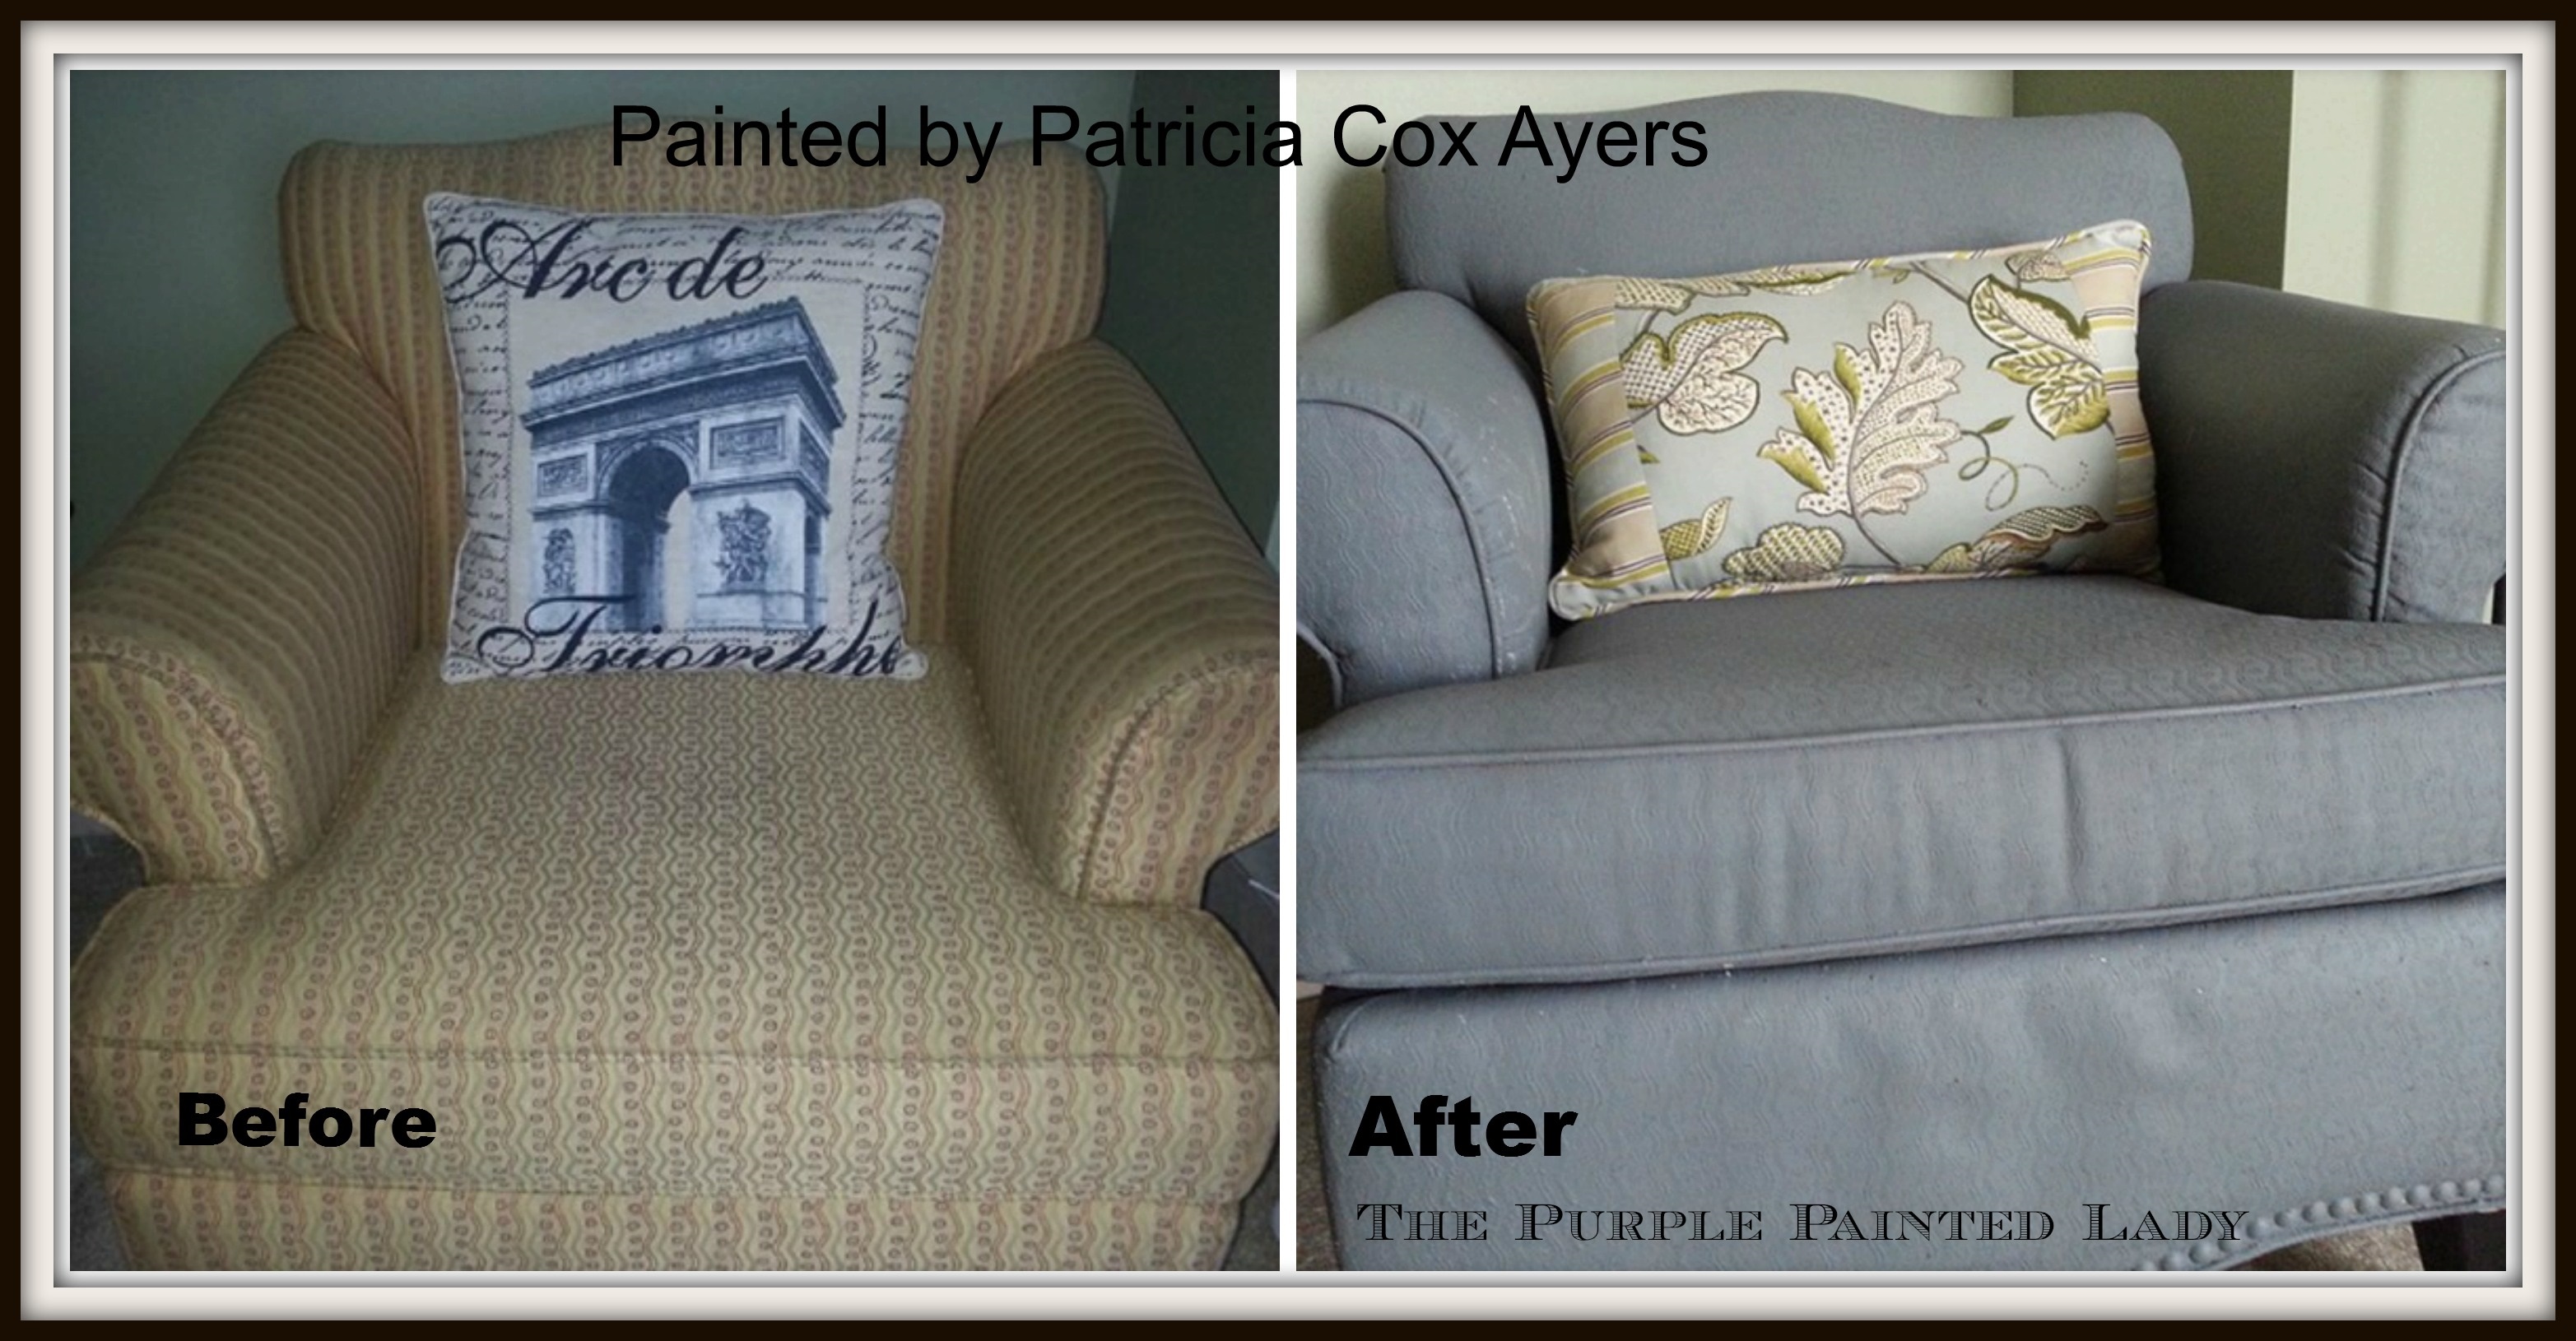
Not in love with your furniture any more?

Instead of tossing it and buying new right away- consider painting it using Chalk Paint® decorative paint by Annie Sloan, like my customer’s Karen and Roxanne have (and many others!)
The Purple Painted Lady Painting a couch chalk Paint fabric BEFORE After 1


It does NOT matter if the furniture is:
fabric…velvet, brocade, leather or vinyl. Chalk Paint® will transform it…resurrect it…..and make you re-love it!


Keep in mind however, painting fabric will change the feel of it. Since you are not dyeing the fabric- it will have a stiffer, firmer feel. So, although many, many people have done this. Do a test spot in an inconspicuous spot and feel it before painting the whole thing!

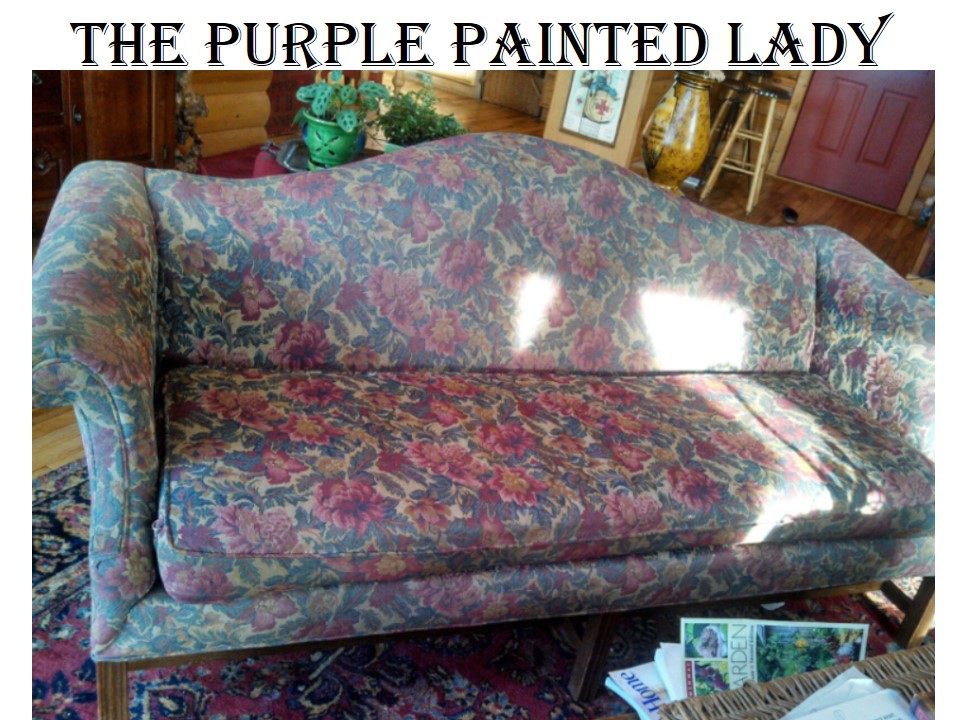
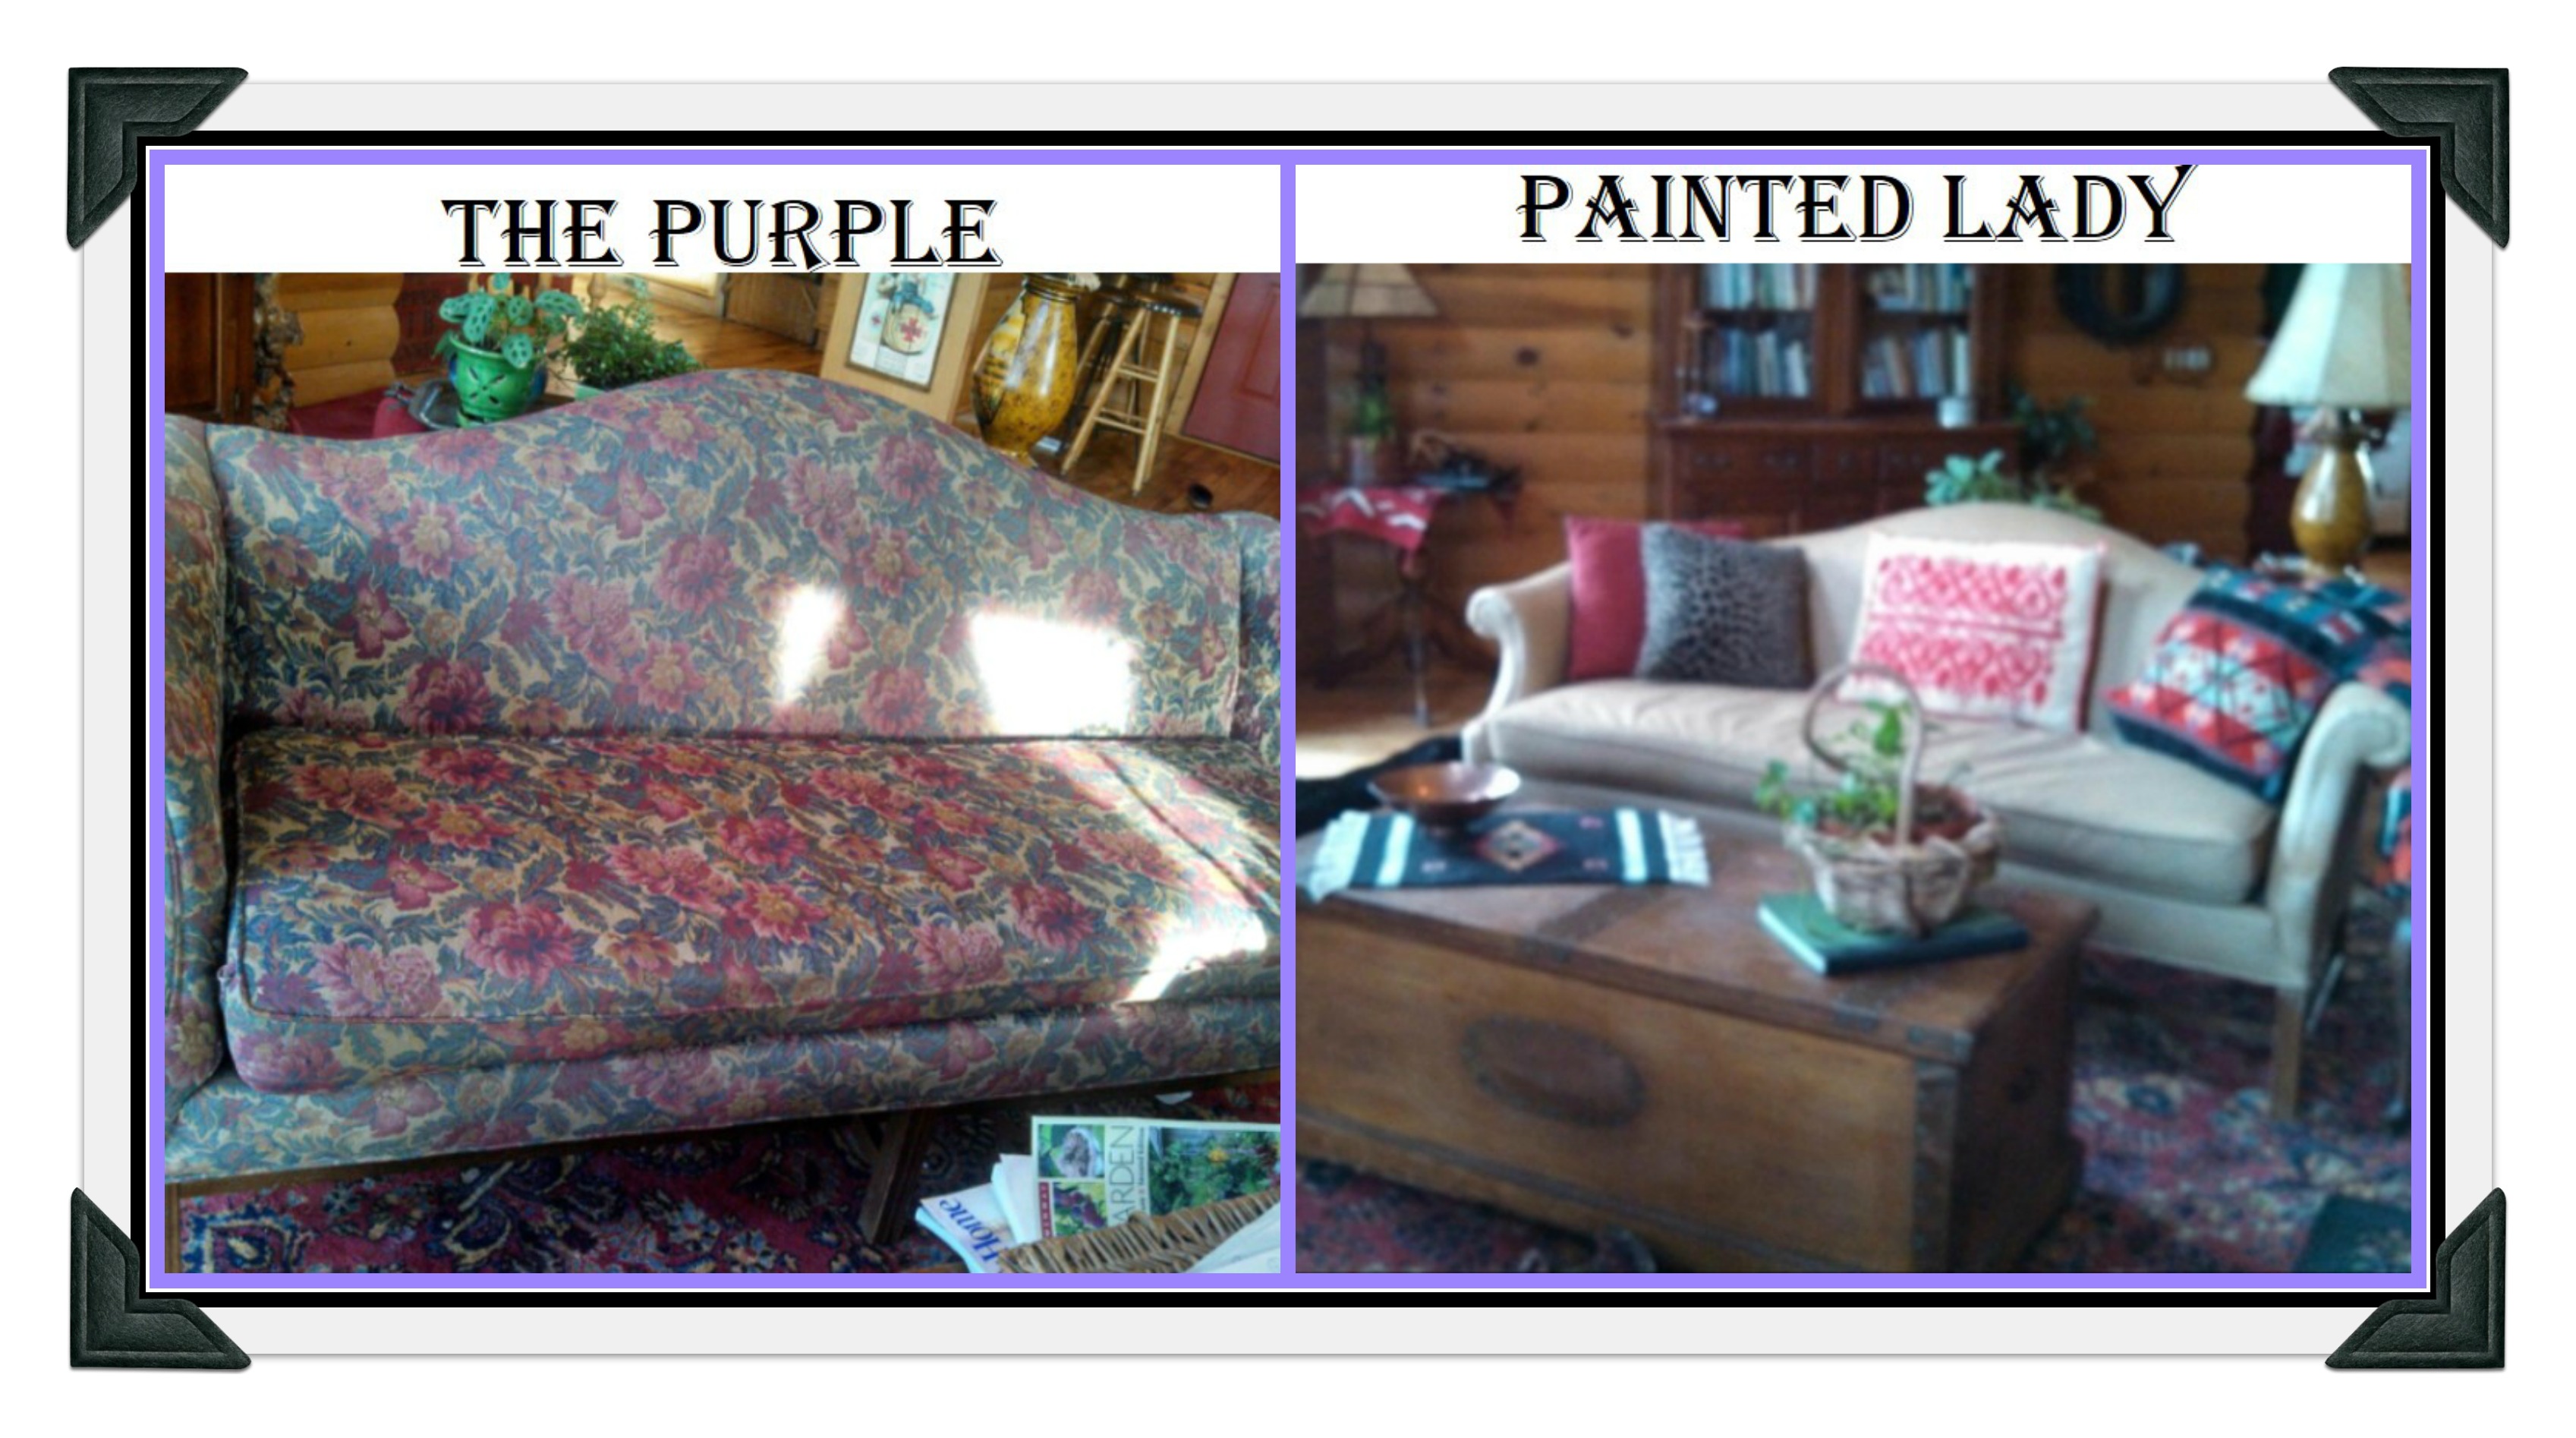
Chalk Paint® is absolutely amazing in all it can do and when it comes to painting furniture- which when it is fabric furniture, it is similar to dying it. The Purple Painted Lady has done this herself and has had so many customers do this also. In fact, one customer of ours, Teresa at Lou’s Back Door Consignment in Fairport, NY had an old style couch. You know the kind with the ruffle pleat that goes all the way around the whole base. She painted it- and cannot stop raving about it!!! (Check out her Facebook page by clicking on the business name above and consider giving it a LIKE)

Sarah Cornett The Purple Painted Lady Painted Chalk Paint Fabric Couch rustic chic interiors 2

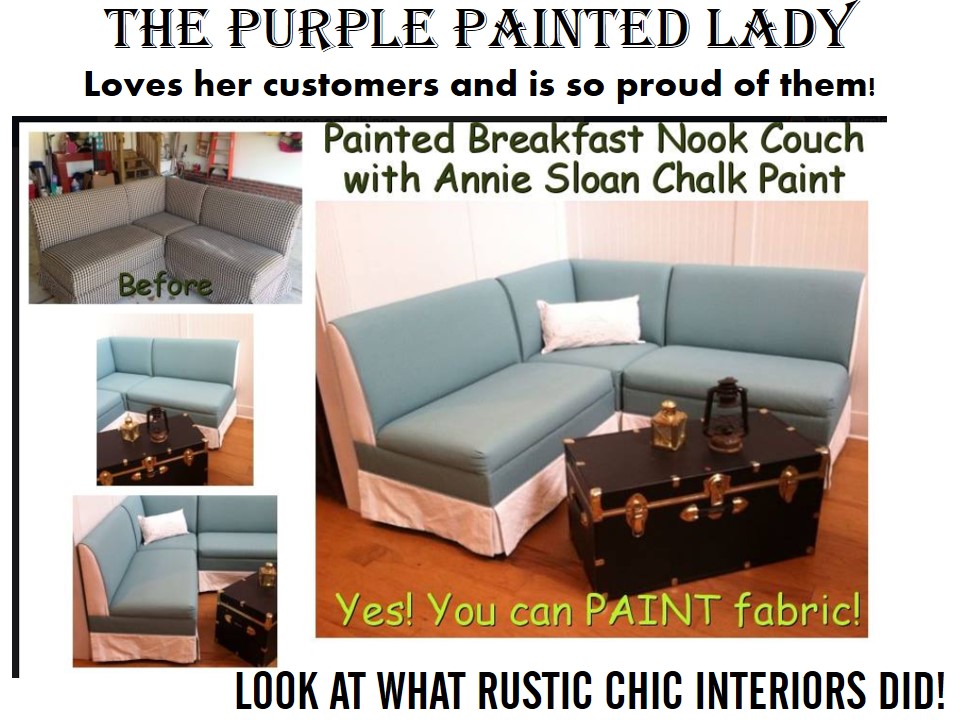
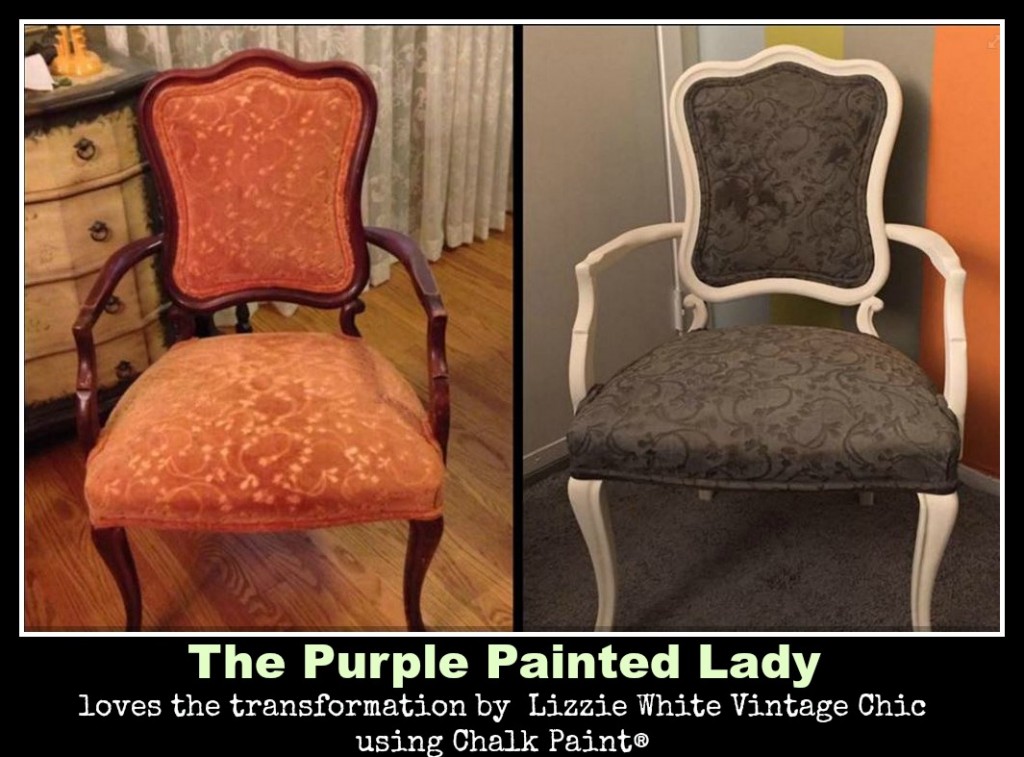
Keep in mind that if the fabric on your furniture has a heavy textured pattern, Chalk Paint® will change the color of the fabric, but it won’t hide the pattern.

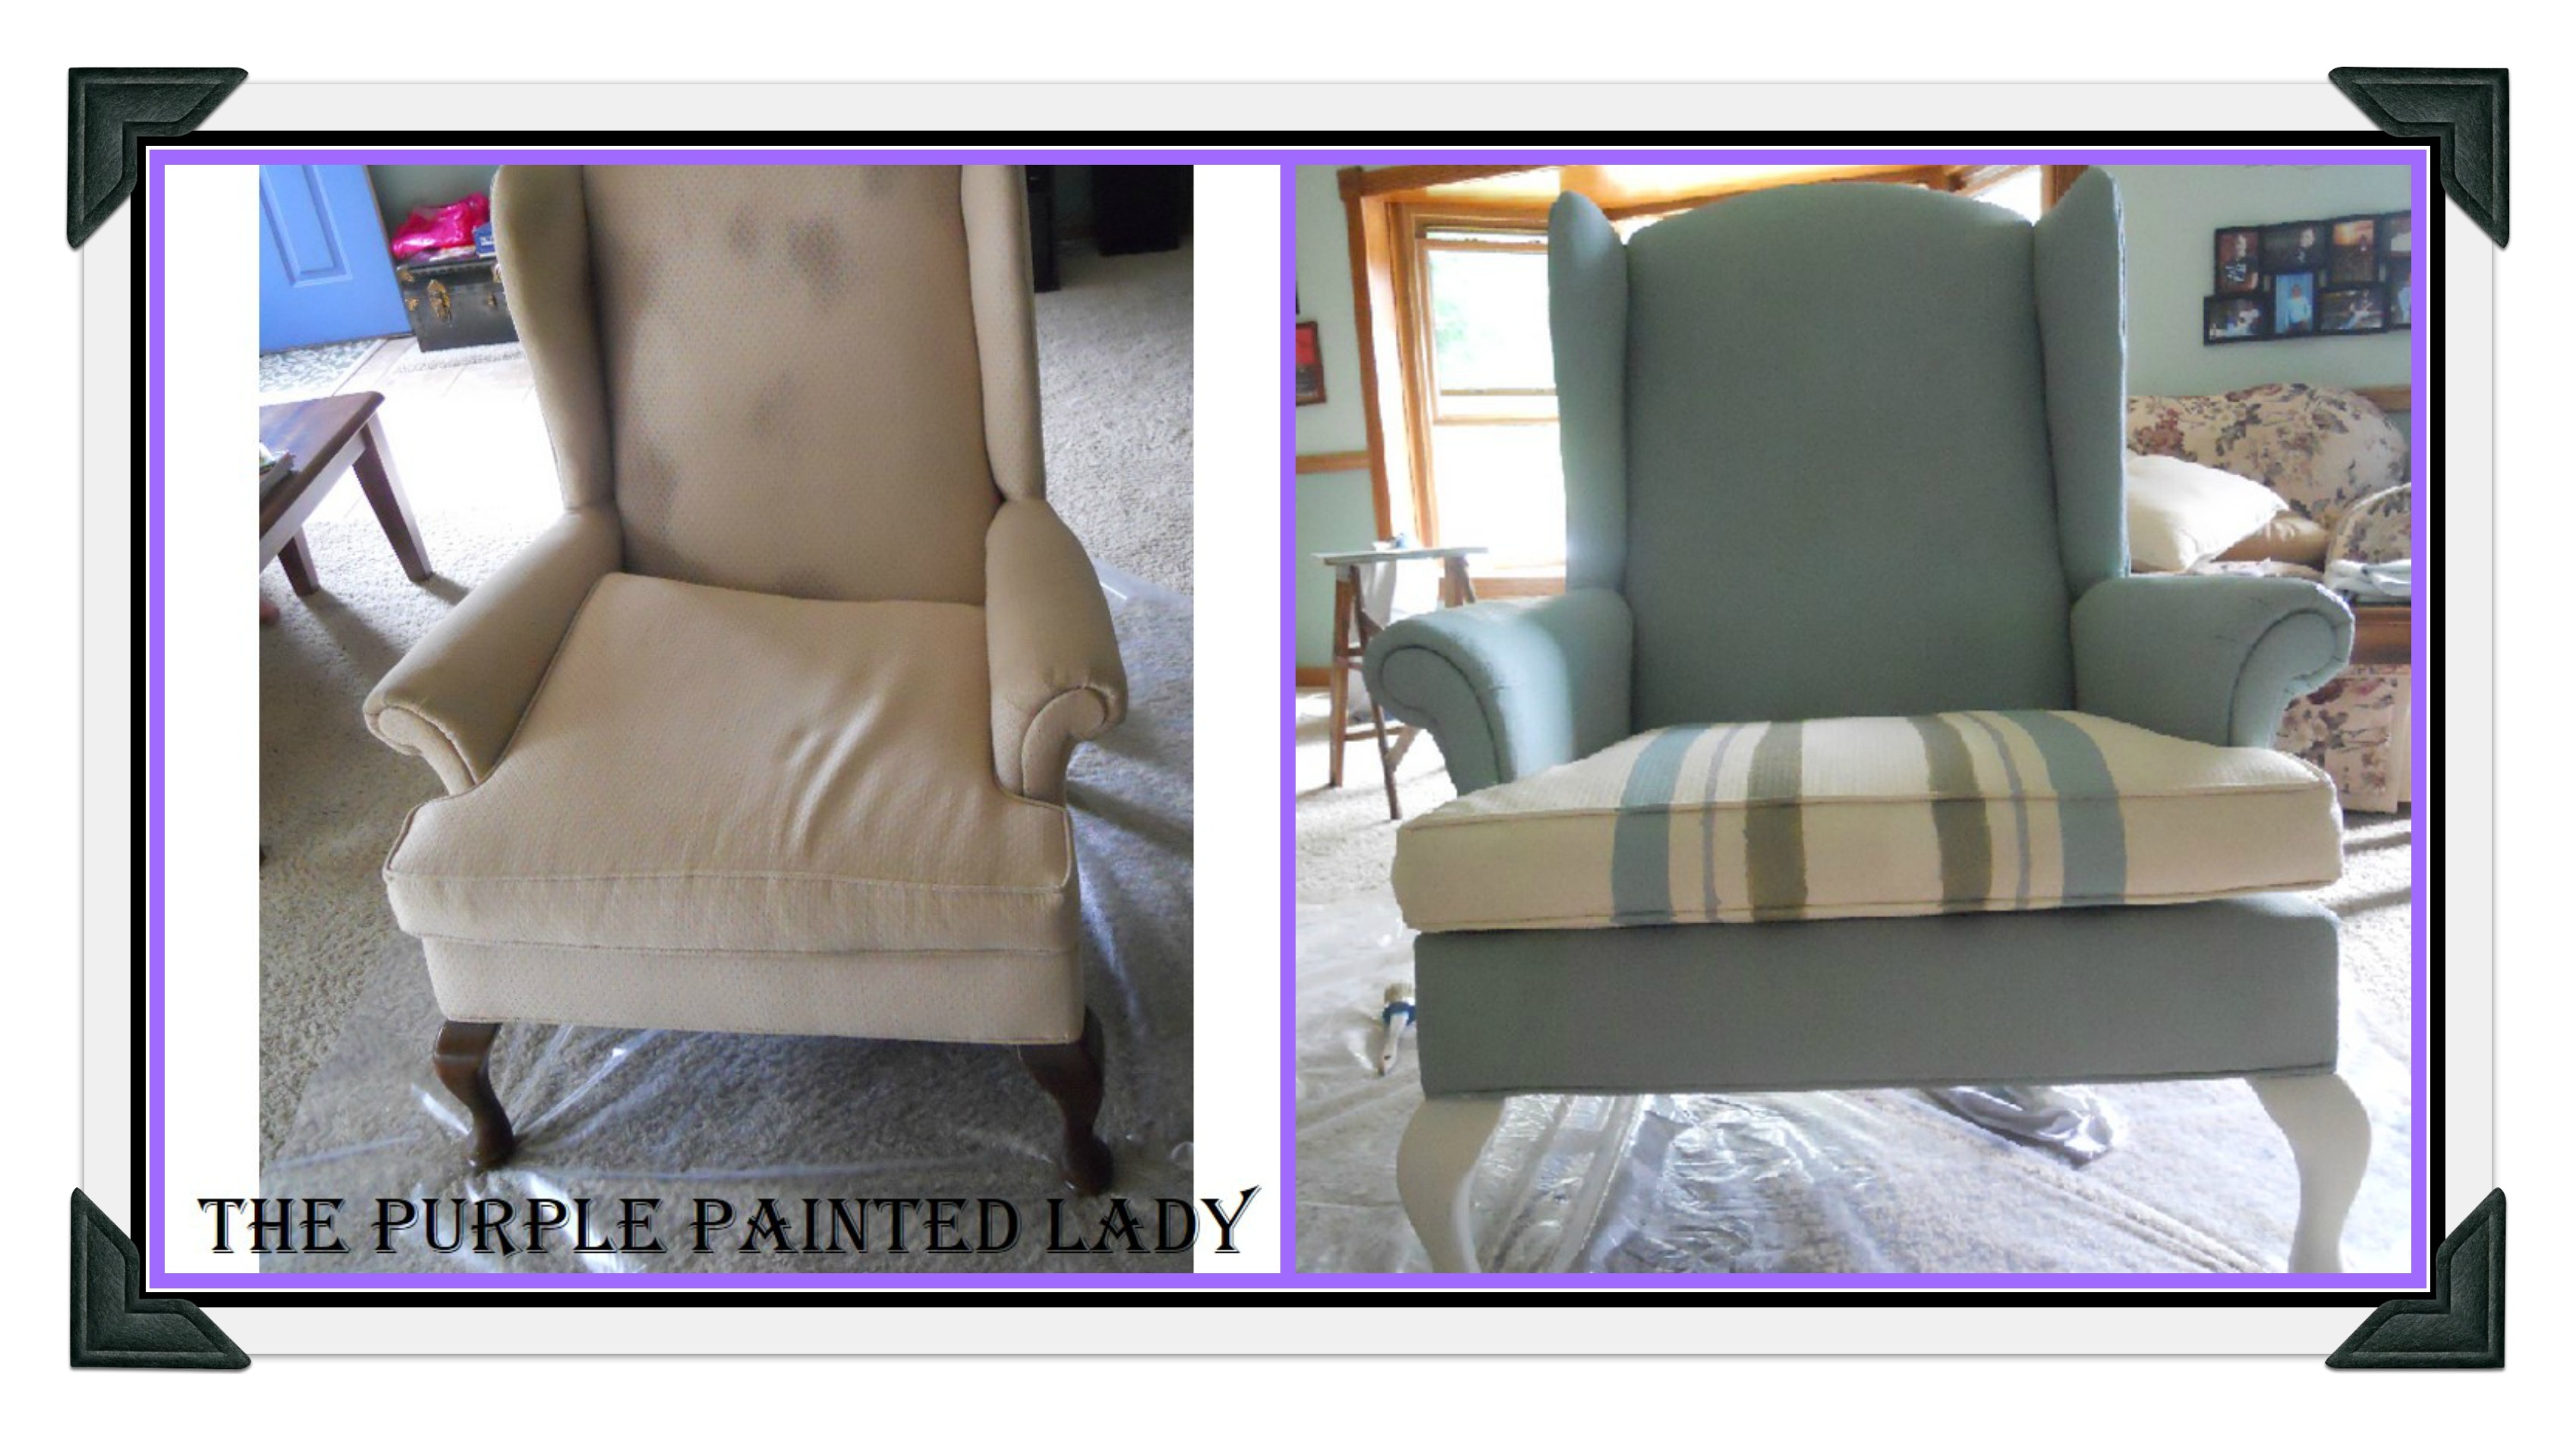
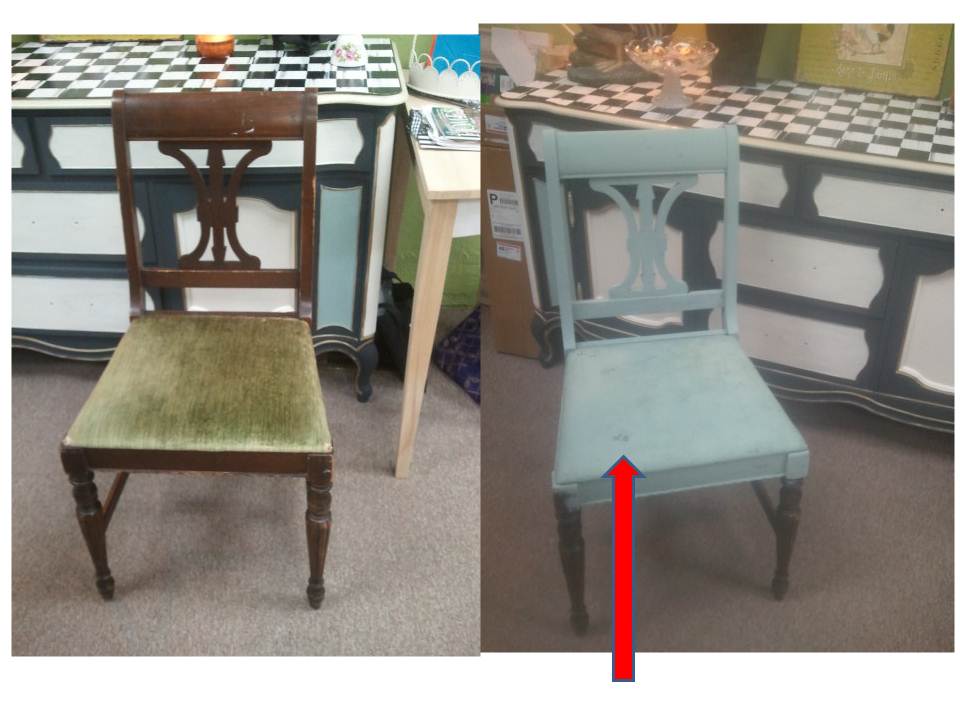
Check out this beautiful transformation by Erin at The French Marketplace. In order to get the stripes nice and crisp, she used “Frog Tape.” She finds that it works really well to achieve a nice, crisp line with no bleed through. Also, she made sure to burnish the tape really well to ensure good adhesion. When she came to the cording, she was careful to make sure that the tape was tucked completely around the cording securely. And that was it!

The Purple Painted Lady Before and After painted chairs Chalk Paint annie sloan


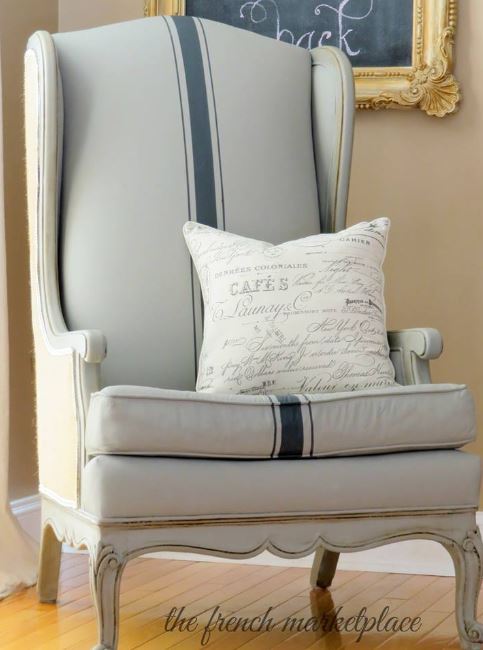
Nice Before & After, huh?  

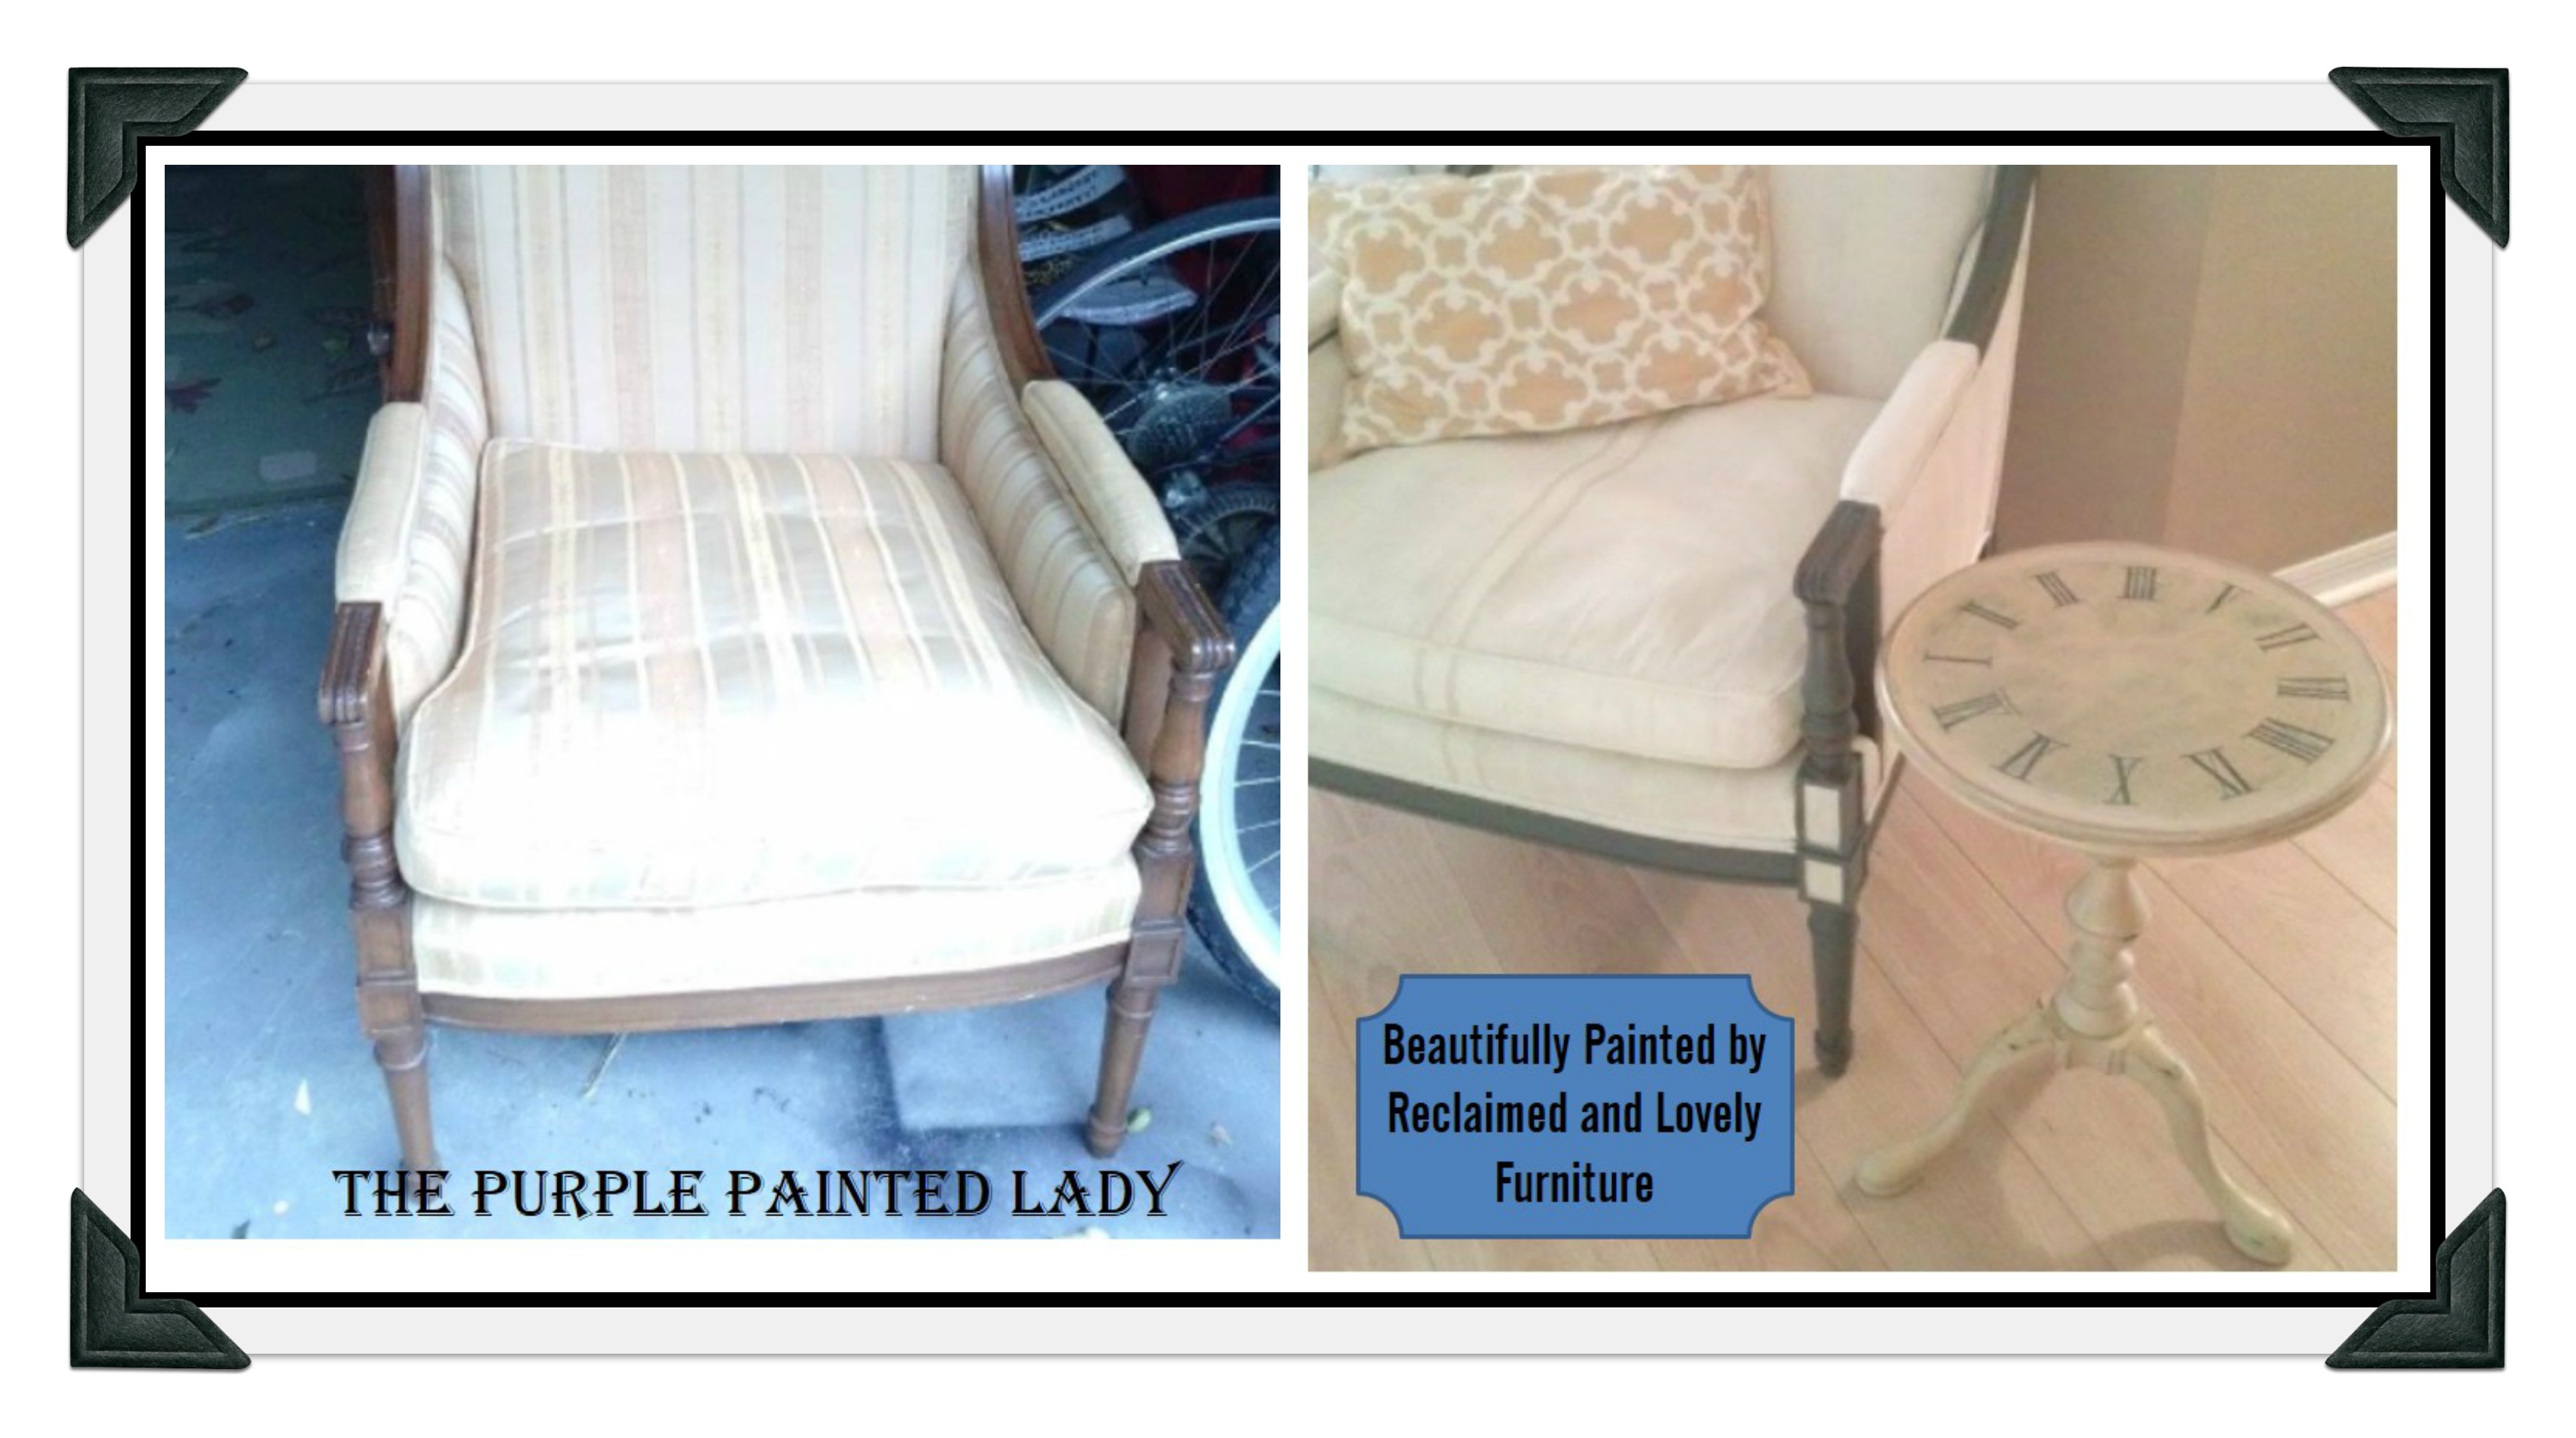
Here is another by Lizzie White Vintage Chic!  If you stop by their Facebook page- tell them The Purple Painted Lady sent you.  : )

The Purple Painted Lady Michael Herrmann Chalk Paint Annie Sloan Chairs with fabric Graphite Lizzie White Vintage Chic

HOW MUCH PAINT WILL I NEED?

When calculating paint needs- keep in mind that painting fabric is very different than painting a hard surface. Fabric will absorb the paint more. You will use more paint covering fabric that will absorb and suck up the paint, compared to painting a wood dresser. You will most likely need to apply two full coats – even a possible- third in specific areas pending the color you chose.

CAN I SAND THE CHALK PAINT® ONCE PAINTED ON MY COUCH?

Yes! Use 300 grit sandpaper after you have applied a couple coats and lightly polish the paint. It will soften it dramatically- but NOTE it will create dust. So, wipe that off with a towel before applying your clear wax. Also- stay away from edges or corners since it is an angle- you could break through the paint and show the real fabric beneath.

Picmonkey painted fabric Patricia The Purple Painted Lady2

LAYING THE KNAP IN YOUR FINISHING STROKE:

When painting velvet that has a heavy texture, make sure to lay the knap in the direction you want it to be once dry with your paint brush in your final, finishing stroke. Meaning, when initially painting, you may approach the fabric surface from different directions with your brush….but before moving on to a new area to paint…with your paint brush…stroke the surface so the knap lays consistently and smoothly in the same direction.

PAINTING LEATHER?:

Make sure to read this post HERE after this one!

Perfectly imperfect/Hollywood Regency Glam? My customer, Maria Antonieta wanted to change a dark – traditional leather & wood chair into “Hollywood Regency Glam.” She used Chalk Paint® by Annie Sloan in Pure White and Silver French Gilding Wax. Maria wrote me, “A lot of work, the leather cracked a little (not perfect as all the blogs I read online) no matter the paint, technique,etc)
The purple Painted Lady Chalk Paint painting Leather Maria Antonieta H

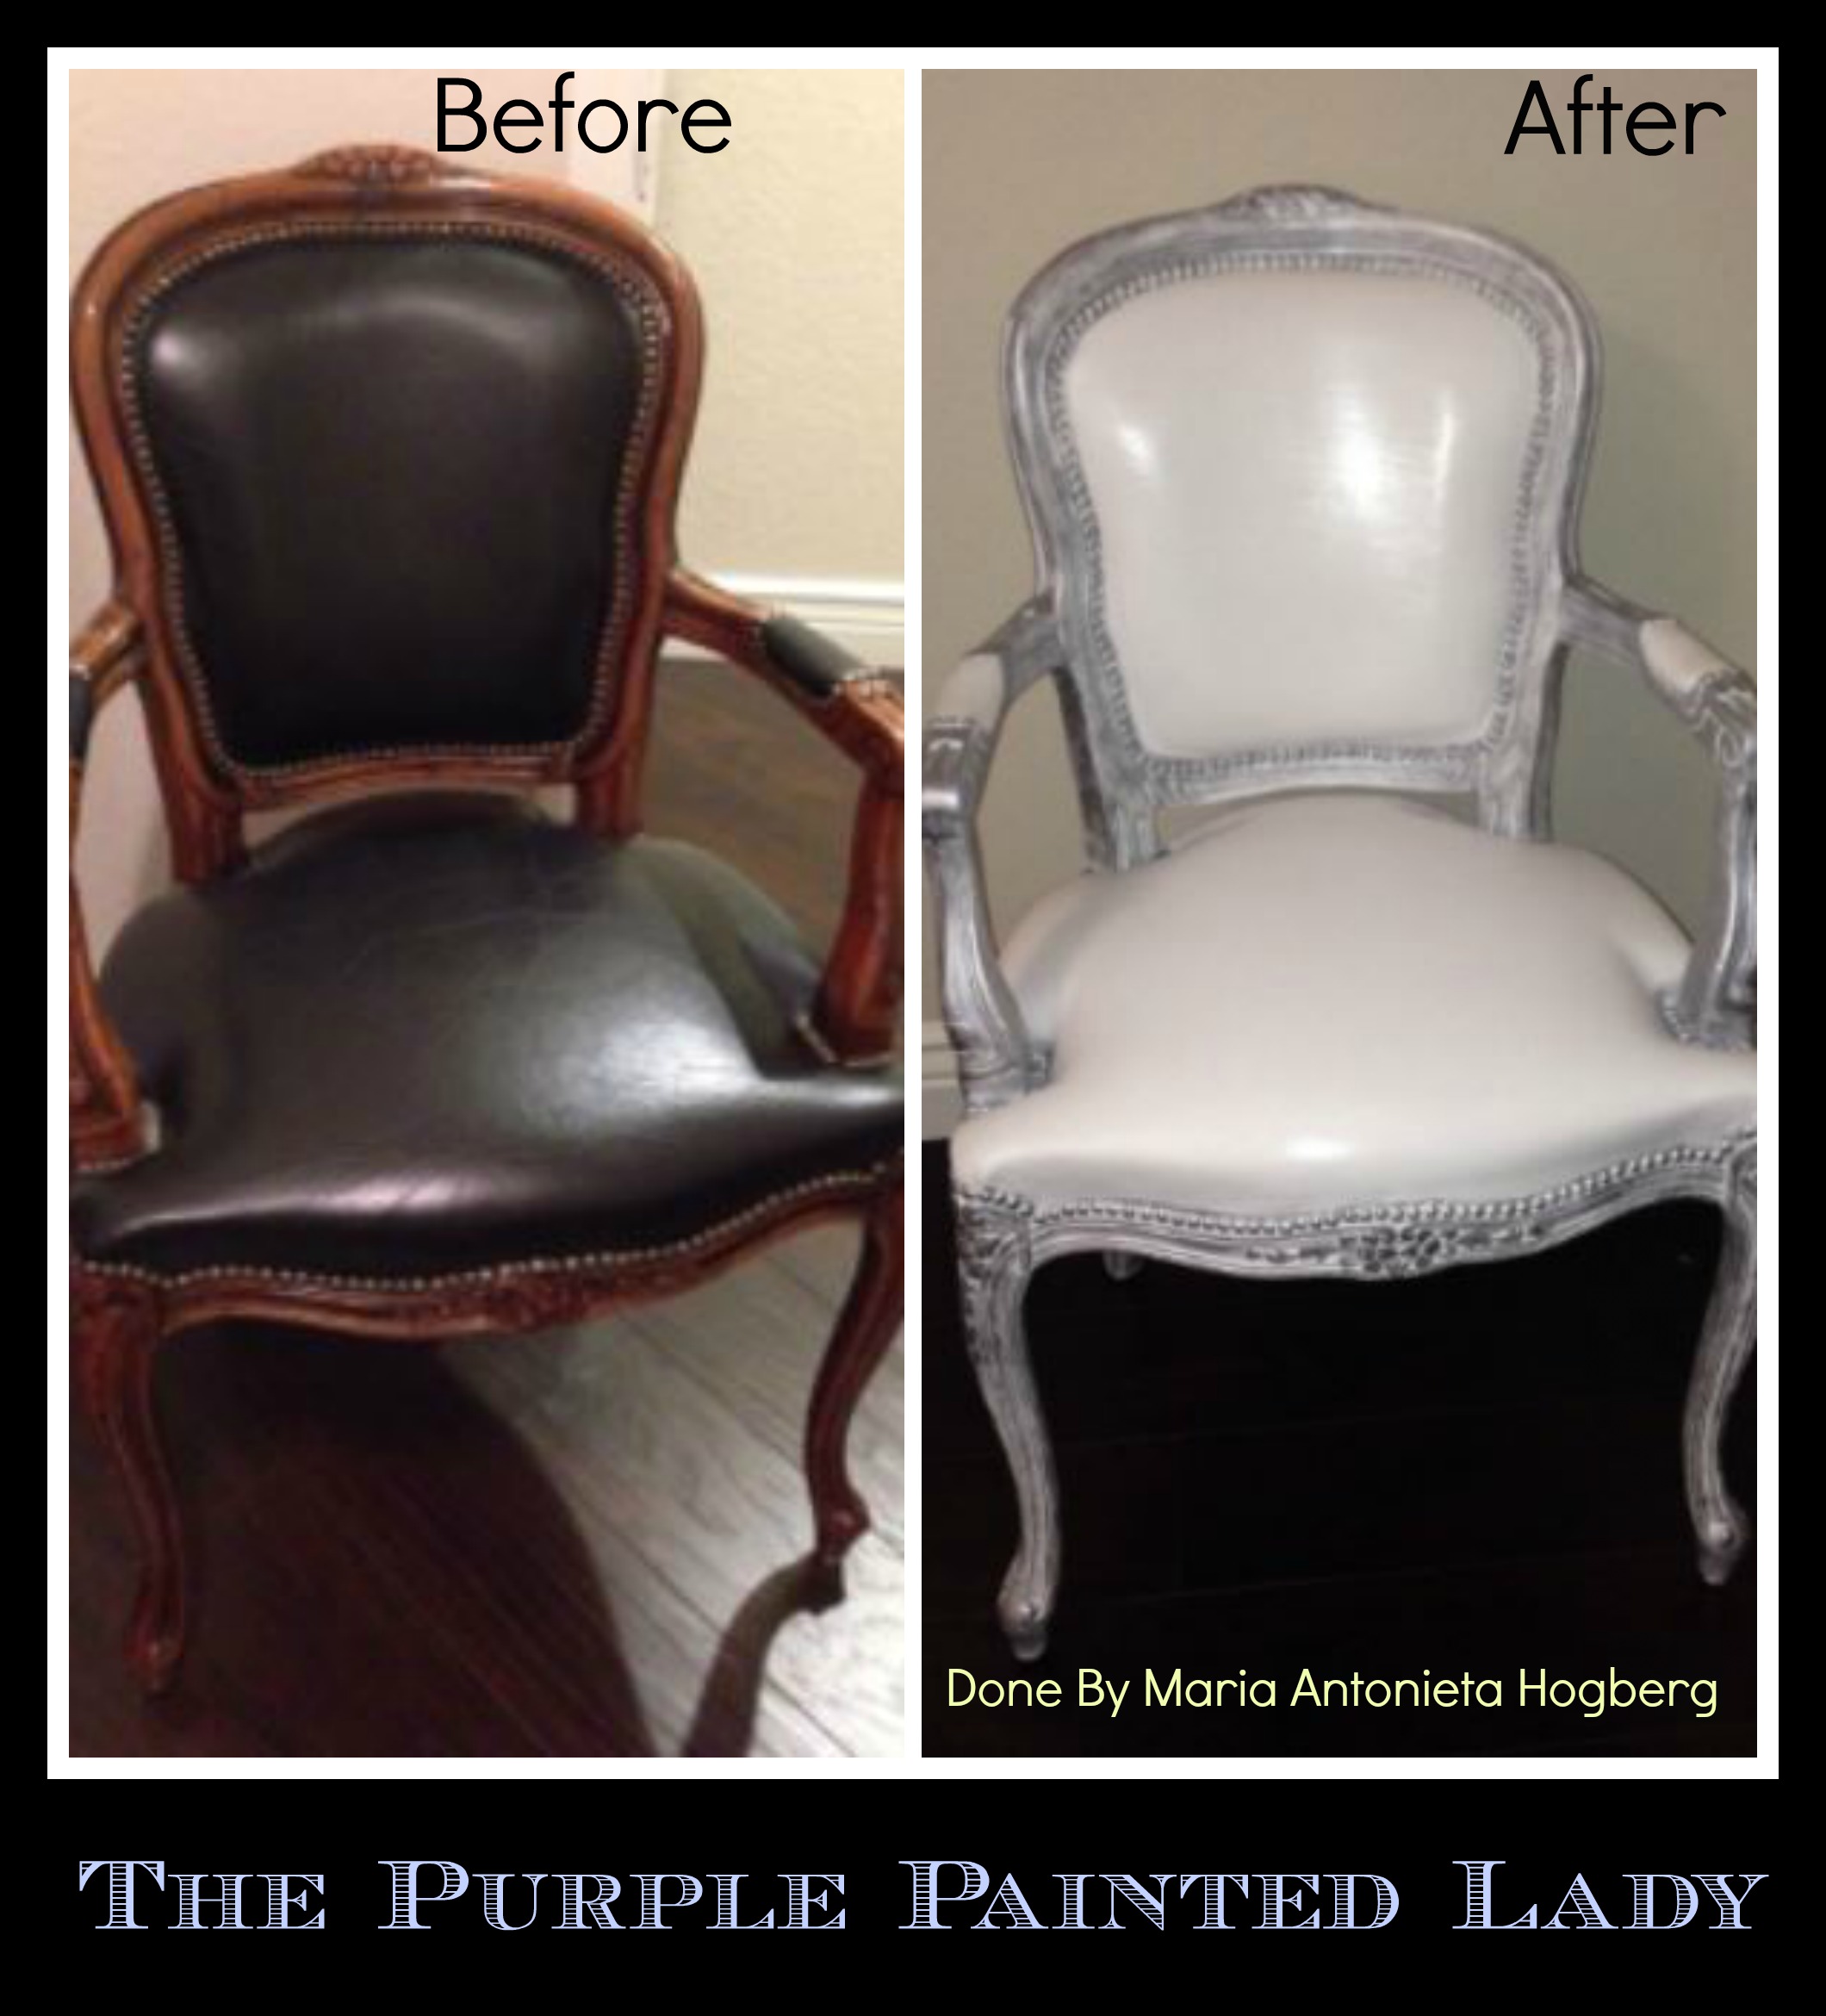
Maria wrote, “The chalk paint is a good paint but not as perfect finished as expected. (on leather) Good enough. But the gilding was the magic. LOVE IT….Love the effect !”

Why am I sharing this?

Because this is Maria’s true outcome. Often Chalk Paint® works perfectly and beautifully. And although Maria had a little crazing- this chair was transformed to blend with her style versus having to buy a new one. What do you think?


DID YOU PAINT LEATHER TOO THICK AND IT CRACKLED?

If you did not thin your paint at all – or enough, you may end up with a crackled look. This may help you.  Try sanding the paint softly with some 300 or 400 grit sandpaper. In this step- make sure to be careful not to sand the edges or corners since you may break through to the actual leather.  Again- stay away from the edges so you do not accidentally get a distressed look by wearing thru the paint.

And lastly, if interested in purchasing product on-line- check out our on-line store HERE after reading this post. We offer awesome customer service and the lowest flat rate shipping and…(drum roll please!) …… we ship the same day you place your order! (small print disclaimer – we ship same day as long as your order is placed before our UPS guy has come) But if you visit our FACEBOOK PAGE and look at our customer reviews- I think you will get the hint that we are super fast in turning your order around and we really care about our customers!

Now..after stirring up all of this excitement I need to share…..that Chalk Paint® is amazing- but it is not a miracle…so always do a test in an inconspicuous location if you are hesitant. What do I mean by this? I certainly do not want to burst the bubble, but I often share with my customers that some people “use” their furniture and then,..there are some who “abuse” their furniture. If you have four 120 pound Great Danes who like to play and jump on the furniture coming straight in from outside with muddy paws…this painting technique will work, but I would not guarantee it for years of use. Ok? For the majority of us who sit on our furniture and watch TV, take naps, read stories to our kids and yes, have pets- …you will love this as an alternative option.
PicMonkey Collage The Purple Painted Lady Chalk Paint Fabric Chair Roxanne

PROCESS TO PAINT YOUR FABRIC OR LEATHER FURNITURE:

1. If painting a chair or couch, you will need:

* Drop cloth

* Chalk Paint® decorative paint in the color of your choice! Depending on your project- you may need more than a sample pot.  Keep in mind, fabric will suck up paint where a wood dresser will not.

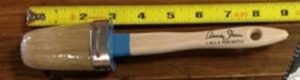
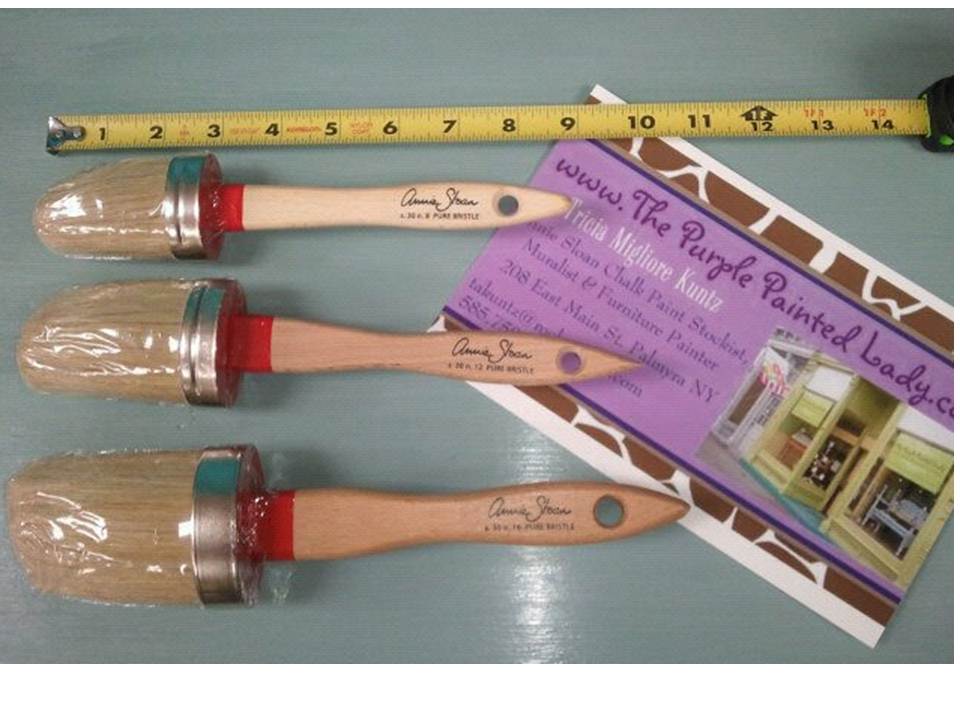
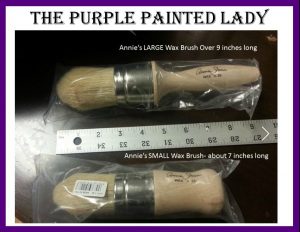
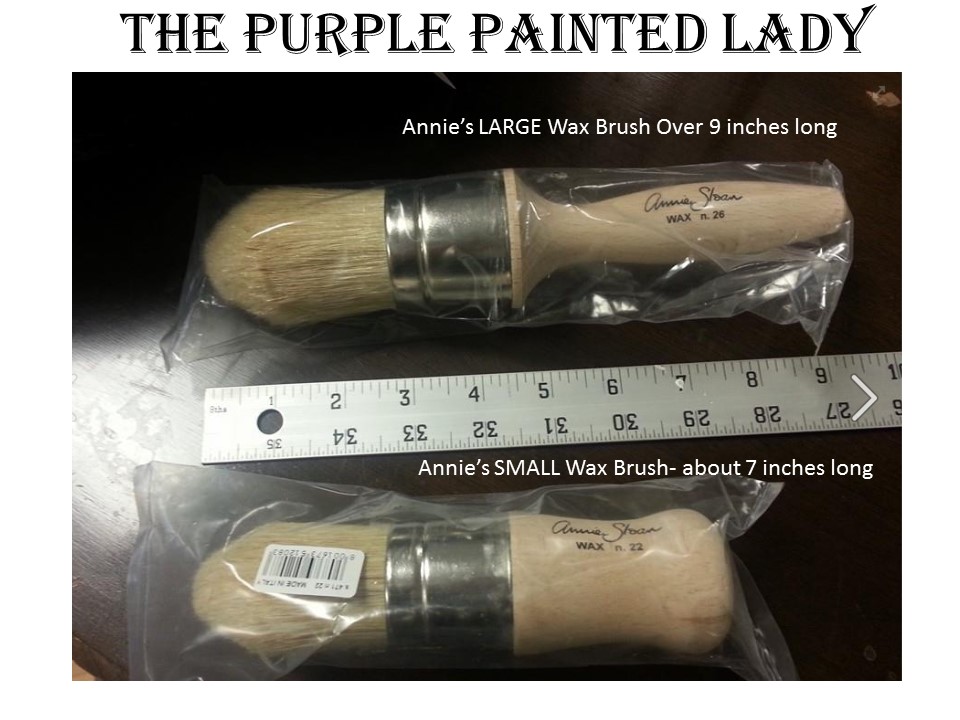
* A natural bristle paint brush …We love Annie’s SMALL Brush because it seems to get the Chalk Paint® in all the knooks and crannies best!

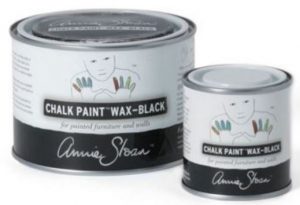
* Annie’s Clear Wax for INSIDE furniture

2. Make sure to have a plastic drop cloth beneath your furniture.

3. It is important that immediately prior to painting the fabric- that you get a spritz bottle (like an old Windex bottle.) Fill it with water and mist your fabric. You want the fabric to be moisten and definitely damp- but not dripping wet.  This will create a conduit for the thinned Chalk Paint® to be sucked in and basically – in a way – stain or dye your fabric.  Think of it this way…your paint is just NOT sitting on the surface!

4. I strongly recommend using Annie’s SMALL paint brush when painting fabric! It will make your project so much easier, versus using a traditional flat/straight cut brush.

Annies Brushes

5. Thin your Chalk Paint® with water. So, whatever color Chalk Paint® you are using…you can either:

A. Pour some in a separate container and thin it slightly with water. I would consider adding about 30% water to whatever amount you have. If you do not thin your Chalk Paint®- due to it being a thicker paint- it may crackle a little. (in fact- it WILL PROBABLY crackle)  The crackle look is only aesthetic.  It should NOT compromise the paint sticking or adhering!   Again….this does NOT jeopardize the adhesion ability of the paint and actually gives the look of leather or crocodile skin. Many of my customers love a chair that I did in my shop over two years ago like this!

OR

B. If you do not think your Chalk Paint® by pouring some out into another container and mixing water directly in to it…some people will take a plastic cup filled with about a 1/4 cup of water. Dip your paint brush into your paint, then quickly dip the tips of your brush into the water. Then paint! Make sure to position your paint and water close to your project- so you do not drip any on the floor.

PicMonkey Collage painted couch The Purple Painted Lady before after

Painted Chair seat FABRIC

6. Begin painting your fabric. Apply a uniform thin coat and let it fully dry. LESS IS MORE!  You are better off applying a couple thin coats than one heavy, thick one!   Try applying the paint using your brush in a circular motion if painting a tweed or velvet. Then, lay your paint in one direction before starting a new section.   If painting a leather- just paint, but lay the finishing stroke in the same direction always too.


STAINS ON FABRIC?

A customer  had bleed through on a painted chair cushion. She ended up using  Kilz Oil Based Stain Blocker in the spray can. She said it worked great!

A. SMOOTH FINISH: **This is important if painting velvet or a fabric with a knapp.  You can apply your paintin any direction, but always finish with a traditional linear stroke. And lay your paint in the same direction as you did in the last stroke of the previous area.  Think about when you vacuum some carpets…and you can see the difference in how the knap is laying based on the vacuum.  You do not want this in your finished, dried paint.  Again- this is only critical when painting velvet or fabrics with knap.  
OR

B. Try experimenting on a sample board prior to taking on your big leather couch and try laying Chalk Paint® in random directions. In many of Annie’s awesome videos on YouTube- you will see her painting like this. It is brilliant and creates a very nice finish. You can either be more subtle with this technique- or be bold.

SECOND COAT: 

You will most likely want to paint a second coat depending on how it looks. Again- mix water in your paint, BUT you do NOT need to spritz the surface with water this time.

The Purple Painted Lady Painted Chalk Paint Fabric Couch Rhonda Banton Vaughn English Yellow picmonkey

7. SEALING YOUR PAINTED FABRIC:     FOR FURNITURE THAT WILL BE USED INSIDE YOUR HOME (versus outside directly in the sun and rain): Once everything is totally dry- and you are happy with the coverage- apply a thin coat of clear wax using a rag. This helps in keeping the fabric soft and subtle and protects it. Some people do not add the wax- but I think it is nice and again, it seals the fabric almost like a Scotch Guard protector. Again- I personally recommend waxing, but if you feel the fabric has too much texture- many of our customers have sprayed their painted fabric using Scotchgard to seal it. 

Please always test this in an inconspicuous spot prior to spraying your whole piece.

You may want to watch THIS funny video of a gentleman named Perry doing the “wiggle test” on a chair painted using Chalk Paint® that has not been waxed. If you watch the video, leave a note that The Purple Painted Lady sent you.
PicMonkey Collage the purple painted Lady Reclaimed and lovely furniture fabric chair chalk paint

Sill unsure of about painting your furniture, check out Annie Sloan herself painting a chair on national television HERE.

DURABILITY:
I have customers who have painted their furniture who also have dogs that get on their furniture and teenagers! They have been extremely satisfied in the longevity and how the paint can withstand the use. With that said, I think it is important to say- it is important that your pets nails be clipped and not be daggers. I also would not guarantee the outcome if you have little ones who use your couch as a trampoline. I always share that Chalk Paint® is incredible, but it is not a miracle. : )
The Purple Painted Lady Painting a couch chalk Paint fabric before after 2

If you have painted your furniture- please feel free to share your photos on my Facebook page! OR- email them to me at takuntz AT rochester.rr.com. (AT – @)

And remember~if interested in purchasing Annie Sloan products, please visit our website if interested in ordering Chalk Paint®. We have Chalk Paint® available for $34.95 per quart every day, we offer low/flat rate shipping and it always ships same day (as long as Joe, our UPS guy has not come already!)

In fact- there are many reasons we think buying through us is the best. Read THIS little post about what sets The Purple Painted Lady apart from the rest.

To visit our on-line store- click HERE.


Fireplace Transformation using Chalk Paint®

Annie Sloan created amazing colors for her suite of Chalk Paint® decorative paint, BUT when you use them in concert with her different waxes…then you can really create some magic!

Debbie Ballo had a vintage beautiful surround for her gas fireplace.   It was special but needed something a little bit more to make it a show stopper.

Debbie used both Annie Sloan and General Finishes products to take it to the next level!

Primer Red Chalk Paint® by Annie Sloan and Java Gel by General Finishes.   Debbie Ballo used both and transformed her fireplace surround. We love it!

Debbie used Annie Sloan’s Clear Wax over the Primer Red, and then finished with Annie Sloan’s Dark Wax.

For the actual mantle where she used the General Finishes Java Gel, she used the General Finishes High Performance Top Coat in Satin over the Java Gel. We love it! #thepurplepaintedlady #justpaintit#anniesloan #generalfinishes

HOW TO APPLY A WASH – Honfleur, French Linen and Old White Wash Armoire

Watch this video!  ==>     HOW TO DO A WASH?  (WATCH THIS YOUTUBE VIDEO ON THE PURPLE PAINTED LADY CHANNEL) Jump to the 7 minute mark to skip all of my babbling!  And..I have loss around 90 pounds since I made that video.  Yay me!  xo Trish  ***and something that has changed- make sure to apply a coat of clear wax over your base coat of paint BEFORE applying your wash so that you do not wipe away any of the base!!!

Annie Sloan created amazing colors for her suite of Chalk Paint® decorative paint, BUT when you use them in concert with each other…then you can really create some magic!

Sadly- I cannot find a “BEFORE” photo of the painted piece below.  Yes, even a veteran painter gets excited about painting a piece and sometimes- skips these important details.  But I can say – this armoire that I bought off of Craigslist was very, VERY DARK wood.  But not anymore!

This armoire above was painted by our team at The Purple Painted Lady.

Anyway- to complete this look on this armoire- that is literally in the bedroom of The Purple Painted Lady, you need the following:

MATERIAL LIST:

Honfleur Chalk Paint®

French Linen Chalk Paint®

Old White Chalk Paint®

Annie Sloan SMALL dome top Paint Brush ($27.95)

Annie Sloan’s Sanding Sponges

Roll of Scott Shop Towels

Annie Sloan SMALL Wax Brush

Click here to watch a YOUTUBE VIDEO SHOWING US CREATING A WASH

PROCESS TO FOLLOW:

STEP 1.   Using your Annie Sloan SMALL paint brush, paint the base color of your piece in Honfleur Chalk Paint® .   Consider applying the paint in some various directions because you will be applying the French Linen over it and when you sand / distress in step 3, it will create a little extra interest and texture for the Old White Wash to cling to.

We like to describe Honfleur like it is the color of a MILK CHOCOLATE BROWN.  ….a DARK BROWN. Think Easter Bunny Chocolate!
According to Annie, Honfleur is named after a seaside harbour town in Normandy and inspired by rich warm browns found in the rustic French countryside and mid-20th century design. This colour works brilliantly with the popular mid century modern style. It looks great combined with Scandinavian Pink, Barcelona Orange, Giverny, Provence, Greek Blue and Antibes Green. It’s also elegant and classical with pastel Louis Blue and pretty Antoinette.

You may need two coats of the Honfleur.  Once all is dry…then proceed to step 2.STEP 2.  Paint a coat of
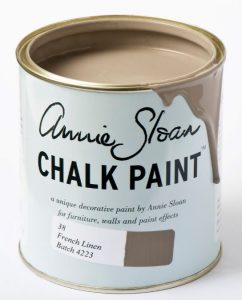
 French Linen Chalk Paint®.  

Thin your paint with a little water if you feel it makes it easier to apply over the base color of Honfleur.  You can add up to 20 to 25% water to your Chalk Paint® to thin it a bit if you feel it makes applying it easier.  Just be careful if you ever add water directly to your quart.  (I recommend to NOT do this)  Because if you add too much water directly to your paint, unless you have another quart….you have no way to fix what you just did.

With this step…use your discretion.  You may only need ONE coat of paint.  You could apply this coat strategically- dry brushing in some areas so the French Linen is very thin.  If you like the look, go for it!  But – again- Annie’s paints are artisan paints and are meant to be experimented with.  There are no rules when it comes to using it! (well, okay, maybe a couple….but go with your instincts on what you like!)

We describe French Linen as a taupey-grey…BUT more taupe!  It is a classic color and very popular!    But keep in mind- if you have a lot of green in a room- it can pick up very subtle green undertones.  STEP 3.  Once the French Linen is dry- then use Annie’s medium sanding sponge and distress some of the French Linen to show the dark milk chocolate color of the Honfleur beneath.  be careful when you start distressing.  it is a lot of fun and sometimes, you can take more pain off then you had in mind.  The goal here is to just remove some of the French Linen, not to break through the base of Honfleur.Also, the amount you distress is based on personal taste.  Sort of like, how much salt you would like in your soup.  
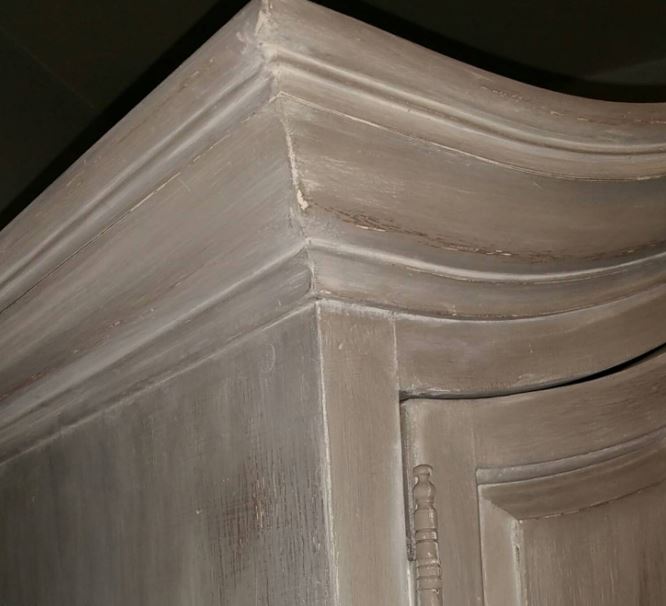
STEP 4.   Once done with distressing, you will wipe off any loose dust.  THEN……(modified instructions here in Jan. 2021 based on Annie’s new direction) APPLY A COAT OF CLEAR WAX and remove the excess. 

THEN…….create a “wash” using Old White Chalk Paint®.   Old White is the number one color that we sell!  It goes well with practically anything!!!!  It is a soft antique white.  i personally think it is a cream.  It does have a very – very subtle slight little yellow in it.  BUT – it is the number one color that we sell! 
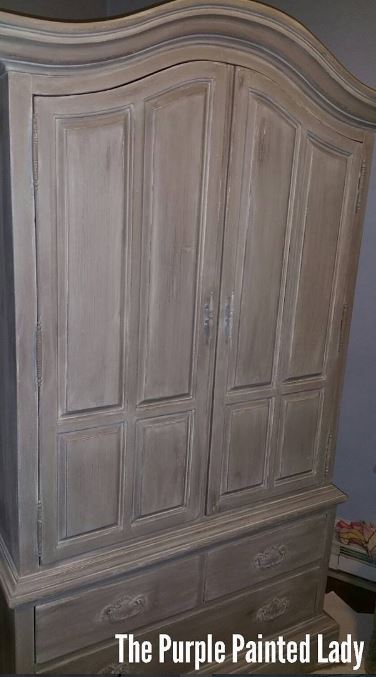
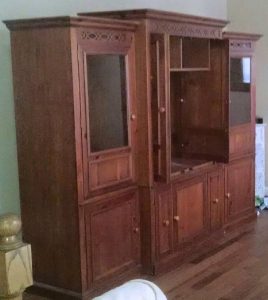
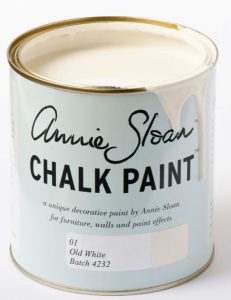
To create a wash with the Old White for this armoire project, pour about a 1/4 cup of paint in a plastic cup.  Add equal amounts of water…so in this example, 1/4 of room temperature water and then, mix well.  Work in sections.  For example, apply wash over one whole door at a time. Use your Annie Sloan Small paint brush to apply.  Then using a couple sheets from your Scott Shop Towels, wipe off the excess strategically.  Wipe off in the same direction as your wood grain.

HOW TO DO A “WASH” USING CHALK PAINT®:  There is the option of doing a wash prior to applying a coat of Clear Wax but Annie typically recommends applying a wash after a coat of clear has been applied.

  1. Always note the water to paint ratio for your wash in case you do not make enough to finish the whole project. (can I stress this anymore? But I learned my lesson once and ended up goofing up a piece over this simple rule! Learn from my mistake!) Often a 1:1 ratio of paint to water is used.  It is important to stir your “wash” frequently as you are progressing thru your project to keep the pigments consistent.
  2. Never add the water directly to your actual quart of paint. You typically would NOT need that much paint mixed with water for a wash technique, unless you are applying the wash to literally to the outside of your whole house!  So, always pour some paint in to a smaller container and mix your water with that.  If you mistakenly add too much water, you need to counter balance it with more paint.  Thus, why to measure.
  3. Brush on the wash in either strategic brush strokes–meaning keep your lines straight and clean. You can use any brush to do this.  Depending on your project, a chip brushmay be best – OR if looking for a heavier veil from the applied wash, perhaps Annie’s small dome top brush.  You do not have a lot of “play” time so be prepared to work after applying the wash.
  4. Be cautious not to drip the “wash” mixture on areas of the furniture you are not currently washing
  5. Put a drop cloth down if doing this in your home…if you are like me- you will drip some on the floor. And be careful not to flick any of the wash when applying to walls or items near you as you work.
  6. Place your cup with the wash on a paper plate to keep work surface clean
  7. WIPE OFF STRATEGICALLY or NOT. (this depends on the look you are trying to create)    Apply wash in small sections BUT- if I was doing a dresser, I would apply it to the whole top and then wipe off excess.  Then move on to the next section. During the wiping off process- be careful to not have “rag blotch marks” unless you are going for that effect.   Start at the top and wipe off in clean, even pressured strokes all the way to the opposite side. Do not stop half way or go against the direction you want the streaks in. As long as you have dampened the surface with a mister bottle – you can wipe off the excess in circles with the rag. If your rag becomes too saturated- get a new one.  ***LEAVE SOME of the wash heavier in the crevices for a cool visual effect!!!  LIGHT with the pressure you apply when removing and actually- this is dependent on how much you want to leave behind BUT – be cautious- you do not wipe away the base coat being too strong!
  8. Plan twice, “wash” once. Meaning- know your piece and your plan on how you are going to approach the project…top first, then sides.  I think starting at the top and working down to the floor is best.
  9. If you are just trying a wash for the first time  – it is best to do this on a piece that is smooth across. Meaning- not raised panels. But keep in mind- if your piece has a lot of carved details…a wash is going to really show them off!
  10. Never place your rag down in the middle of a wash. Gently wipe from one direction to the other- otherwise you run the risk of leaving an imprint of the rag in the middle of your painted surface.
  11. If you get a wash in a spot that you did not want…don’t fret. Mist it lightly with some water and wipe it off or spread it out more. Just don’t dilute too much with water and be cautious not to impact the base coat of paint.
  12. If you are applying your “wash” over a wood piece versus over a layer of Chalk Paint®…meaning you had a wood dresser and just wanted to do a white wash over it….once the wash has dried, give it 24 hours before applying your top coat to allow the chemistry in the paint to do its job and adhere better.

STEP 5  Apply your Annie Sloan Clear Wax as our instructions state. Using a wax brush is best and easiest- so if you do not have one…consider buying one.  These are our favorite!!!!   

And voila!  you should have something similar to my armoire!

Aubusson Blue Chalk Paint®, Graphite Wash and Black Wax…Ooh La La!

WOWZA!  Yes, that is right.  That is all I (me…Trish…The Purple Painted Lady) thinks when I see this piece completed by our customer Carol Ann Bianchi who is from Rochester, NY!


Seriously, what a change from the BEFORE photo!

Carol Ann wrote,  “This was a beast, but I’m thrilled with the outcome. I bought this whole entertainment center at Salvation Army for $79! It’s a Broyhill and solid! Two coats of Aubusson Blue Chalk Paint®, (followed with a) Graphite wash, Annie Sloan’s clear wax, and then black wax around the raised areas. Gold gilding wax to finish it off!

I used one and a half quarts of Aubusson but used almost two full quarts of the Graphite to paint the inside and do the wash on the outside. The inside was a lot of work.

I get all my supplies from The Purple Painted Lady INC®! Tricia and her girls are wonderful to work with! They are always so helpful and accommodating! I HIGHLY suggest you order from her if you don’t have a local stockist.”

Aubusson Blue is very popular color!   Annie Sloan’s Aubusson Blue is named and designed after the beautiful deep grey blue found on the classic 18th and 19th century Aubusson rugs from France. It is an elegant color that works well with many colors as it is a dark neutral but in particular it works with Paris Grey. It is also a color found in Scandinavian painted furniture.


After painting Aubusson Blue, Carol Ann then did a wash using Annie Sloan’s Graphite.  A “wash” is just thinning the Chalk Paint® with water.  Never add a bunch of water to your actual quart of paint.  If you mistakenly add too much, you are past the point of no return and the only solution is to buy more paint to offset too much water.  So, always pour some paint into a separate container and mix your water in that.  Often the ratio will be 1 : 1 or a little less water to paint.  By adding water to your Chalk Paint®…it thins it…..which allows you to create a translucent “veil” of the color versus a heavy, opaque effect. (See steps below on how to do a wash)

Once done with the wash, Carol Ann used Annie Sloan’s Clear wax.

After removing the excess of the clear wax, Carol Ann finished with Annie Sloan’s Black wax…making sure to let some catch and stay in the crevices and grooves.

Annie’s Wax Brushes are wonderful for applying wax.   


And don’t forget to pick up a roll of Scott Shop towels.  They are lint free and really helpful and sometimes, you just run out of t-shirts to cut up!


And the cherry on top, was the thin accent of gold gilding that Carol Ann delicately placed to highlight some of the entertainment centers architecture.

GILDING: The Purple Painted Lady sells gilding in all metallic colors at her shops and on her on-line store HERE.   Gilding waxes are easy and fun to use. They add a little sparkle to any project, humble or grand. You can use a small brush but personally I prefer using my finger to apply the waxes. There is something about the way your finger can just glide across the surface of a bead or relief that looks natural and authentic. Gilding waxes are the closest thing to the look of real gold leaf but are infinitely easier to apply and come in stunningly beautiful colors.

By dipping a small 1″ or 2″ brush into mineral spirits wiping the excess on a paper towel, then dipping into the wax you can create a beautiful metallic glaze for your entire piece.

Like all wax, the gilding waxes clean up with mineral spirits. If you get a bit in an unwanted spot simply saturate a cotton swab with a dab of mineral spirits and wipe the area clean. OR- I PREFER to use a little of Annie’s Clear Wax on a rag and wipe off the extra gilding- this works like a charm!

In the sense of at what point do you apply Gilding Wax to your painted project piece….it is the very last step. Think of gilding wax as in roses on top of a wedding cake.  Once the roses are added- you do not go back and re-frost the cake!    : )

The Purple Painted Lady® INC was thrilled to see this transformation by Carol Ann!  

In fact, this color combination is something we are going to be doing in a home that is part of the property we host our annual art festival on and that Annie Sloan herself, will be staying in when she attends the 2018 Festival!

Here is our sample cabinet:


This what the kitchen currently looks like:


Since Carol Ann did a wash on the entertainment center, I thought it would be helpful to include some suggestions, tips, tricks and caveats about doing a wash.

Try this “wash” effect OR experiment with other color combinations like Duck Egg over Old White….or French Linen over Graphite, Provence over Old Ochre OR just Old White “washed” over natural wood! There are no rules- but I hope the following helpful hints make this project idea more do-able for you! Please keep in mind the following….

HOW TO DO A “WASH” USING CHALK PAINT®:

1. Always note the water to paint ratio in case you do not make enough to finish the whole project. (can I stress this any more? But I learned my lesson once and ended up goofing up a piece over this simple rule! Learn from my mistake!) Often a 1:1 ratio of paint to water is used.  

2. Never add the water directly to your actual quart of paint. If you mistakenly add too much, you are past the point of no return and the only solution is to buy more paint to offset too much water.

3. Brush on the wash in strategic brush strokes–meaning keep your lines straight and clean, not circular.

4. Be cautious not to drip on areas of the furniture you are not currently washing

5. Put a drop cloth down if doing this in your home…you will drip some on the floor.

6. Place your cup with the wash on a paper plate to keep work surface clean

7. WIPE OFF STRATEGICALLY.  Apply wash in small sections and wipe off – then move on to the next section. During the wiping off process- be careful to not have “rag blotch marks.” Start at the top and wipe off in clean, even pressured strokes all the way to the opposite side. Do not stop half way or go against the direction you want the streaks in. Never go in circles with the rag. If your rag becomes too saturated- get a new one.

8. I used a chip brush to apply- I like the streaky effect from the bristles.

9. Plan twice, “wash” once. Meaning- know your piece and your plan on how you are going to approach the project…top first, then sides.  Ithink starting at the top and working down to the floor is best.

10. If you are just trying a wash for the first time  – it is best to do this on a piece that is smooth across. Meaning- not raised panels, or with a lot of carved details.

11. Always wipe off your wash in the direction of the brush strokes. Never do it in circles- it will look a mess.

12. Never place your rag down in the middle of a wash. Gently wipe from one direction to the other- otherwise you run the risk of leaving an imprint of the rag in the middle of your painted surface.

13. If you get a wash in a spot that you did not want…don’t fret. Let it dry- then gently sand it off using some 400 grit sandpaper.

Well, we think that Carol Ann wins the 1st place award for the least money, largest piece transformation!  And we think it screams, “WOWZA!”

If interested in purchasing Annie Sloan products, please visit our website if interested in ordering Chalk Paint®. We have Chalk Paint® available for $34.95 per quart every day, we offer low/flat rate shipping and it always ships same day (as long as Pete, our UPS guy has not come already!)

In fact- there are many reasons we think buying through us is the best. Read THIS little post about what sets The Purple Painted Lady apart from the rest.

To visit our on-line store- click HERE.

Lastly, we share a lot more information to help you get the most functionality out of your Chalk Paint® on our Facebook page. Consider checking it out by clicking HERE. While there- kindly consider LIKING us.

Thanks again,
Tricia Migliore Kuntz ~The Purple Painted Lady ~
Design/Consulting, Kitchen Cabinet Refurbishing, Custom Painted Furniture, Chalk Paint® & Miss Mustard Seed Milk Paint Retailer & herRochester Blogger

PHONE: 585-750-6056

Come visit one of our TWO locations:

EAST SIDE OF ROCHESTER (Our MAIN store!)

Photo of 77 west Main Street shop store front photo

77 West Main Street in Macedon, NY 14502

OPEN Mon – Wed 10– 4, Thurs 11–7, Fri 10 –5 & Sat 10-4.…CLOSED SUNDAY

OR

WEST SIDE OF ROCHESTER

The shops on west ridge pic 3200 The Purple Painted Lady

3200 West Ridge Road in Rochester, NY 14626 (The Shops On West Ridge)

OPEN Thurs – Sunday 11–6 ……CLOSED MON, TUES, WEDNESDAY

Painting Walls With Chalk Paint®

Painting Walls With Chalk Paint® is not only going to give you a beautiful finish, but may be ideal for people with hypersensitivities, according to our customer Carrie.   It is also great for walls if you live in an older home with lath and plaster walls.

The Purple Painted Lady® LOVES her customers ~ and loves to hear about your experiences with Chalk Paint®.

Carrie is one of our customers with a hypersensitivity to chemicals decided to give Chalk Paint® by Annie Sloan a try.

Check out how Carrie painted her entire house!

Carrie wrote us, “After renting for 12 ½ years, my husband and I bought our first house this spring.  One of the tasks that I was both excited about and dreading was painting.  It was exciting as we could finally choose colors that we wanted to use in our home; it was worrisome as I have intense chemical sensitivities, allergies, and asthma.  I started researching options other than latex paint.  Previously, I had used milk paint on a piece of furniture and loved the results, so I visited The Purple Painted Lady® in Macedon to talk to them about milk paint on walls.  I met a kind, helpful, and knowledgeable employee, Courtney, at The Purple Painted Lady®.  She told me about what to expect with milk paint on walls.  She also asked me, “Have you considered Chalk Paint®?”  That day I left with the Chalk Paint® color card and went home to research Chalk Paint®

The next week I went back to the shop in Macedon to purchase a quart of paint to try out Chalk Paint® on a small hutch that I had bought.  The paint applied easily and looked terrific, but more importantly, I had no negative health reactions from the paint.

The Purple Painted Lady Carrie Titlow Image #1

My husband and I decided to go ahead with painting all of the rooms of the house using Chalk Paint®

Color Blocking Ability:

The Purple Painted Lady Carrie Titlow Dining Room Chalk Paint by Annie Sloan Transformation

Each time I went back to The Purple Painted Lady®, the employees were helpful and curious about our BIG painting project.  Some of the first rooms that we painted were the living room and dining room.  The previous owner had painted the rooms dark red and yellow.  We were concerned that it would take several coats to cover the dark red; however, the coverage of the Chalk Paint® was exceptional.  In the photo above – Carrie used Duck Egg Chalk Paint®.  Note that it looks darker than normal, but that is only due to the room’s lighting.

Duck Egg Blue Sample Board Annie Sloan Chalk Paint The Purple Painted Lady


After one coat, my mom asked, “Do you think that you even need a second coat?”  The coverage was truly that thorough.

The Purple Painted Lady Carrie Titlow Image #4

CUSTOM COLOR TO LOOK LIKE JADITE:

One of my favorite colors that we used was a mix by Courtney at The Purple Painted Lady®.  I walked into the shop with a bowl from my favorite vintage dishes, Fire King Jadite.


The Purple Painted Lady Chalk Paint Jadite Custom recipe

I asked her to match the color as closely as possible.  She experimented and mixed until we were both pleased with the color.  The results are remarkable.  Thank you, Courtney!  The color makes me smile every time I walk into the kitchen.


Courtney’s recipe for a Fire King Jadite color completed in Chalk Paint®:

1 part Pure White

1 part Antibes Green

¼ part Louis Blue  

The Purple Painted Lady Custom Chalk Paint Annie Sloan Jadite color

We used  (a 2 quart mixing bucket sold at The Purple Painted Lady®)  with measure marks to mix the paint. I loved the Jadite color so much that we used it in the bathroom as well.

In the library, we used Annie Sloan’s Old Ochre.


Old Ochre Sample Board


Unfortunately, we did not take any before pictures of this little room.  It was blue above the chair rail and a pinkish-hued tan below the chair rail.

The Purple Painted Lady Carrie Titlow Image #15

We learned that Chalk Paint® by Annie Sloan can also be used outside.  In fact, Old White was a perfect color match with the existing paint on our porch.

The Purple Painted Lady Old White Chalk Paint Exterioir use outside handrails Carrie


Preparation:

  • Spackled
  • Dry dusted walls
  • Wiped walls with a damp cloth and let air dry
  • Removed switch plates
  • Taped trim

Process:

  • Painted edges and corners of rooms with brush
  • Painted walls with large and small rollers
  • Allowed paint to dry overnight
  • Kept the temperature around 70 degrees in the house while the paint was drying
  • 2 coats of Chalk Paint® in each room
  • Waxed walls of bathroom with Annie Sloan Clear Wax

Results:

  • No allergic reactions, no difficulty breathing, no headaches, etc.
  • Complete coverage of dark colors including dark red and navy
  • Lathe and plaster walls look better with the flat paint…fewer imperfections show
  • Friends and family remarked at how great the paint was to work with
  • My husband and I discovered that we truly enjoy painting together


Products used:

The Purple Painted Lady Carrie Titlow Alcove Transformation Chalk Paint by Annie Sloan
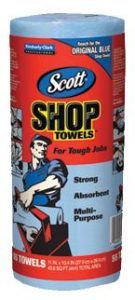
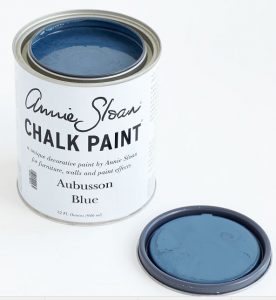
Chalk Paint® Colors used:


What we have painted so far using Chalk Paint® by Annie Sloan:

  • Living room
  • Dining room
  • Kitchen
  • Bathroom
  • 3 Bedrooms
  • Library
  • Porch railing and spindles
  • 3 pieces of furniture


What we have yet to paint:

  • Vintage metal medicine cabinet
  • Trim
  • Hallway
  • Back porch
  • Front and back doors
  • Wainscoting in bathroom

The Purple Painted Lady Carrie Titlow Image #27CARRIE’S TIPS & TRICKS

  • As paint is drying, cover vents with terry cloth towels otherwise cool air blowing directly on drying paint will make the paint crack
  • Use the small roller around the edges to give the paint a more consistent look- the brush and roller apply the paint quite differently
  • Pour the paint in the paint tray and then use what’s left in the can to work on the edges- there is still quite a bit of paint in the can clinging to the bottom and sides


Chalk Paint® cans fit perfectly into the HANDy pails.

The Purple Painted Lady Carrie Titlow Image #28

SUMMARY OF THIS EXPERIENCE:

If I was asked to condense my experience of using Chalk Paint® by Annie Sloan into a few sentences, it would be this:
“Chalk Paint® applied easily, and the results were beautiful.  There was very little odor to the paint, and I had zero allergic reactions when using it every day for 2 weeks (small miracle for me who reacts to everything).  I will be going back to The Purple Painted Lady® for Chalk Paint® by Annie Sloan for all of my future painting projects; I am a customer for life.”


Come visit one of our TWO locations:

EAST SIDE OF ROCHESTER (Our MAIN store!)

Photo of 77 west Main Street shop store front photo

77 West Main Street in Macedon, NY 14502

OPEN Mon – Wed 10– 4, Thurs 11–7, Fri 10 –5 & Sat 10-4.…CLOSED SUNDAY

OR

WEST SIDE OF ROCHESTER

The shops on west ridge pic 3200 The Purple Painted Lady

3200 West Ridge Road in Rochester, NY 14626 (The Shops On West Ridge)

OPEN Thurs – Sunday 11–6 ……CLOSED MON, TUES, WEDNESDAY