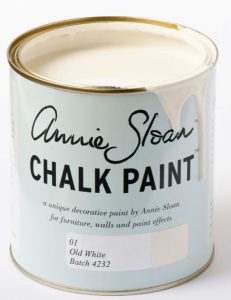
I have been using Annie Sloan’s products for over 8 years…but the funny thing is that they have been around to close to 30 years! People always ask me, “how did you create that shine?” or “get THAT look?” My response is always the same and is so simple! I used Annie Sloan! Chalk Paint® requires no stripping, sanding or priming. (I especially want my friend Rita M. to take note to the NO priming part there)
Anne, who is on The Purple Painted Lady team was walking her adorable daughter Olivia around their neighborhood recently, and lol and behold….she found these cabinets on the side of the curb. (gasp!)
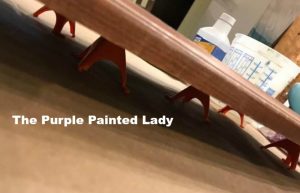
Okay, I included a photo of Anne below who is one of our awesome paint extraordinaires who works as part of our team at The Purple Painted Lady.

I am not joking when I say, “gasp!” above. Those cabinets that Anne salavaged from the curb are solid wood, nice styled cabinet doors. They have a heaviness to them that you do NOT find in most new cabinets. You know the kind – if you were go to a “big box” store and they would run you at least $12K to buy for a smaller average sized kitchen to buy and then have installed!
Granted the cabinets Anne hauled from the curb were a bit filthy. They had these shiny reflective spots on them, as if someone splattered polyurethane on them. They were banged up and scratched….BUT…. Dirt can be cleaned and those splatter marks, that did not come off with cleaning, I rubbed slightly with a medium Sanding sponge, …then all of those “imperfections?” They created PERFECTION when you I used Chalk Paint® by Annie Sloan!
So, at a recent Kitchen Cabinet Painting Workshop I had time to paint a door myself. And this was what I did, while Nancy, a teacher from Fairport, NY – painted her kitchen door I painted Anne’s curb side find. Here is one finished and unfinished side by side!
![]()
Pretty ….crazy…amazing!
All I want to do is go back to the home that Anne found these at with these two and show the homeowner this and say, “Crazy that someone gutted their kitchen and was throwing away these solid wood cabinets. Look at what Chalk Paint®️ by Annie Sloan in Old White and 90 minutes of time can achieve!”
MATERIALS USED: (click on the item and it will bring you to out on-line shopping cart)
CONSIDER BUYING THE HANNAH’s KIT:
Note if you are going to buy a quart of Chalk Paint®,Annie Sloan wax, the Annie Sloan Small Paint Brush and the Annie Sloan Small Wax Brush- You should purchcase our Hannah’s Kit where you get all of these in a bundle and a FREE gift!
STEPS TAKEN:
Okay- here is what I did (keep in mind, my cabinets already had the hardware removed. I suggest, you take yours off and lay cabinets flat. You will achieve a nicer finish if you do this, if you ask me. You do not have to remove the cabinet doors, but I feel it is worth it! Also, if you plan on painting the backs (which I like to do) ….do the backs FIRST! I just do two quick coats and wax, and then get on to the fun side…the fronts.):
- Those splatter marks that looked like polyurethane that I mentioned about above, I slightly sanded them to knock them down using a medium grit sanding sponge. I want to stress you do NOT need to sand when using Chalk Paint®, but this door had some markings that would not come off while cleaning and they required it.
- I then used a little bit of Low Odor Mineral Spirits (not the environmental green
 kind) on a rag to wipe the doors off. I literally, flip the bottle of Mineral Spirits over a couple times to moisten a rag (it is NOT dripping wet!) You can use an old towel, Blue Scott Shop Towels to do this…it does not matter.Think like how you get a cotton ball moist when using nail polish remover. Wipe the door down thoroughly. This will help remove any grease, grime, dried splattered food, dog drool, kids greasy finger prints, crayon, etc. (I could go on and on in regards to what I have scene on cabinets, but for the sake of your stomach and time- we will skip that!)
 - Follow up with another cleaning using just fresh, clean water and a new rag. Same deal, not dripping wet – just a moisten rag with fresh water. Wipe down the cabinets and then let dry.
- Set up a painting area and create an assembly line. The more cabinets you can paint at one time- the better. Reason being, Chalk Paint® dries so quickly- by the time you get to the last cabinet door in the row- you probably can begin the second coat on the first cabinet.
- Place your cabinet doors once cleaned up on “painter’s tripods” or use little cut up spacers of 4×4’s,
 or old books. Anything that can lift the door up so you can get a clean stroke on the edges and the paint cannot pool and seal the cabinet to your flat work space. I like one in each corner and one in the middle.
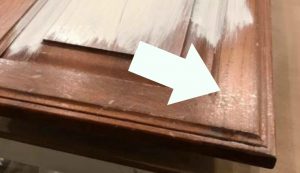
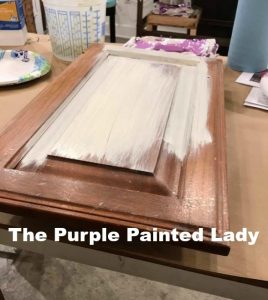
6. Next I applied a uniform thin coat of the Old White Chalk Paint® that I mixed with about 10% of water. If you are a baker- I think of this first thin coat of paint as when baking a cake, and doing a “crumb coat” with frosting.
It is to get a base for my next coat. It is okay if you can still see the door beneath a little – as shown in my photo below. Less is more and I do not want a heavy coat, and never do I want paint pooling in the creases of my cabinets.
While painting – here are some IMPORTANT TIPS!
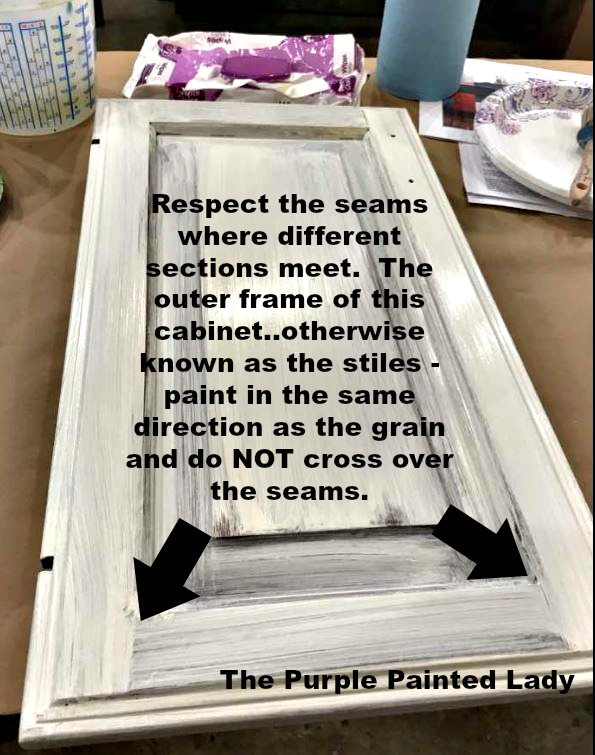
- Always paint in the same direction that the wood grain is.
- Respect the seams where wood meets. The outer frame of this cabinet..otherwise known as the stiles – paint in the same direction as the grain and do NOT cross over the seams. You can see that I painted with a horizontal brush stroke below and also vertical strokes on the sides, respecting that seam. See my image below that illustrates this with the arrows.
- Keep the paint light and from pooling in the seams!
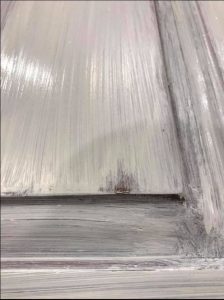
- After applying the paint in one section- I always do one continuous fluid stroke from end to end. Note on how my cabinet door you do NOT see a bunch of short brush strokes! I think this is a very important thing to achieving a nice smooth finish.
7. Once you have your first coat applied, and it has dried, you can begin your second coat. I will still add a little water and I always use my Annie Sloan SMALL Paint Brush. Only load your rush with the amount of paint you can control and manage. Personally, I would rather do three uniform thinner coats, than two heavier coats, but you will determine what is nest for you and get a groove.
 8. Once the paint is dry, I then distressed my edges and corners. (This is NOT required, but I wanted to do it.) I used my Annie Sloan Medium and Fine sanding sponges. Keep in mind- these are totally reusable, so when the sanding side accumulated dried paint in the crevices of the grit, I just rinsed them and then squeezed excess water out and continued using them. I also used the FINE Annie Sloan Sanding Sponge to lightly “polish” my Chalk Paint® in some areas.
9. Blow off any powder you created, and now you can begin the clear wax application.
CAN I PAINT THE LAMINATED (Faux Wood) ON END CAPS OF CABINETS?:
YES- you can paint the laminate end cap. But you will want to lightly sand in the same direction you will apply your paint- which should always be the same direction as the wood grain. (even if it is a faux wood grain.)
Then, clean the surface per the insructions we provide.
Thin your paint with a little water and paint a uniform, thin coat- making sure to “lay” your paint from top to bottom at the very end of every stroke- so you get rid of any small segmented brushstrokes. Then….WAIT 24 hours till you apply coat number two. Don’t try to scratch the paint with your thumbnail during this period…because you will be succussful.
There is a lot of chemistry in paint and you need to allow that chemistry to do it’s thing! Once all done painting, apply the wax top coat per the instructions and voila…..you will be amazed!