YES! It works great! Be sure they are clean and give a very lightly sanding with some 150 grit – which is best for durability.
Have you had issues with understanding the Wax Application with Chalk Paint®?
Read this and let me know if it was helpful for you!!!
How Much Wax Do I apply?
First, take note …we are not icing a cake! We are waxing furniture. So, very thin – uniform coats are best. If that is all that you remember from this hand out- you should be ok! Just like when you put moisturizer on your skin- you do not put a thick coat on, but rather a THIN coat and rub it in- so that it will be absorbed into your skin. This is the same approach when waxing furniture.
CLEAR WAX- this is how I use it:
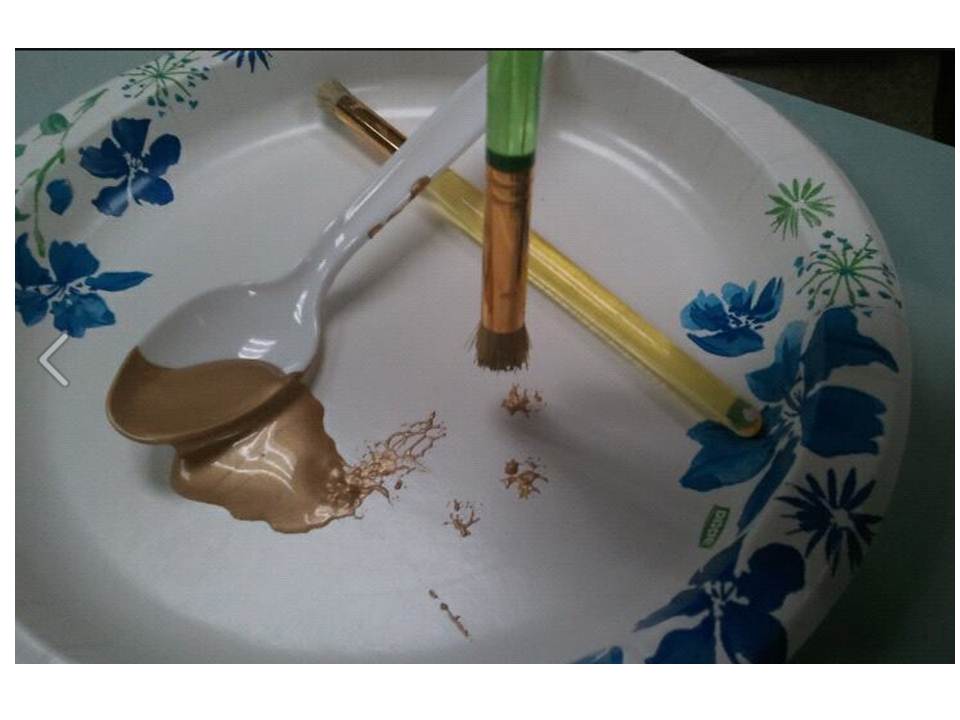
1. I take a plastic spoon and a paper plate. Using the backside of the spoon- I take a good tablespoon amount of wax out of the tin and put it on the paper plate. (Place the cover back on the tin of wax until you need more)
2. I use my wax brush and pull some of the wax from the glob (for lack of better words.) Only the tips of your wax brush should have wax on them- and not a lot!!!! A little goes a long way! Again- you are not icing a cake where you want a generous amount of thickness. We are applying the wax very thin- pressing uniformly with steady pressure- but not so much that you are bending the bristles on the wax brush. I like to use the analogy that this is similar to waxing your car…you apply the wax- BUT NOT SO MUCH that when it is time to wipe it off or buff- you need a power tool to do it! So- apply a thin layer of wax and GET IT IN THE GROOVES OF THE PAINT.
3. DIRECTION TO APPLY WAX For most pieces (except when going for that Rustic look or when you have a textured piece) I usually apply the wax in the same direction as my painted brush strokes. Or- if I use a circular motion- I still ALWAYS finish with a few clean straight finishing strokes in the direction I painted. If I was doing a dresser top- I would start at the back reaching across while standing in front of the piece and as I apply the Annie Sloan wax – I work my way toward the front as so I don’t lean into a previously waxed area. You will see where you waxed prior because it does deepen the hue of the paint a slight amount but be aware of where you just waxed.
4. After a few strokes from one side to the other with the wax brush- I will notice when the wax is not covering as much- that is my queue I need more wax. But first….using a lint free cotton t-shirt (an old one from my husband or an old sheet) and I wipe off the residual wax with one or two strokes in the same direction as I just waxed. (I am not buffing the wax at this stage! Merely just removing or incorporating any small wax “crumbs” that may be present.) Again- just one or two uniformed swipes across the whole area in one sweep – and that is it.
5. Resume waxing the next area- I wax strategically – meaning in an organized direction so I do not miss a spot.
6. The wax will dry (meaning no longer be tacky to the touch within a short time….maybe an hour or two?) However a variable in the dry time is the temperature and humidity where you are located. Is it is humid and cooler- cure time will be longer. If it is taking a long time and your wax is still tacky and you are not in the rain forest- reread my warnings above regarding applying the wax thin!
Depending on the piece I am finishing- I may have different amounts of wax coats. For instance…..a dresser. I may have 2 – 3 coats of wax on the top, but only 1 coat of wax on the sides and front.
7. Once the piece is no longer tacky- if you want to have a shinier finish- buff your piece. If you like it as is- then you are done! It does not take much rubbing and the piece will be quite shiny- so pay attention and have good lighting so that you do not over do it.
8. Remember NO WAX when painting pieces for outside.
9. Surfaces that will get serious use (wear and tear) like tops of dressers and tables – should receive 2 to 3 coats of wax. Follow the procedure above – always allow wax to dry between additional coats.
I will always lead my customers on a path to get the best value from their purchase. If a person walks in and is describing an application where another product would be better- I let them know! Now when it comes to tools- in the sense of brushes – I strongly believe that wax brush is a necessary purchase if you plan on doing multiple pieces. I understand that they are not inexpensive, but if you maintain them- they will last forever and will make your waxing process much faster and from a cosmetic perspective- will significantly improve your application! I always say- this is similar to applying make up. I honestly don’t think the applicator you choose for putting on eye shadow is a big deal- but try putting blush on with a skinny brush versus a nice big soft brush and you are going to look ridiculous. Invest in a wax brush and get a professional quality finish. You will not regret it. If you agree with my post- please comment. Thanks!
Here are my directions to you – and without me there guiding you- this is not 100% full proof- but should improve your piece.
1. BUY A WAX BRUSH if you haven’t already for the next time you apply the wax. (If you have a wax brush- again- super thin coats of wax. Thinner than how you apply moisturizer…but total coverage! If you have wax going up the sides of the brush- or gobbed on- you have too much!)
2. REMOVE SOME OF THAT WAX BUILD UP from your piece. This is the step you need to approach carefully and be aware and focused when doing. Take some Mineral Spirits (which is what I suggest you have on hand to clean your wax brush.)
3. Pour some Mineral Spirits onto a LINT FREE & CLEAN – rag.
4. Starting on the top of your piece….and working from the farthest point back towards you. Wipe the piece across with the rag that has mineral spirits. Make sure the rag is saturated, but not soaked and dripping all over!
5. Wipe the dresser in the same direction as you painted and applied the wax….meaning not all willy-nilly in every direction! You want to be strategic and make sure you wipe the entire surface so pay attention and overlap your wipe strokes slightly.
Also- don’t scrub! You don’t want to wear away in pockets all the way to raw paint.
Once you have done this- step back to view your piece from the “big picture” Does it look better?
If yes- let the piece sit for a couple of hours and then you can re-apply a THIN and even coat of wax. Reference my wax direction above on wax application prior!
IF……you do the Mineral Spirits tricks and it still looks like ….(for lack of better words) crap. Repaint with one coat ……..remember Annie Sloan Chalk Paint can be painted over her wax…as long as the wax is dry! Never just paint over real think wax that is still soft- you will continue to have problems.
ONE LAST approach if the above does not work or you would rather do. Carefully sand the piece – wearing off some of the wax only- wipe off or blow off sanding dust from piece. Repaint with one coat. Let dry. Rewax with the correct technique.
Call me with questions when doing if needed.
585-750-6056
Trish The Purple Painted Lady
The Ultimate Waxing Brush has a comfortable wooden handle that fits nicely in your hand and the ferrule is made of nickel-plated steel guaranteeing no rust. The 2″ long 100% Shanghai White Bristle, the finest available, is solvent proof, double set in epoxy and combed twice to ensure little bristle loss. The brush is round and easy to use on furniture as well on walls. The brush head is shaped by hand in the United States by a brush-maker with over 35 years experience. The quality is unmatched and its pricing is unbeatable.
If taken care of- this brush will need to be noted in your will since it will last forever! If you plan on using both clear and dark wax- it is HIGHLY recommended you get TWO, otherwise you will contaminate your clear wax. The cleaning is simple, just dampen a soft rag with low odor mineral spirits and gently twirl the brush. If you plan on using your wax brush regularly you can cover with Press n’ Seal or even a rubber glove or ziploc bag. You don’t have to clean each time you use it, but if there will be a lot of time between use- you might as well!
This brush makes applying wax a pleasure.
Please rub the wax into the finish after brushing the wax on. Wipe off the excess wax. The wax has dried when it is no longer tacky to the touch. Depending on the conditions of where you are located, temperature, and humidity- curing time may vary. Often we recommend to let it dry – some people say overnight prior to buffing- BUT if you apply the wax thinly…you should be able to buff within hours. Unless you need to do multiple wax coats – like on top of a dresser or table. You can use you piece right away, but keep in mind- that wax that is dry – is still curing and that process can take up to 3 weeks. So do not let your neighbor’s son with his metal matchbox cars to come over and play on it.
Here are the directions for cleaning this brush based on how The Purple Painted Lady prefers to clean it! CLEANING YOUR WAX BRUSH- (My preferred way!) Anyone out there ever buy a product and not receive “Instructional Information” with it…especially something like paint & wax OR a wax brush (how to clean the thing) The Purple Painted Lady ALWAYS includes helpful How-To’s and Instructions with every shipment! Not to mention- periodic surprise gifts. But back to why I started this post. Wax Brush Maintenance Instructions: (NOTE- this applies to most brushes…this specifically is based on the brushes I sell on my website.)
Congratulations! You are the proud owner of a new Chalk Paint / Wax brush. Its hair is the finest Shanghai White Bristle from the cutest little boar in China! The ferrule is made with nickel plated steel for rust resistance- but that does NOT mean you can soak it over night. I personally recommend cleaning your wax brush with odorless Mineral Spirits. I first get a paper plate and use this to work on top of. I then get a plastic or paper cup….and typically pour a little amount of the mineral spirits in it (NOTE: do not use a styrofoam cup.) Pour just enough Mineral Spirits in the cup as so to cover the bristles about 1/4 to 1/2 inch up when the brush is standing in the cup. The Mineral Spirits will get absorbed and pulled into the bristles very quickly- like within seconds. I then take the brush out of the cup, and using a paper towel or two….gently “squeegee” the wax out- starting from the ferrule and pulling the wax down and out- again, doing this very gently since we do not want to yank on the bristles as if to pull them out! Then- once done …you can gently wash the bristles with mild soap and water. Please remember not to break the bristles open or spread them apart when cleaning- you want your wax brush bristles to stay tight and compact.
When disposing of your residual wax….just like bacon grease, never-ever pour this down your sink drain. Place the residual wax into paper towels or on a plastic plate. I then- thoroughly wet with WATER a few more paper towels and place them on top before carefully disposing. This is very important if you live in a state with hot temperatures, or if someone in your home is a smoker. Safety precautions are important.
I hope this information was helpful and if you follow them- you should never need to purchase another wax brush from me. : ) Think of this maintenance – just like regular oil changes for your car. In fact- when was the last time you did that? Some people have recommended using vegetable oil- I personally don’t since if you do not get all the oil out- it can be a problem next time you go to use your brush. Google that process if interested. Thanks again
Doing a touch up of paint over the painted and wax piece- is totally fine! But you will also need to do a touch of wax. The paint is a “flat” or matte finish and the wax does change the hue a bit as you may have noticed….it not only intensifies the color a bit, it also adds a smidge of a sheen. So, it is not a big deal to do a touch up with paint, but note you may need to also do a touch up with the wax base on your personal preference of how it looks after. I prefer the touch up with wax after!
Oh, but before I begin- did you know that Annie Sloan Chalk Paint is made here in the USA! Yep! Quite a few Americans are employed due to this brilliant product! It is manufactured in the USA, it is distributed by Americans, and heck- the last I checked- I am American too. So – rest assured- when you purchase Annie Sloan Chalk Paint- you are not just being GREEN due to it being non-toxic, and totally water soluble, but you are also supporting the Red, White & Blue! Besides the fact that this is the most amazing product on the planet- it was developed by a real woman named Annie Sloan (you probably guessed that though by the label on the quart, huh?) Annie is a real woman, a wife and a mom! She is just like you and just like me.

Annie developed her incredible Chalk Paint® over 2 decades ago. No make believe person or gimmick here….I also like to think about the fact that there was not a team of marketing exec’s sitting around a board table brainstorming savvy names to call it that may appeal to you and I. Chalk Paint® has over 20 years of real life use INSIDE and OUTSIDE of homes! So- you never need to be concerned about what this paint will look like 10 years from now! If you try it- you will be impressed. No sanding or priming, unbelievable adhesion quality, and finished to rival the most expensive furniture lines anywhere! From ONE quart of paint- I have painted a hutch, a buffet, a small dresser, a side table and 3 chairs. Through my retail shop of Annie Sloan’s products – that equates to about $5 material cost per piece. Not too shabby! So please stop in and visit me…….. like Jennifer from Buffalo did today. She ended up waxing part of this table so that she could go home and not have any questions in regards to application!
Okay- on with my post of this workshop table! So- here it is …..my workshop table. Pretty lines- but not so pretty surface on top. Notice the nice dark stain and all the paint spots. But hey- considering I got it for free- who was I to complain! However- that doesn’t mean that a girl cannot grab a quart of Annie Sloan Chalk Paint to give it some TLC.

I love Duck Egg Blue Chalk Paint®! I would just like to reiterate- there was nothing done to this table prior to me painting it- NO sanding, NO priming —just good ole’ MADE IN THE USA – Annie Sloan Chalk Paint- Which is THE BEST PAINT IN THE WORLD!
Oh yes- did I mention – this is ONE coat of Chalk Paint® in Duck Egg Blue on this table?! What do you think of the coverage? No trick photography…heck I am lucky the pictures are not blurry since I only use my Droid cell to take pictures. Now- HOLD UP! Before you go & grab a quart of Annie Sloan Chalk Paint in Pure White or Old White thinking you are going to get the same coverage- STOP! Because you probably won’t. Some colors have better coverage characteristics than others. With Old White or Pure White this probably would have taken me two solid coats- and heck- I may have even used my Zinsser shellac first (reference a post below about this!)

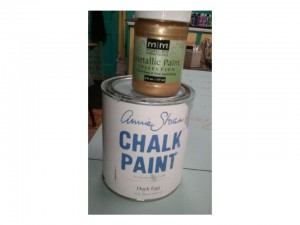
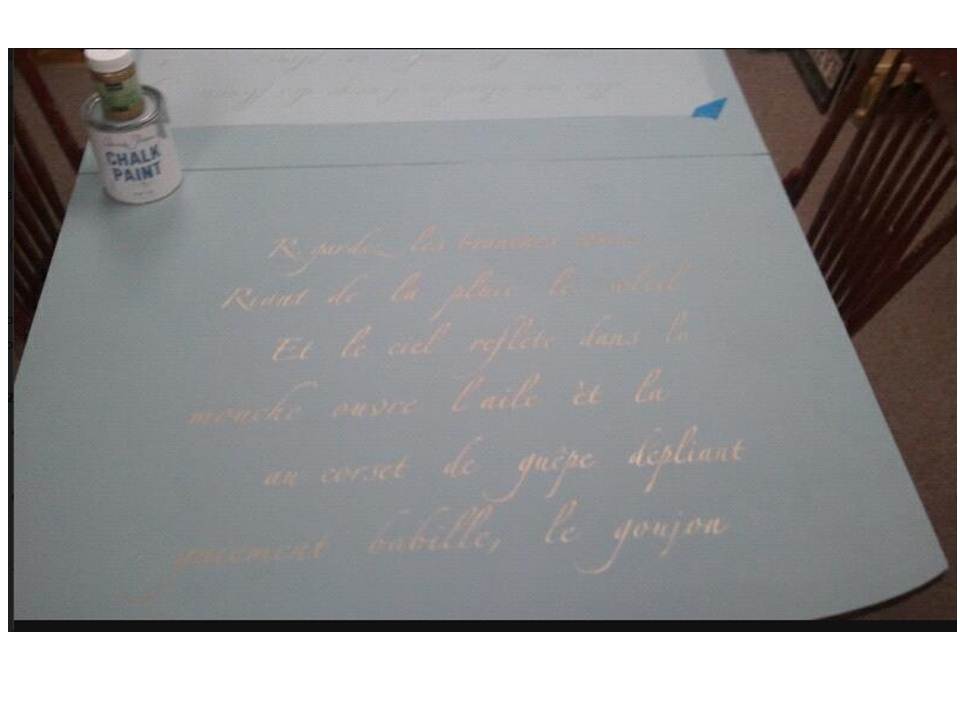
Okay- so the Annie Sloan Chalk Paint- Duck Egg is beyond gorgeous…but for my workshop table- I needed a bit more “bling!” So – how about a fun stencil? Super easy way to make a piece unique! I tape the stencil down after lining it up by eye where I want it. You should always use painter’s tape or a mild spray adhesive to hold the stencil in place. I plan on using Modern Masters Metallic Pale Gold Paint to take this table up a notch with some pizazz! : ) Just to note- all I have done so far was paint the table- NO WAX.
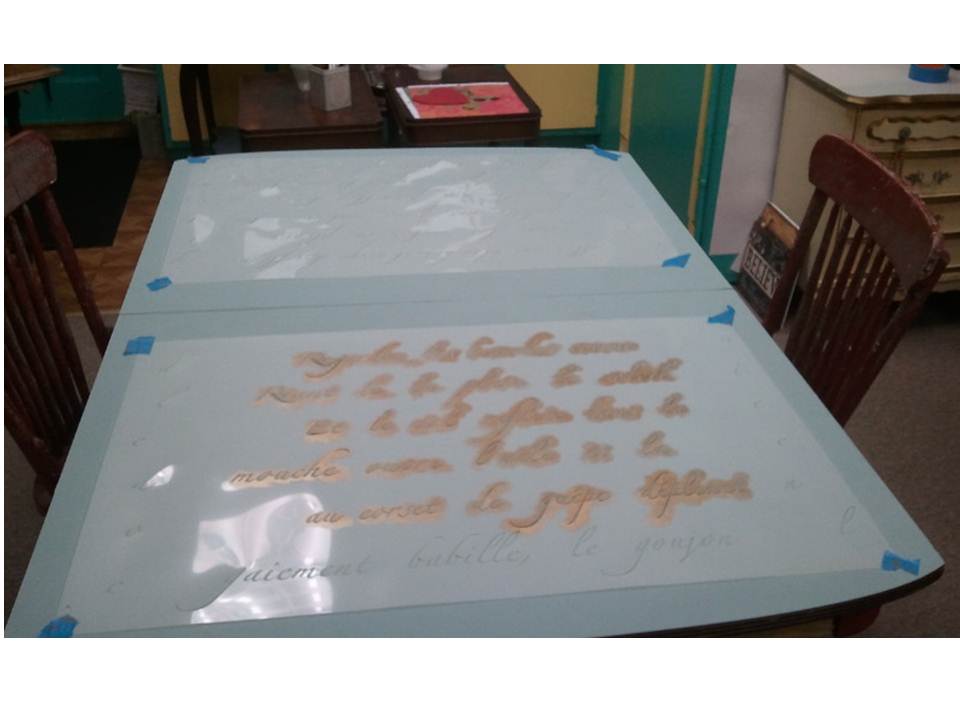
Just a small amount of Modern Masters Metallic Pale Gold will do it! I use an inexpensive stencil brush that you can pick up at any craft store. Get paint on the brush and then blot some off….remember we are stenciling and do not want to have that much paint on our brush that it squirts under the stencil. Then with a vertical up and down motion- I blot the stencil. When it comes to stenciling- here are some tips to help you:
Stenciling Tip 1: Use a Professional Tool
Stenciling brushes are round with short, stiff bristles. Use it in a quick up-and-down movement to dab paint onto your stencil. This helps prevent paint getting under the edges. Never apply in a circular motion. A sponge or small roller works well too, but I prefer the brush.
Stenciling Tip 2: Work from The Outside
Start panting on the edges of the stencil, working into the center, rather than from the center outwards. Again this helps prevent paint getting under the edges as you’re less likely to accidentally bump the brush against an edge.
Stenciling Tip 3: Less is More
Don’t overload a brush with paint as it will bleed under the edge of the stencil. Load the brush lightly, so that the ends of the bristles are covered evenly- blot or wipe off any excess on a piece of paper or cloth.
Stenciling Tip 4: Think Thin
You will get better results by applying two thin coats rather than one thick one. Wait for the first to dry before applying the second. Do not remove your stencil until you are absolutely sure you are done.
Stenciling Tip 5: Get Sticky
Keep a stencil in place by taping it at the top and bottom with a piece of tape. Painter’s Tape works best as it’s very easy to remove and should not pull off any paint from the surface.
Stenciling Tip 6: Go Multi-Colored
To use more than one color in a stencil, use tape to mask off areas of the stencil you don’t want in a particular color so you do not forget and get carried away with the wrong color.
Stenciling Tip 7: Practice Makes Perfect
If you’re using various stencils together, first try it out on a piece of paper. It’s far easier to find out that something isn’t working at this stage versus having to try to correct it when you’re painting on your final surface.
Stenciling Tip 8: X-rated Stencils
Old x-rays are great for cutting stencils, so if you were unfortunate and have some – put them to good use.
Stenciling Tip 9: Wash Regularly
If you’re doing a repeat design, wash your stencil regularly in warm water to keep the edges free of paint. If there’s some paint on an edge, you won’t get a crisp edge to your painted stencil. As paper stencils don’t lend themselves to washing, acetate stencils are better for repeat designs. With a paper or card stencil, wipe off the excess paint, then leave the stencil for a bit so the paint on it dries, before using it again.
Stenciling Tip 10: Store stencils Flat
A stencil, obviously, needs to be flat to be usable. To stop it from buckling, put it between two pieces of cardboard and store it somewhere flat.
What do you think? Do you think the workshop table looks nicer now than it did raw before? Do you like the stencil with pale gold? When I think French Country- I always think Annie Sloan! And for that matter- I think Annie Sloan Chalk Paint in Duck Egg!

I plan on doing two coats of Annie Sloan Clear Wax- which actually I finished this evening. I applied one coat (with some help from a new friend of mine named Jennifer who drove in from Buffalo to see me and buy some Annie Sloan Chalk Paint for her new home!) Jennifer got a hands on tutorial regarding wax application using my wax brush. Then – tonight I went back in and applied another coat of clear wax since the first coat was no longer tacky. Tomorrow- I will buff the table gently and voila….I just ReFunked MY Junk…I mean, I just refurbished an otherwise “not so pretty” piece into a piece that many of customers will love and enjoy working on!
Thanks for reading my post. I am always available to answer “Dear Purple Painted Lady” questions. Just email me at takuntz@rochester.rr.com
Until tomorrow ~ ”Art washes from the soul the dust of everyday life.” — Picasso.
Here is a story true story of the progression of this issue with a trestle table that I recently painted for my shop, The Purple Painted Lady. A photo of her is below. Doesn’t she have great lines? I saw her and was in love and knew immediately how much potential she would have once she received a little TLC.:

First of all, at my shop I use and prefer specific products. Yes…I have used many products over the last decade, but just like make-up or soda pop, we are creatures of habit and usually stick to the brand that we like the most and that does the job for what our needs are. Now before I go on…here is a little disclaimer I wanted to add regarding this post. I am not endorsed or sponsored by this particular brand/company I am going to write about. But I can say that I always have a bunch of cans of this product in my shop for sale and for my personal inventory because it has been a life saver…and also a money and time saver for me. And AMEN to all of that!!!
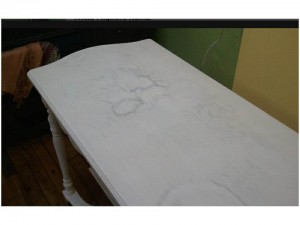
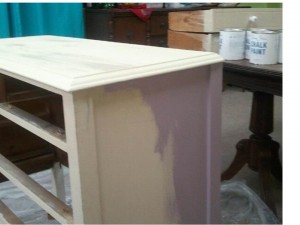
OK…with that out of the way- let me get back on track! So, you can see in the photo above a beautiful trestle table- but look close at the top if it. Now check out the image below and you can sadly see the water stains that bled through after beginning painting it. Foolish me…even “experts” (and I use that term very loosely) make mistakes. Again- if you look closely at the top of the unpainted table- it was quite obvious this was going to be an issue!
I totally knew I should have taken precautionary steps – but perhaps I was in denial. I don’t know, but either way- after that first coat of paint- reality hit me quickly and I did what I needed to do.
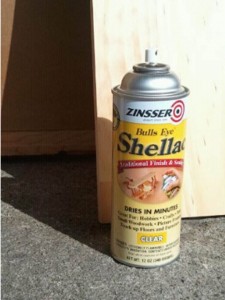
Ok, are you ready? Here it is…my secret to covering up water stains and preventing wood tannins from bleeding through my painted pieces of furniture or cabinets. It is…ta-daa…..using a spray shellac. Just like the one I have shown here.
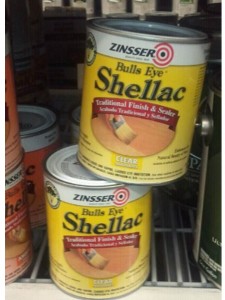
This “miracle in can …or quart” also works great when dealing with knotty pine or if painting kitchen cabinets that were manufactured and installed in the 1980’s or 1990’s. Come on- you know the one’s that have that yellowish wood stain color and you can see the grain of the wood. The wood tannins bleed through your paint like the photo above shows. To prevent the bleeding you can approach this problem by using multiple (meaning many!!!!) coats of a serious excellent covering primer (adding more expense to your project.) OR…you can try my secret weapon.
Make sure when using any product to read the manufacturer’s usage and safety directions first. Like most spray paint, polyurethane or shellac – this stuff has some serious smell to it. I always recommend- when possible to use this in an outside area or garage. Wear a mask and even safety glasses. You do not want any wind or dust when using. Take off that sparkly diamond ring you might be wearing or any other jewelry or watches, so you do not accidentally spray them. Then, once the piece is dry – which is very quickly- open the front and back door to get a cross breeze to air out your work space. It doesn’t take much time and the smell dissipates quickly!
When you have stains and need to spray your piece, always spray the whole surface that contains the stains. Get uniform coverage – do not just target the stain section. You wouldn’t think just a quick spray of shellac in only a small targeted area could be visible once painted, but it is! I am going to repeat that because this is important! Make sure when you spray the whole area of the piece! So in my example- I sprayed the whole top of the table. And feel free to do this twice. First, spray it once and let it dry which only takes 10 minutes. I love the quick drying time because even the most impatient people will be impressed with his stuff! Next- spray another full second coat!
Again, play it safe! Do this step outside since the shellac has a serious strong odor- but the smell goes away quick and dries in minutes.
Below is the same table after one coat of Zinsser Spray Shellac and a coat of Old White- which is a paint that does not require a primer to stick to the shellac. Doesn’t it look better? .
Again, this is wonderful stuff and if you paint lots of furniture… I recommend always having a can on hand. Or two, or three….!
Imagine when you go to paint those old kitchen cabinets that you cannot stand the color of. Save yourself time- just take the precautionary step and spray shellac all the doors after a good cleaning- and spray them twice. And don’t forget to brush on the shellac to your kitchen cabinet frames too.

Anyway- I think this trestle table looks lovely now! Tomorrow this gorgeous table will receive a mix of Dark & Clear wax to showcase the “crocodile” textured surface around the front and sides.
Hope you enjoyed this not-so-little article- but isn’t that typical of me? Please write to me, “Dear Purple Painted Lady” with questions and you may be featured right here online! Any painting questions, color selection issues, or even design issues- send them on in. Please just write me at takuntz@rochester.rr.com and note in your subject, “Dear Purple Painted Lady.”
Until next week…. in the words of St. Francis of Assisi:
A woman who works with her hands
is a laborer.
A woman who works with her hands
and her head is a craftsperson.
A woman who works with her hands.
her head and her heart
is an artist.
Stay well!
Tricia Migliore Kuntz ~ aka…The Purple Painted Lady
Annie Sloan recommends doing 3 THIN coats of wax- make sure to give ample dry time between coats of wax. Please- make sure to use a wax brush- you will get the best results and it is the fastest method!
Congratulations! You are the proud owner of a new Chalk Paint / Wax brush. Its hair is the finest Shanghai White Bristle from the cutest little boar in China! The ferrule is made with nickel plated steel for rust resistance- but that does NOT mean you can soak it over night. I recommend cleaning your wax brush with odorless Mineral Spirits. I first get a paper plate and use this to work within. I then get a plastic or paper cup….and typically pour a little amount of the mineral spirits it (NOTE: do not use a styrofoam cup.) Pour just enough Mineral Spirits in the cup as so to cover the bristles about 1/4 to 1/2 inch up when the brush is standing in the cup. The Mineral Spirits will get absorbed and pulled into the bristles very quickly- like within seconds. I then take the brush out of the cup, and using a a paper towel or two….gently “squeegee” the wax out- starting from the ferrule and pulling the wax down and out- again, doing this very gently since we do not want to yank on the bristles as if to pull them out! Then- once done …you can gently wash the bristles with mild soap and water. Please remember not to break the bristles open or spread them apart when cleaning- you want your wax brush bristles to stay tight and compact.
When disposing of your residual wax….just like bacon grease, never-ever pour this down your sink drain. Place the residual wax into paper towels or on a plastic plate. I then- thoroughly wet with WATER a few more paper towels and place them on top before carefully disposing. This is very important if you live in a state with hot temperatures, or if someone in your home is a smoker. Safety precautions are important.
I hope this information was helpful and if you follow them- you should never need to purchase another wax brush from me. : ) Think of this maintenance – just like regular oil changes for your car. In fact- when was the last time you did that?
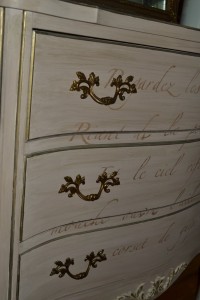
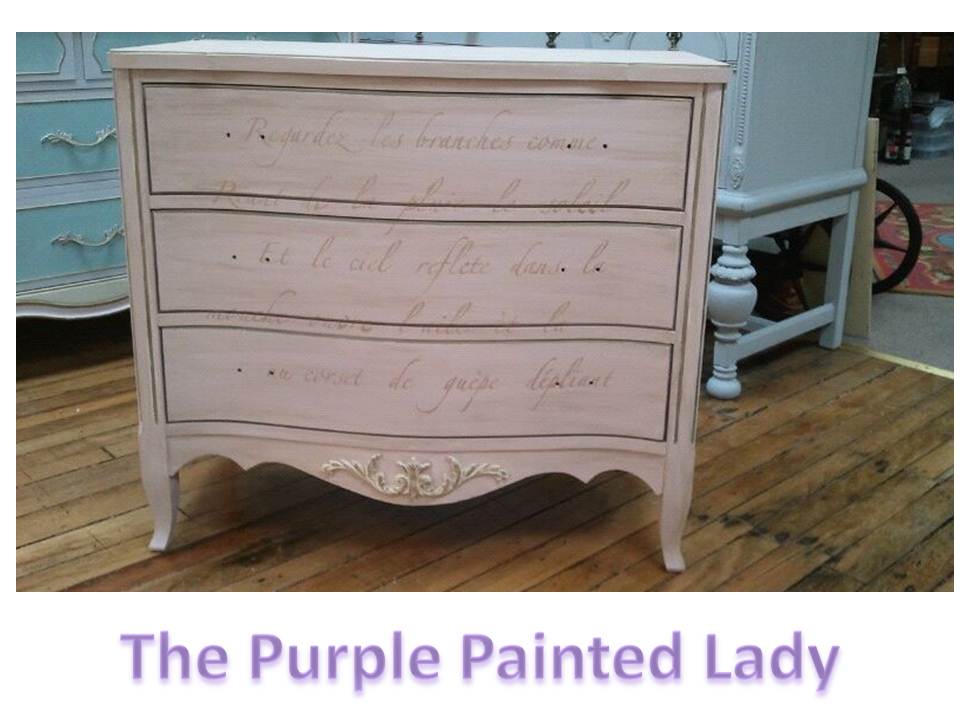
I have received a bunch of questions pertaining to my CoCo wash over the Antoinette Bombay dresser that I posted in Feb. 2012 on my Facebook page. (see photo below) You might remember this one since it had that pretty pale gold French poem stencil across the front! Ooh la la! Anyway- back to the wash “how to”….the type of paint you use for doing a wash is VERY important.
I am focusing on Annie Sloan Chalk Paint here because that is my favorite paint and because of that….. it is what I sell in my shop and use when I want a velvety, silk-like finish. (Now don’t get me wrong- I still use Latex and love it depending on the end product I am going for – but try making a “wash” with latex…(I would like to stress the sarcasm meant with that comment!) Now back to the CoCo Wash…..to make a “wash” – I first pour some chalk paint into a plastic cup. A “wash” goes a long way in regards to coverage. For this dresser I used about a half cup of Annie Sloan’s CoCo Chalk Paint. I then took my Sharpie marker and made a line noting how high the paint was in the cup. I did this in case I needed to make more.
Next…using a teaspoon add water to the paint-one teaspoon at a time (remember to measure and note the amount you add)….less is best since you can always add more water. The mixture of water and paint should begin to thin out. (Keep your paint:water ratio written down in case you need to make more!) The thinness or viscosity of the paint will be based on your preference. No recipe or rule here- but remember this is a “wash”– if you wanted to paint the piece- no need to add water. I added only a few teaspoons for my Antoinette painted dresser.
Then I brushed on the “wash” mixture and used a clean, lint free rag and wipe off the excess. That’s it- pretty simple, huh?
You can make a “wash” that goes on over a piece that has already been waxed or not waxed. I prefer doing the wash before I apply a coat of wax…that is just my preference.
A wash makes for a real beautiful translucent effect! Let dry and then wax as normal. This is a great way to make a piece richer! OR…perhaps you want to try a bold color like Barcelona Orange, but are too chicken to “go for it”…I would suggest trying it in a wash first. It seems to be a more conservative approach and feels safer! And why buy glazes when you can do something similar but in any Annie Sloan Chalk Paint Color too!
Try this “wash” effect with a color like Duck Egg over Old White….or French Linen over Graphite, Provence over Old Ochre OR just Old White “washed” over natural wood! There are no rules- but I hope the following helpful hints make this project idea more do-able for you! Please keep in mind….
1. Always note the water to paint ratio in case you do not make enough to finish the whole project. (can I stress this any more? But I learned my lesson once and ended up goofing up a piece over this simple rule! Learn from my mistake!)
2. Brush on the wash in strategic brush strokes–meaning keep your lines straight and clean
3. Be cautious not to drip on areas of the furniture you are not currently washing
4. Put a drop cloth down if doing this in your home…you will drip some on the floor.
5. Place your cup with the wash on a paper plate to keep work surface clean
6. Apply wash in small sections and wipe off – then move on to the next section. During the wiping off process- be careful to not have “rag blotch marks.” Start at the top and wipe off in clean, even pressured strokes all the way to the opposite side. Do not stop half way or go against the direction you want the streaks in. Never go in circles with the rag. If your rag becomes too saturated- get a new one.
7. I used a chip brush to apply- I like the streaky effect from the bristles.
8. Plan twice, “wash” once. Meaning- know your piece and your plan on how you are going to approach the project…top first, then sides.
9. If you are just trying a wash for the first time (or 2nd or 3rd) – it is best to do this on a piece that is smooth across. Meaning- not raised panels, or with carved details.
And lastly- if you try this- please post a photo of your before and after on my FB page!
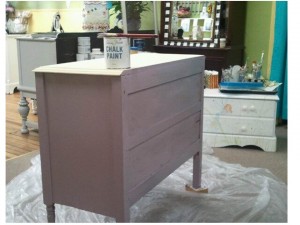
There are many reason why I really love Annie Sloan Chalk Paint…one of them is the ease of use of the paint. It is exactly like how Annie Sloan describes it – kind. First of all- it is super easy to apply. And – the process is super quick. All I did to “prep” this piece was wipe it down and I shop vac the drawers out. I started by painting the top in Annie Sloan Chalk Paint Old White..which took a whole 5 minutes.
There was specs of dark “stain” on the top…and the Old White covered it all. Next I started to paint the body of it in Annie Sloan Emile- which is a beautiful warm soft aubergine color with pink red undertones giving it a rich complexity that makes a sophisticated lilac tone. I LOVE this color!!!!! I started the whole process at 11:03 am and finished painting the entire skeleton of the dresser within 15 minutes. (Now keep in mind- my store is open on Saturdays and I am doing this all the while I have visitors) I didn’t use anything fancy to paint the dresser – in fact- I used one of my handy old brushes that seems to be my “go to” brush.
Here are a few suggestions that may be helpful for you. First- I always put whatever I am painting, up on scrap blocks to elevate it off the floor. You can see my blocks in the photo above. It will make painting the tip of its legs easier, especially if you have a drop cloth on the floor. For some reason- drop cloths always bunch UP and get in the way of painting. Second- If you paint pieces to sell or if this is for your home…please don’t forget to paint the back of it. I like to use the analogy that when a woman goes to the hair dresser she still gets a cut & color on the back of her head…even though she cannot see it. The same applies to furniture. And this includes painting inside the drawers. By putting in this little extra effort – it gives the piece double duty in case you want to use it to divide a space in a room or, depending the size of the dresser, if it is small enough, place it at the foot of the bed. The back can be kept the same color, or use a surprise color! But definitely paint it. That whole surprise color idea- applies to inside the drawers too. Use a fun accent color for a bit of whimsy. Or- if this is for your teenage daughter who insisted she wanted her walls of her painted in bright neon orange, but you compromised on a different color- use the orange in the drawers! She will love it!!!
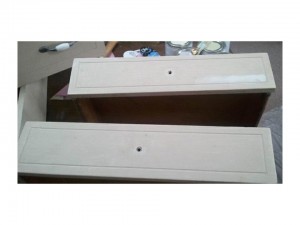
Now I know we are all in a hurry and time is of the essence- but go to the effort and take the knobs off the drawers as shown below. : ) It will make painting much easier- and besides- now you can decide to use the existing knobs or purchase new ones without the worry of having to match the shape and size. Seems elementary, but thought I should write it.
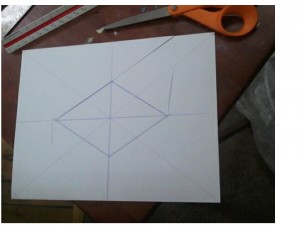
For the top of the dresser, I love whimsy. So, how about a little Harlequin design? I think….yes! To begin this step, first I determine what I personally think would look good for the size of the diamonds. I take a ruler and place it from the front to the back dresser and measure the depth. I decide that three full diamonds or close to it would look best. So- I take the measurement and divide it by 3. The rule of thumb for a Harlequin diamond (now that is a bit redundant isn’t it) is that the height of the diamond should be twice the width. This is just a guide- if you prefer more of a square shape- do that instead, this is your dresser. For me- I start by making a diamond shaped template.
I then find the center point on top of my dresser and using water color pencils (never use regular lead / graphite pencils since the lead smears and is difficult to cover) I make a grid to find the center point easily. I place my template centered on top of the dresser and begin my layout always using either a watercolor pencil or piece of chalk…never use your run of the mill lead or graphite pencil because depending on the paint you are using- it can be a bear to cover and the lead will smear in you paint and alter the color.
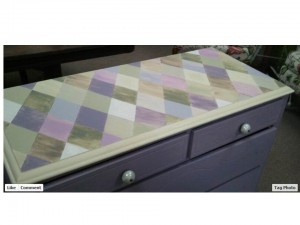
When I painted the diamonds in using about 6 different colors- to get more interest- I would thin out the paint- almost to a “wash” consistency just to get variation in hue and depth of color. It gives the piece more of a water color feel.
Since I was doing all of this while my shop was open- I had multiple paint sales and people coming in with questions about Annie Sloan Chalk Paint. So- I did not finish the piece today- but I will soon. Below are some additional photos of how it looks right now. I painted out the front panel on the drawers in a cream because my next step after finishing the harlequin pattern I will add a pretty landscape of one of our beautiful NY Finger Lakes. Stay tuned for the finished piece which I promise to take photos of with a real camera versus my cell phone. : )
Great day at the “ReFunk YOUR Junk” Workshop held on Jan. 22, 2012

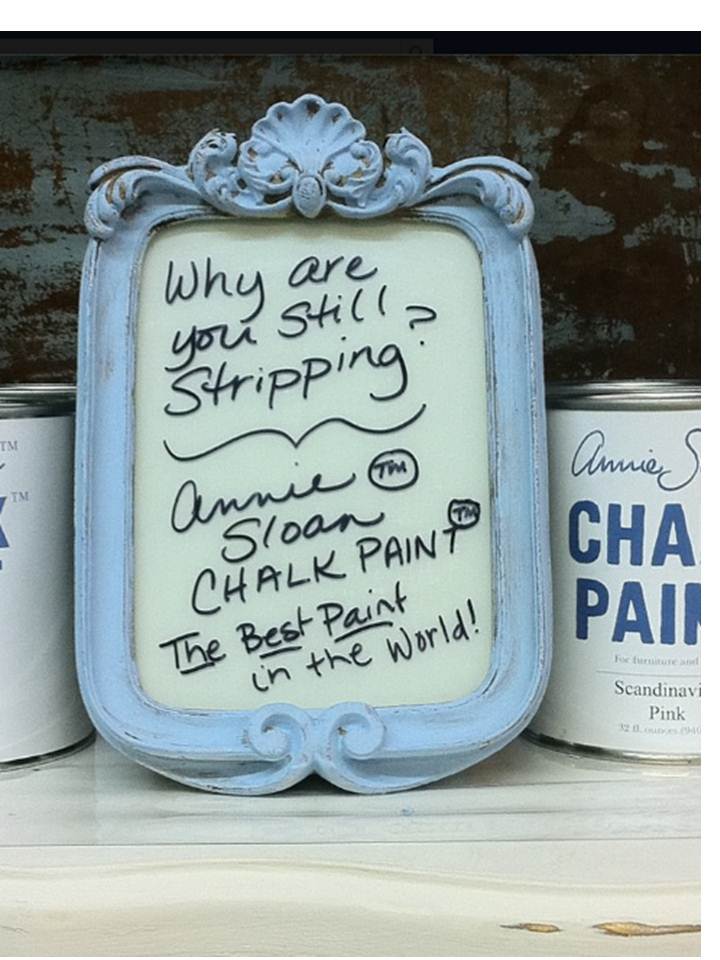
1. Find the cutest picture frame – paint the BACKSIDE of the glass with Annie Sloan Chalk Paint (TM) Pure White or Old White and let dry. Of course, paint the frame too in any Annie Sloan Chalk Paint (TM) color you desire. Once glass is dry—
2. Reinsert glass into frame- but remember to place it with the painted side facing INWARD. (So unpainted side of glass is on the outside)
3. Then – use a Sharpie and voila! You are all set…write away!
For clean up => …use hand sanitizer, glass cleaner or clorox wipes (whatever you have available to wipe the sharpie off.) You can use expo markers instead of sharpies but they smudge easier.
What is awesome about this- is you can get frames that are small OR super big based whatever your needs are- versus being stuck with whatever the store only has. AND- the frame can be super cool!
Great HELPFUL HINT.. Shop Salvation Army, Goodwill, or VOA’s for art work in frames with a glass top plate. Pick up pieces for cheap and convert to this idea!
* Makes a GREAT end of year Teacher’s gift!!!
* Leave one in the garage for a quick communication board for yours kids or hubby to communicate with each other. : )
A. Painting a resin piece like an urn or a garden cherub with Annie Sloan Chalk Paint (TM) and want the look of distressing, but not wear it down through to the “plastic” it is made of.
B. OR you are painting an ugly piece of furniture and you do not want the original finish to show through, but you would like to distress it. In that case- you would follow the instructions below:
Example A…where you are painting a resin object- follow there directions:
1. Paint your piece one color of Annie Sloan Chalk Paint (TM) …perhaps Old White (then…..let dry)
2. Moisten a sponge or rag (should not be dripping any water- just damp) and wipe away the top coat paint color.
This will reveal the base color of the urn or cherub without scratching it down through to the plastic. Just a reminder- do not use wax for outdoor applications.
Example B…where maybe you have an ugly dresser that is currently painted a color you dislike- follow there directions:
1. Paint your dresser first in the base color of Annie Sloan Chalk Paint (TM) you have chosen (this is the color you will a slight bit of when you distress) …for this example- we will say that is Old White (then…..let dry)
2. Then using Annie Sloan clear wax – apply per wax directions in a thin coat and let dry. (if you are applying the wax correctly- it should not take more than an hour or so!!!!!!)
3. Then paint second color of Annie Sloan Chalk Paint (TM) (this will be the primary top color that you see the most) …for this example- let’s say that Louis Blue. (then….let dry)
4. Moisten a sponge or rag and wipe away the top coat paint color (Louis Blue) where you would like to distress so you can see the Old White beneath.
5. Then do a final clear wax over the Louis Blue.
1st Annie Sloan Chalk Paint (TM) is awesome in that you can paint fabrics and that it will not crack like latex paint!
2nd Make sure to pre-moisten the fabric a bit. I did this by dampening my paint brush and basically brushed the velour fabric to moisten it. (NOTE I do not mean saturate it with water)
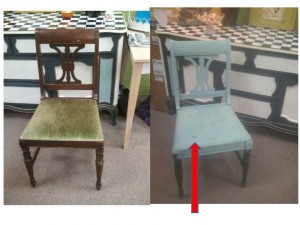
3rd Notice the red arrow in the photo below pointing at the little blemish? What I learned when painting velour is to make sure you do a final stroke when painting. Make sure to lay the velour fabric smooth or you will get a blemish also where the fabric is standing up.
Tomorrow I will finish the chair and then wax the fabric- so stay tuned for the details and hopefully a photo with better clarity!
PS I have used this chair (sat on it) and the paint holds up just fine!!!!!
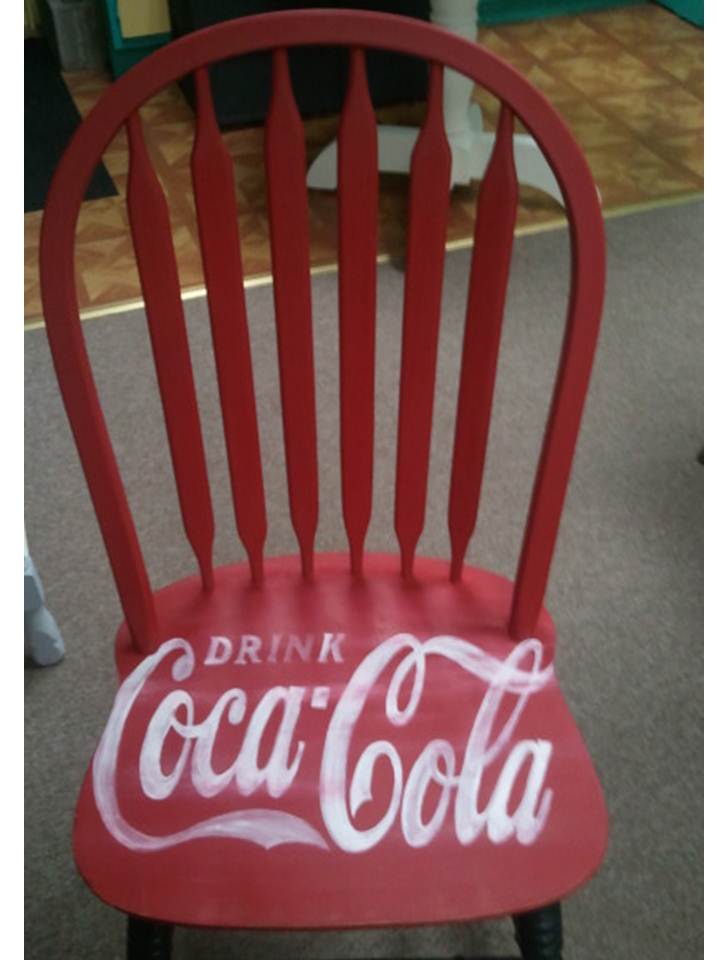
Something that I love about Annie Sloan Chalk Paint™ is how it lends itself to so many different types of projects! When I painted this Coca-Cola on the chair below- I wasn’t concern with having solid smooth swirled paint strokes within the letters. When I painted them- you could see my brush strokes where some paint was heavier in areas than others. But that was okay because I knew after I clear waxed the piece- I would use some high grit sand paper to smooth it out and distress and it would add character and age the piece. I used some 220 grit initially to distress the edges of the chair and also wear down into the “Coca-Cola” so it would look vintage! (And it does now!!) Be strategic when doing this step and make sure to randomly wear areas as so it does not look like a pattern when you step back and look at it. I then followed up with some 800 grit to “burnish” the seat or in other words…..smooth it all out. The seat is silky smooth now!!!! I may go back and carefully outline the “Coca-Cola” with some Graphite but will put that idea to a vote to those who visit my shop and see it first hand. So- the moral of this story is…..if you like to create vintage looking signage – Annie Sloan Chalk Paint™ is perfect!!!!!!
Can you use Chalk Paint® over wallpaper?
Yes, you can use Chalk Paint® over wallpaper BUT……..
But…….. the most important factor to consider though was if your wallpaper was sized properly when it was first hung. You would not want to paint the wallpaper- have the chalk paint moisten it and then have the wallpaper fall off the wall.
So, if you want to paint wallpaper- I would also recommend that you apply one or two coats of Shields Wallpaper Primer. The Shields Wallpaper Primer will act as a moisture barrier so that the wallpaper does not not become saturated and loose by the Chalk Paint®. It will also block any inks used to print the wallpaper from bleeding through into the new paint layers.
I would STRONGLY suggest doing a “test” area in the most inconspicuous spot in the room because we cannot guarantee that this will not cause an issue with your wallpaper (that is a disclaimer in case we were subtle). And then — be prepared for if it does not work – to take on the project of stripping the wallpaper! I get that removing wall paper is not fun. In fact- if it was not put up properly- can even ruin your drywall when removing it….but in the end, you may have to bite the bullet.

