Painting Your Floor with Chalk Paint® Projects (wood floor, tile and Linoleum)

These floor projects using with Chalk Paint® on wood floor, tile and Linoleum are just spectacular. 

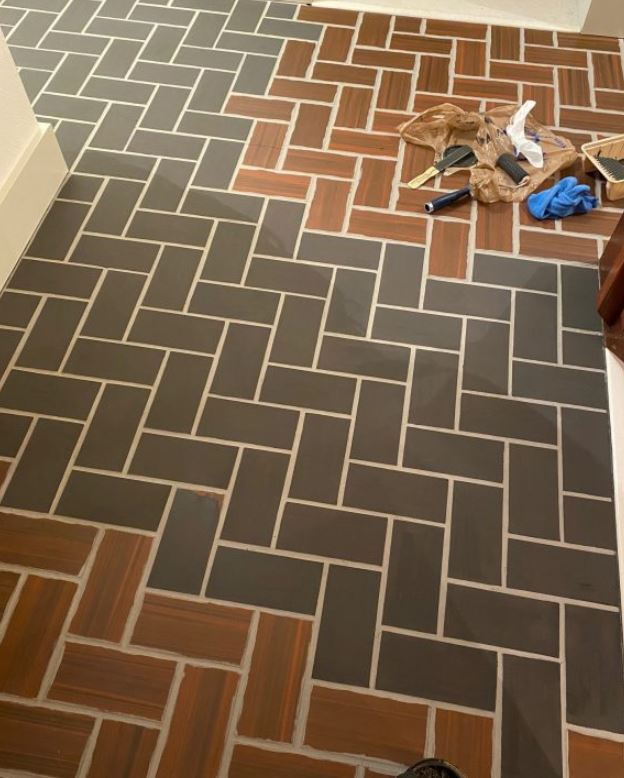
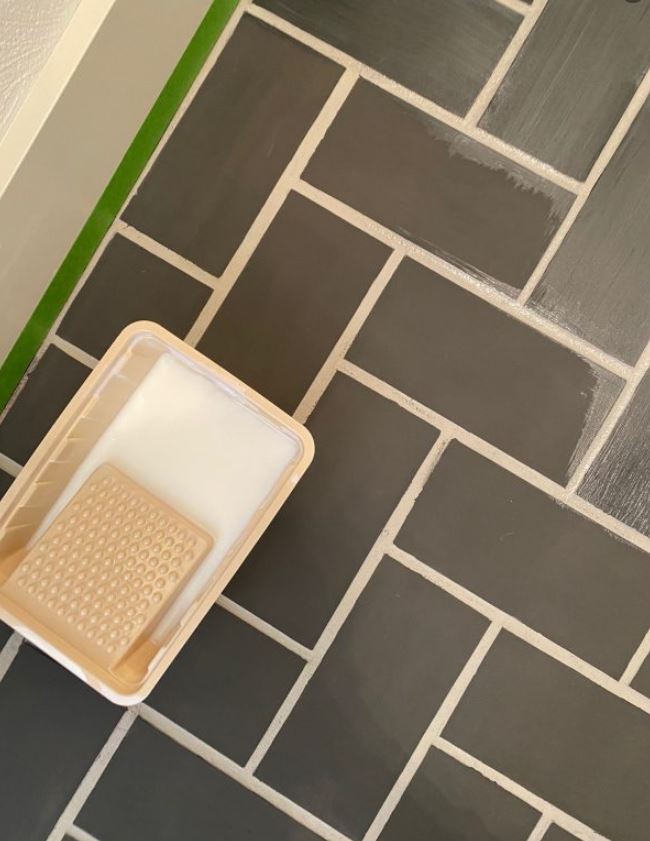
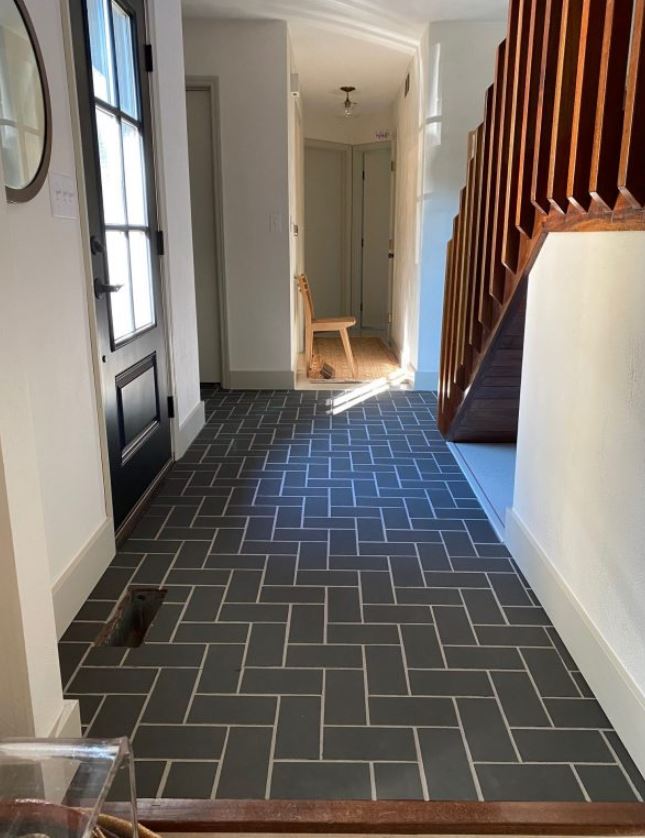
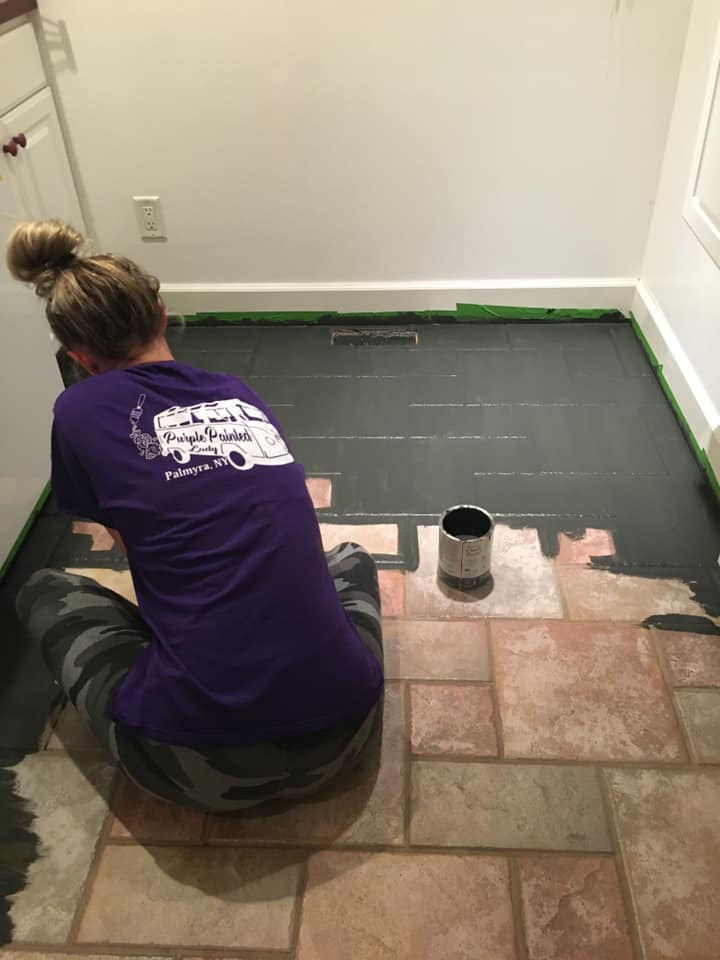
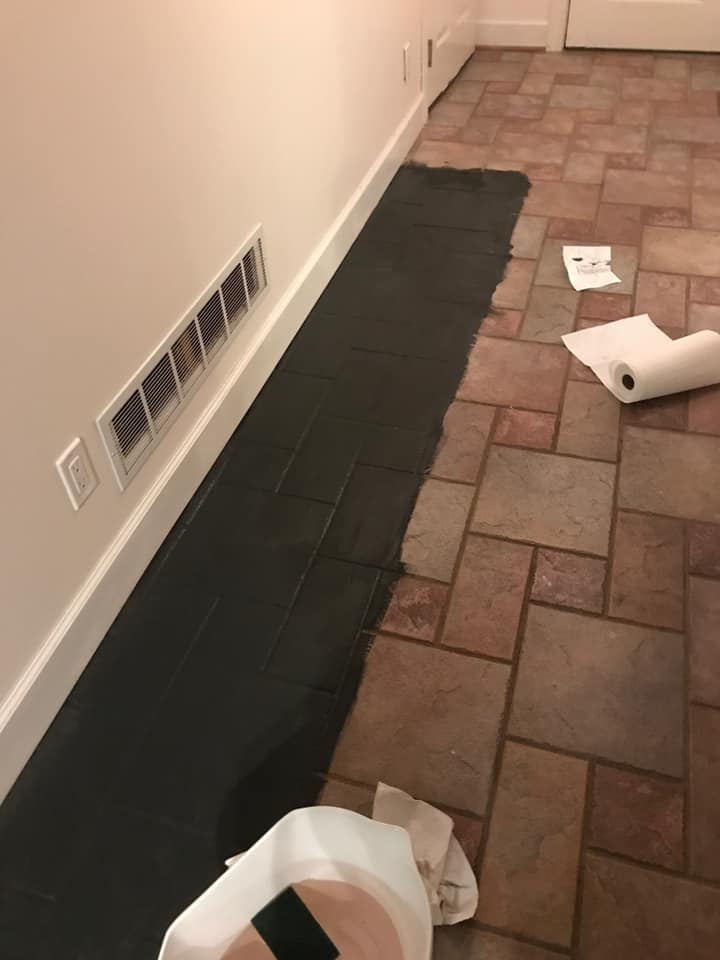
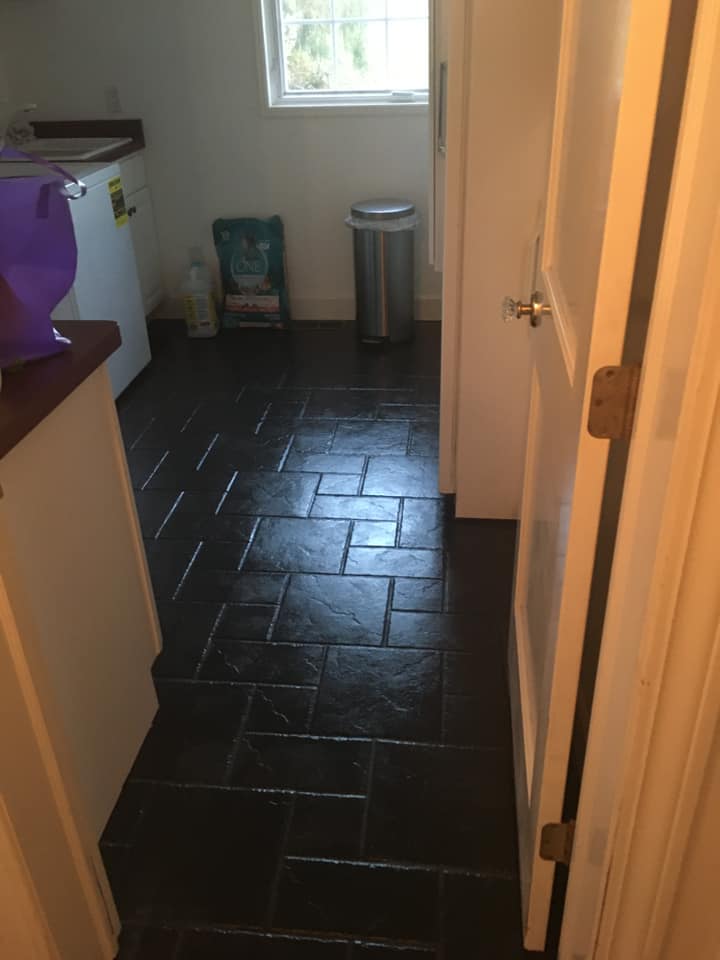
Here is one of my favorite blogs to follow, Dana at HOUSE*TWEAKINGDana is a pharmacist by trade but her passion is houses. She is seriously talented in her vision. She recently painted a tile floor entry to look like slate using Graphite Chalk Paint® by Annie Sloan and then protected it with Annie’s Matte Lacquer.

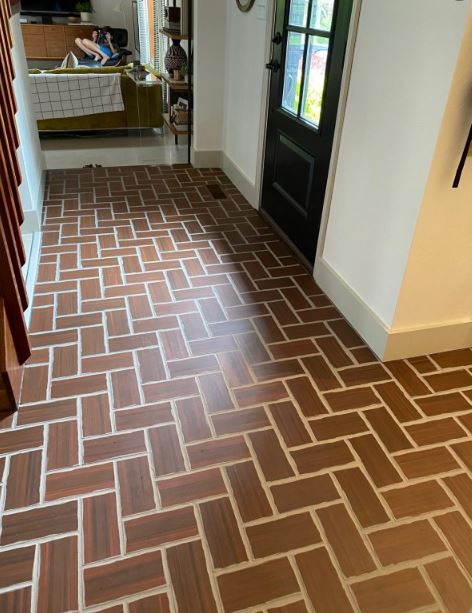
Tile floor project by HOUSE*TWEAKING

Just a disclaimer, usually over dark colored Chalk Paint® you should use Annie Sloan Gloss Lacquer since the flattening agent in the Matte can look hazey.

Dana was clever though and wanted that potential haze to make the tile look more like authentic slate. 

Here is a link to Dana’s beautiful website: https://www.housetweaking.com/


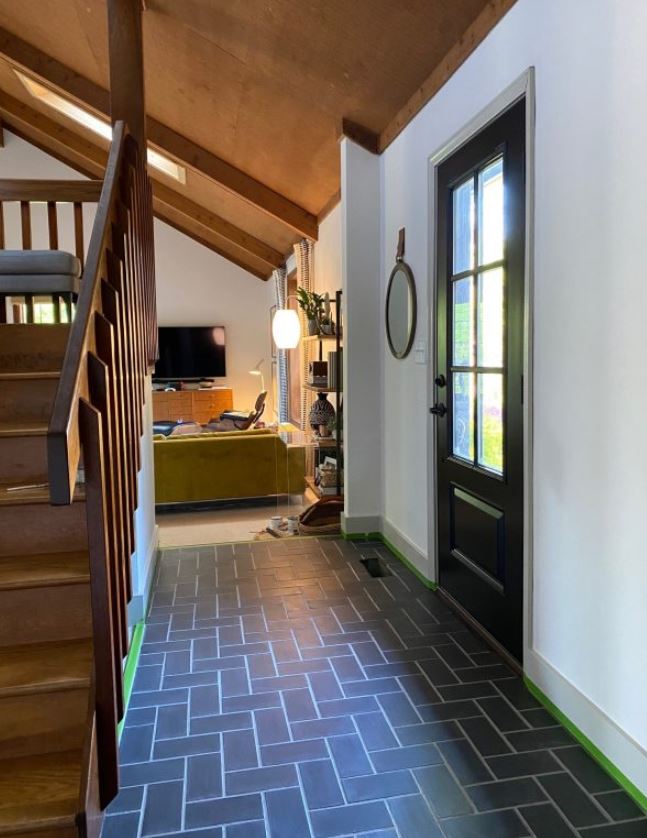
HOUSE*TWEAKING TILE FLOOR PROJECT


HOUSE*TWEAKING – applying Annie Sloan Lacquer

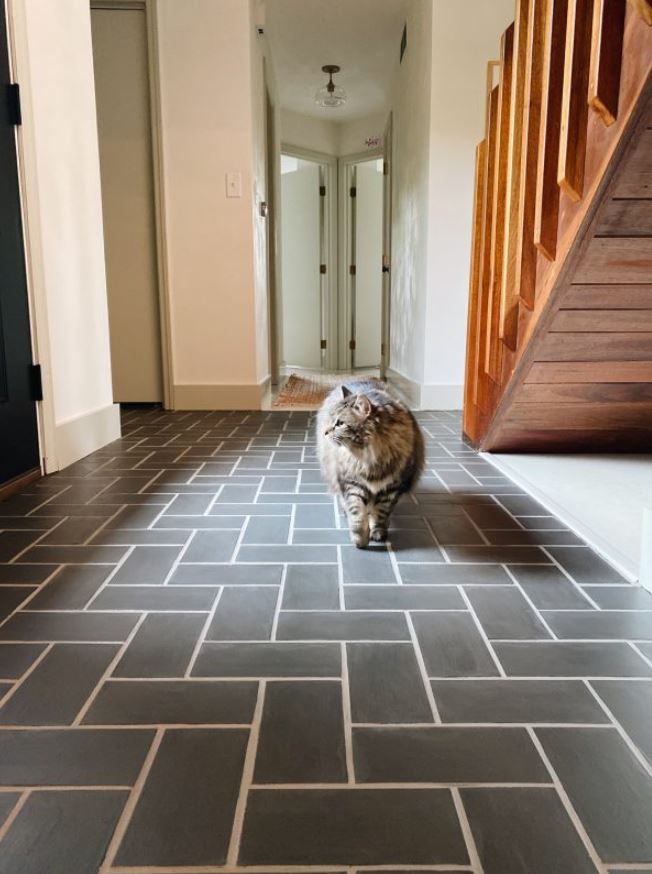
0We think she nailed it! In her post, she shares some of our instructional information…but check out the first comment below to a link to our website for a lot more Lacquer tips! Here is a link to Dana’s beautiful website: https://www.housetweaking.com/

Check out this wood floor fixer upper project by our friend Amy Smith – who is an entrepreneur and has had multiple successful businesses.

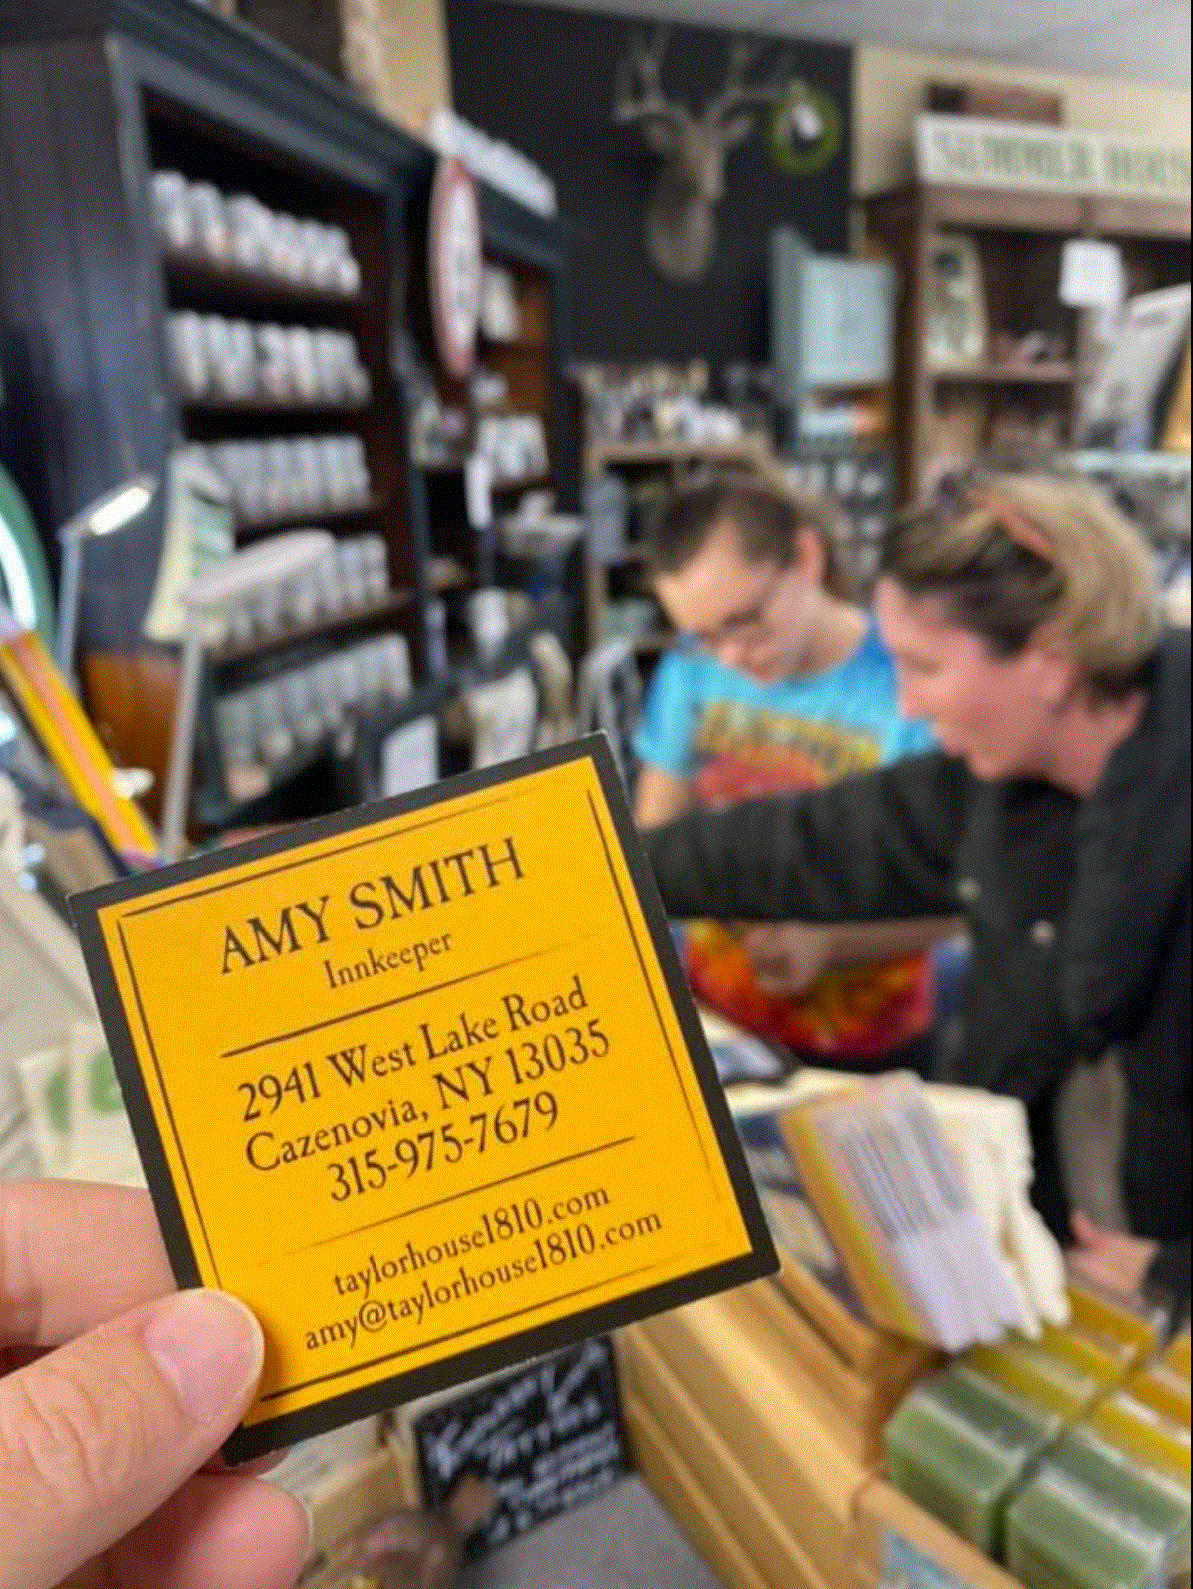
Picking out colors of Chalk Paint® at The Purple Painted Lady

This new chapter she just began is being the caretaker for the Taylor House 1810 at 2941 West Lake Road in Cazenovia, NY. They will be doing an exciting new launch of their gorgeous bed and breakfast in early January 2020….and will be sharing more photos. But we just had to share what they did to their floor using Chalk Paint® by Annie Sloan.

However, we wanted to give you a little taste of how they are using Chalk Paint® by Annie Sloan and inspiration from blogs like Quintessence on this journey. 

Amy’s Inspiration for her floor transformation


Amy had some restoration to the wood floor and the repairs did not fit in with the previous wood stain.

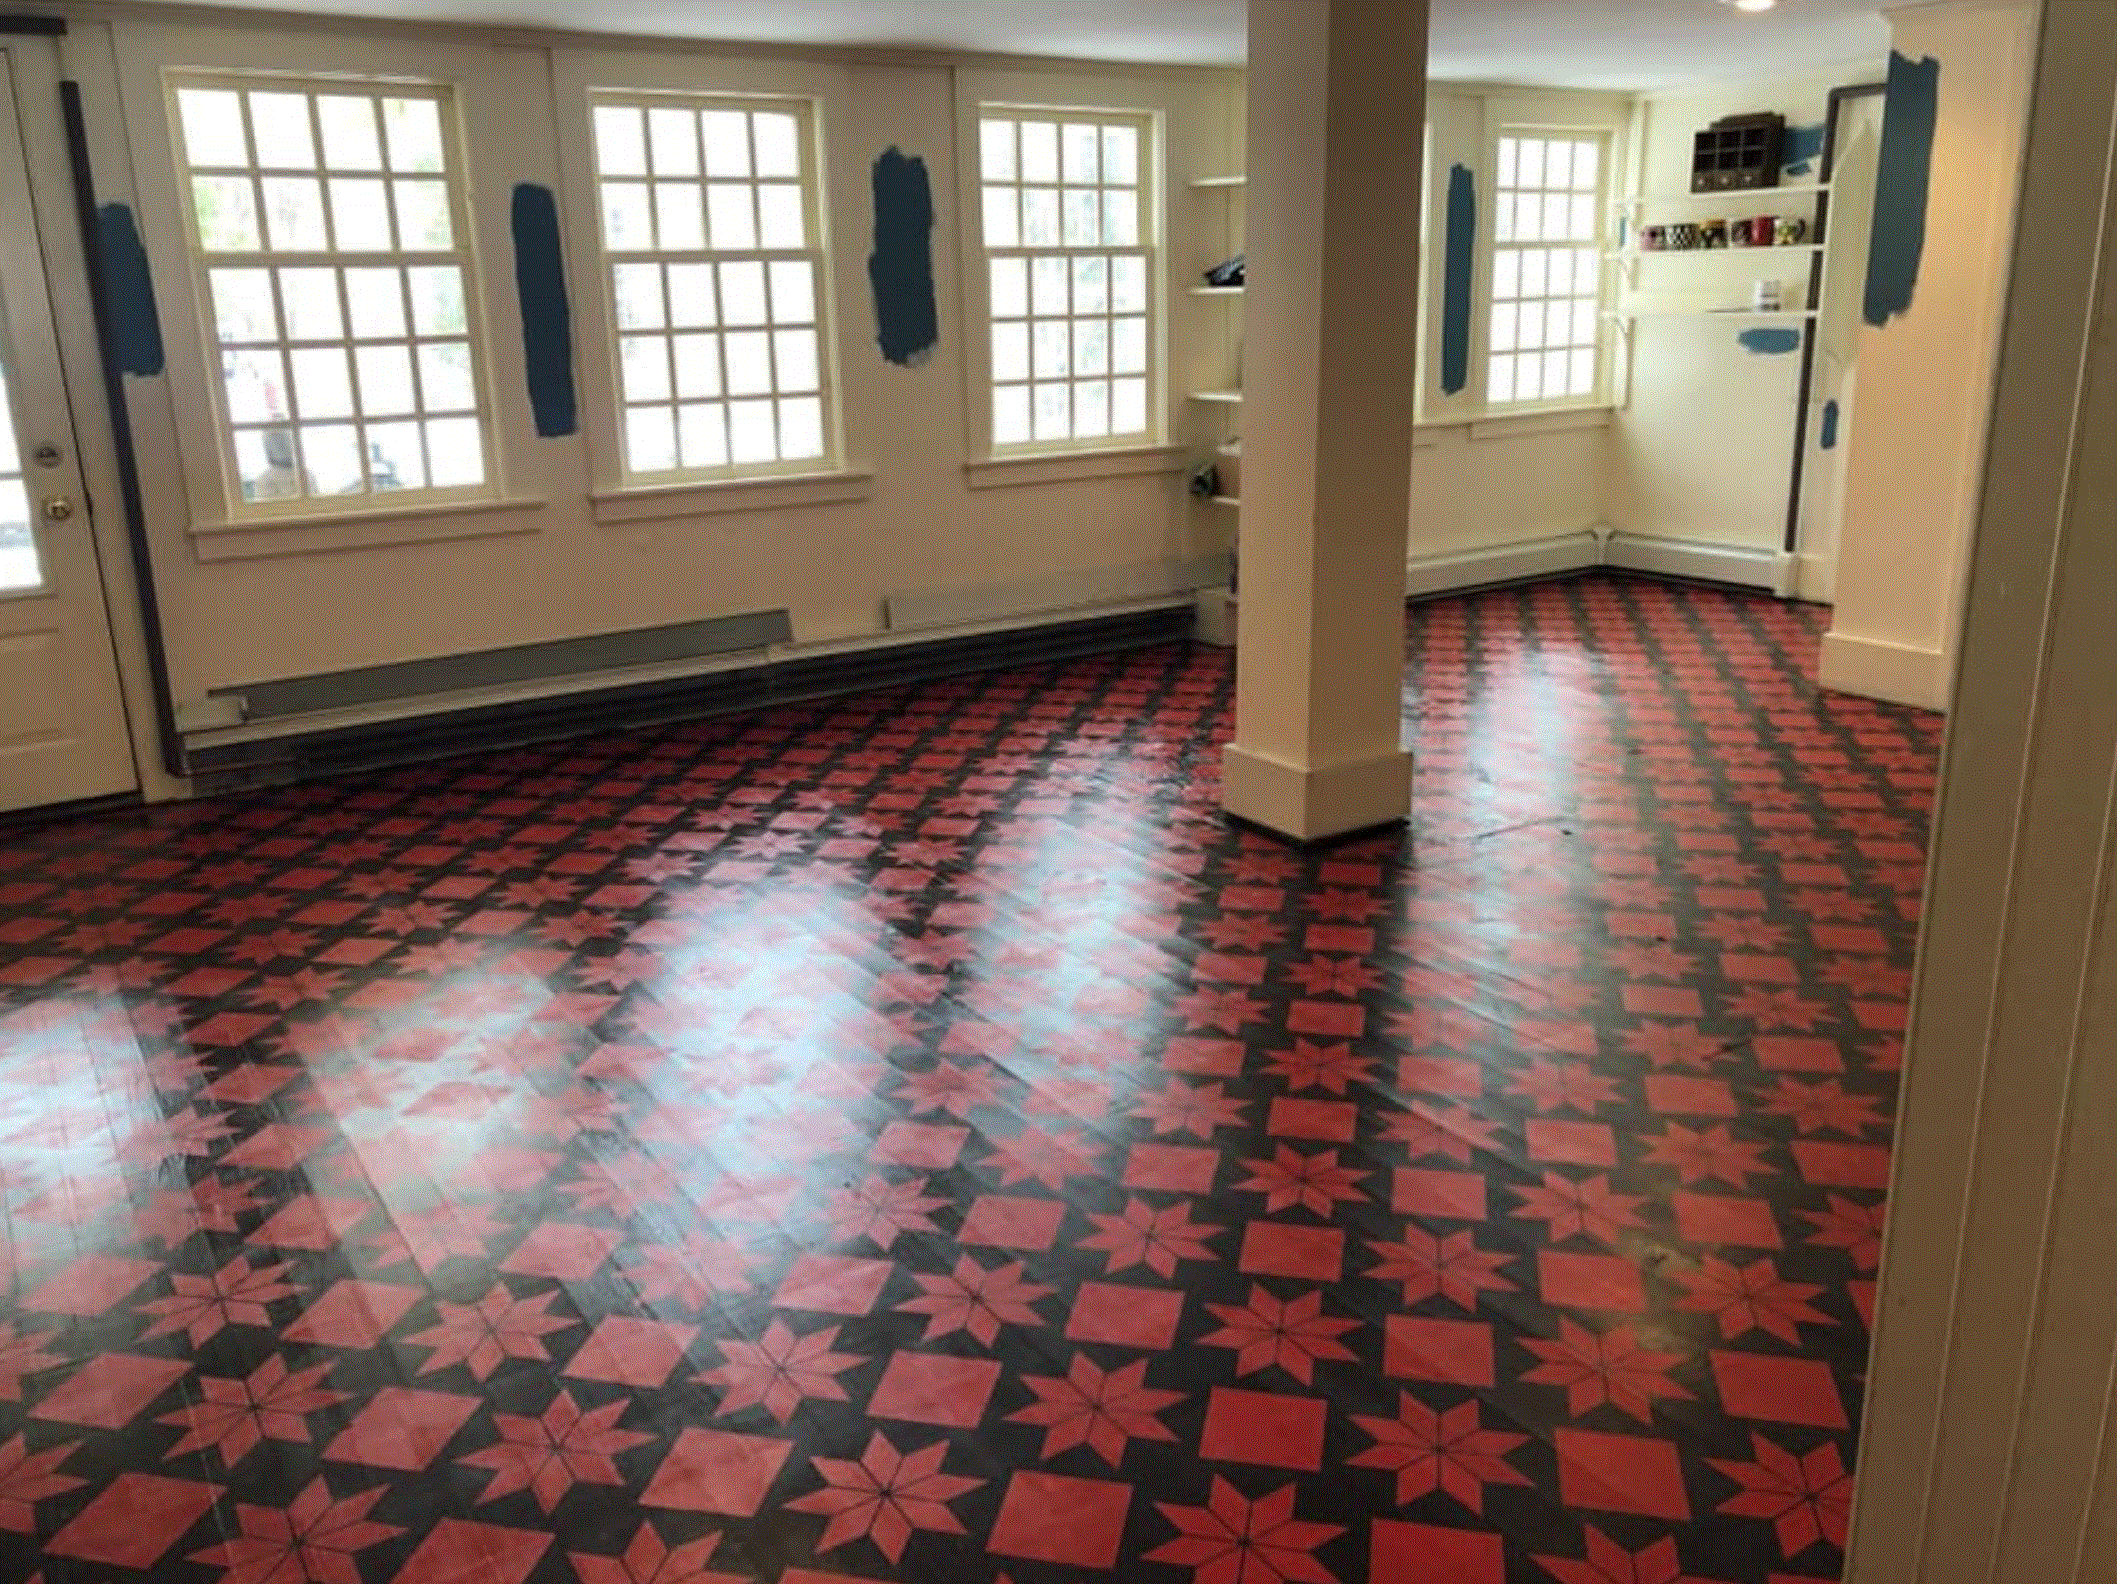
Taylor House 1810 Wood Floor Restoration

Amy had a vision and with Athenian Black, Emperor’s Silk Chalk Paint® and patience ~ she is creating something gorgeous.

Taylor House 1810

……and then she used Annie’s GLOSS Lacquer to seal the floor.  To read more about using Lacquer- visit this post HERE.    The whole bed and breakfast is really coming together! 


Once the Taylor House 1810 does their formal debut- The Purple Painted Lady will make a road trip to visit Amy and do a Facebook LIVE. We will give you a tour and discuss the projects Amy did and let you ask any questions to get real answers! I cannot wait- it is going to be gorgeous!!!!

Next up is a project from an Annie Sloan Stockist named Josh Mintoft who owns Martha Heritage in Sheffield –  he transformed his old tile that was a terra cotta red to something current, fresh and very clean looking! 

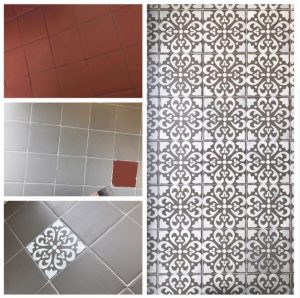
Josh cleaned his floor well and followed up with an additional rinse of fresh water to ensure there was not soap residue left behind, or any dirt.  He then made sure the floor was totally dry before he began.  Especially, in the grout lines.

MATERIALS USED:

French Linen Chalk Paint® by Annie Sloan

Annie Sloan’s Lacquer

First- he painted in the grout lines with white.

Once the white on the grout was dry- he began to use the French Linen Chalk Paint® by Annie Sloan to cover the bulk of the tiles. 

He was not too concerned about if he accidentally covered some grout with the French Linen Chalk Paint® by Annie Sloan because he knew once he added the stencil…there would be enough movement- no one would really notice!

Josh stated he used a brush, and managed to get away with one coat generally of the French Linen – but touched up in places.  Then he stenciled and applied the Lacquer.   

Here is some important information about using Lacquer since it does NOT behave like paint. It is critical you read and follow the instructions we provide!!!!

http://www.thepurplepaintedlady.com/…/using-annie…/

This Linoleum floor was completed by Maddie with her sister and mom.  They used Graphite Chalk Paint® by Annie Sloan.  They sealed the floor using two solid coats of Annie’s Gloss Lacquer.  Most importantly- they wanted to share to take your time cleaning the floor.  It is one of the most important steps…along with taping the perimeter to protect the walls.
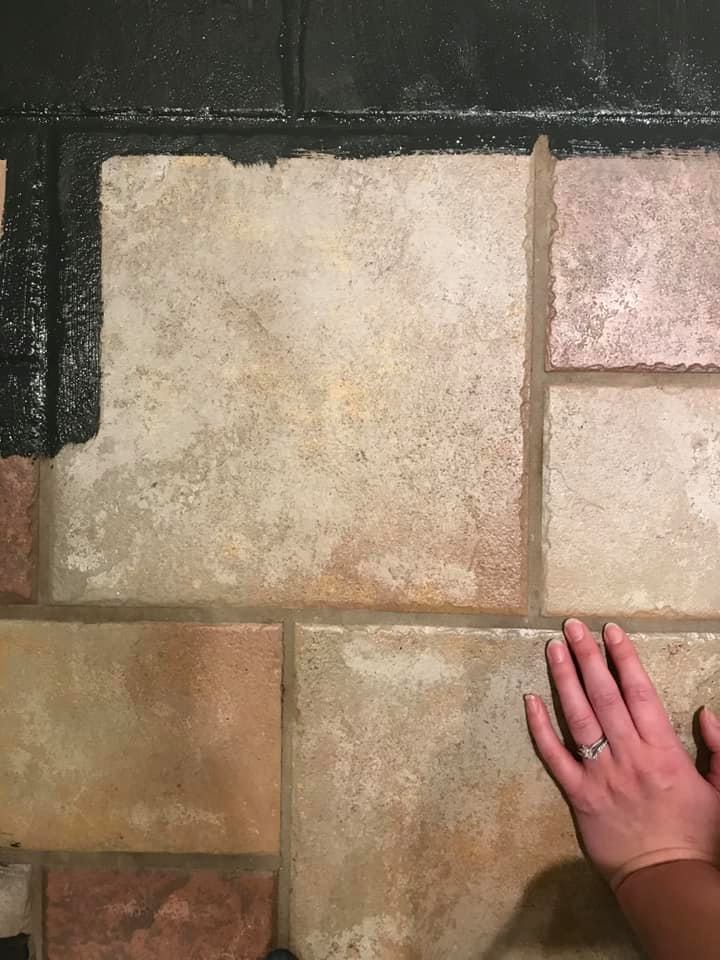
Continue reading

How To Clean Your Painted and Waxed Cabinets

Hi!  If you have have refinished your cabinets using Chalk Paint® by Annie Sloan and her wax ….. I bet they look awesome!  Congratulations!

I want to help you keep them looking great!

NIGHTMARE:    First- let’s address the worse situation.  Meaning, something VERY BAD happens- (queue the scary music in a horror film now)  ……like a black sharpie was taken to the front and there is a “permanent” mark….or Crayola Crayons were used, or the black from the rubber bumper around a vacuum left a scuff …or a scuff from a kids shoe…..or for that matter……anything that does not come off with a gentle cleaner/dish soap and warm water.    

  • Grab your tin of Annie’s clear wax (in fact- always leave it under the kitchen sink.) 
  • Take a soft towel and get a small amount.  Like less than a single green pea.  
  • Lightly rub that on the abused area until you see the stain lift off.  
  • You might need to re-wax the whole door to get a uniform look- but this should have done the trick.  The reason this works is –  there is a component in the wax that keeps it soft and spreadable.  This component will also soften the top micro layer of existing wax on your cabinet door (or dresser, or table, etc)   When it softens that layer- it also allows you to lift any serious dirt or stain.  
  • If your cabinets were painted a while ago- you do not realize this…but dirt and dust will land on them.  By cleaning only one spot….it may acknowledge that the rest of the door needs to be cleaned also.  So, a nice once over with the clear wax will do the trick.
  • NOTE- if you have applied a tinted wax all over your cabinets- such as Annie’s Dark, Black or White wax.  You will probably need to use Clear Wax over the entire door, and then re-apply the tinted wax.  
  • Another option is using Odorless Mineral Spirits on a rag- to wipe off all of the surface wax, in hopes- it also removes the problem area.  Using a little odorless mineral spirits on it and wipe off some of that wax build up. Your rag should be damp only, not dripping! I like to use “real” Mineral Spirits..meaning not the environmentally “green” Mineral Spirits that has a milky white appearance. I feel it does not work or perform nearly as well as the original Mineral Spirits. Take your rag and place it on the opening of the Mineral Spirits container. Flip the container a couple of times in different areas of the rag. (the image I want you to think of is how a person would put nailpolish remover onto a cotton swab or ball!) With a tiny bit of Mineral Spirits on your rag, rub the area you are trying to remove the wax.  The mineral spirits on the rag will remove some of the wax. You do not want to be aggressively scrubbing in any one spot- you want to have uniformed removal of the build up.  If the stain or problem area disappears- then – take a rad lightly moisten with water,  Wipe the cabinet down again.  Let it completely dry.  Finish with a fresh coat of wax over the entire surface. 
  •   Lastly- Annie Sloan’s products are amazing- but they are not a miracle.  If for some reason- you can’t remove the “nightmare” of a stain – you may have to repaint and then wax.  This is why I always tell people, to keep some of their leftover paint and a tin of Clear Wax in the back corner under their kitchen sink.   And know this- a touch up probably will not work.  You may need to repaint the entire door.

ON GOING CLEANING of Cabinets painted with Chalk Paint® and have Wax as a top coat:

Cabinet Care & Cleaning

From regular dusting to cleaning splatters and spills, you can help maintain the beauty of your cabinets by following these recommendations.


CLEANING GUIDELINES (HOW TO CLEAN YOUR PAINTED AND WAXED CABINETS)

A soft cotton cloth dampened with warm water is usually sufficient to clean your cabinets. If more thorough cleaning is required, please use a fresh solution of mild hand dishwashing liquid mixed with warm water.

After cleaning, wipe all surfaces with a clean, damp cloth. Dry immediately using another soft, clean cloth.

Do not aggressively scrub in any one spot.


CLEANING PRODUCTS TO AVOID:

The following cleaning products are to be avoided as damage may occur (this would apply to brand new cabinets from a big box store too):

  • Harsh detergents, strong soaps, abrasive cleaning products such as tub and sink cleansers, scouring powder, scouring pads, steel wool or self polishing waxes.
  • Sponges or dish cloths. They may contain particles that could scratch your cabinets, or they may contain food and oil residue or remnants of harsh cleaning solutions.
  • Solvent-based or petroleum-based products such as mineral spirits, nail-polish removers or paint thinners.
  • Ammonia or cleaning products that include ammonia.
  • Bleach or cleaning products that include bleach.
  • Silicone-based cleaning, waxing, or polishing products.
  • Soaps that are a “de-greaser.”

SPLATTERS AND SPILLS

Clean spills and splatters immediately. Prolonged exposure to spills, including food, water or other liquids, or to oil and grease splatters, can cause permanent discoloration or damage to your cabinet’s finish.

REGULAR DUSTING

cabinet care tips

Use a clean, soft lint-free cotton cloth for regular dusting.

Packaged dusting sheets are not required or recommended. Do not use pre-moistened dusting sheets, and do not use aerosol products made for dusting.

POLISHING

Over time, polishing compounds may build up on the surface of your cabinets and cause a hazy, streaky or yellowed appearance. Never use Endust or Pledge on cabinets.  

DO YOU PAINT CABINETS FOR OTHER PEOPLE?

I recommend that you add or embed to your painting quote ….the cost of one new tin of clear wax by Annie Sloan.  Leave it with the customer under their kitchen sink.   Explain to them and leave a document on how to use it.  

Provide them with TWO copies of a documented “CARE TAG” regarding on the proper way to clean their cabinets and have them sign off on your job – acknowledging that you left it. 

If you do not have a care tag…MAKE ONE NOW!   Just copy and paste what is above and tweak it to fit your style! 

If you transform a project and would like to share it with The Purple Painted Lady® via your Facebook or Instagram page, please use our hashtag!!!  #thepurplepaintedlady   We love seeing what you are all working on!


BUY PRODUCT FROM …..THE PURPLE PAINTED LADY®:

First- if you have a local stockist- go visit them and build a relationship with them.  Go to them with your questions and project issues.  BUT- if you do not have a local stockist- we invite you to try our customer service!

As for buying any of the products we mentioned earlier in this post- I hope that you select The Purple Painted Lady® to be your one stop resource!  We have two locations in western NY.  Check out our Information tab and come and meet us!  Otherwise- if you are not located near me- the following information may apply to you.  
 
This information is directed to those who do NOT have a local stockist.  Because if you do – go and meet them, shop from them and build a relationship with them. The guidance, information and knowledge they share with you – will be invaluable.  Get inspired by their shop that they lovingly curated – just for you!   Enjoy that one on one experience!   But for those who are in a location where there is no one selling paint products- and you must buy on-line- consider us.  With that said, visit www.anniesloan.com to find a stockist near you.
 
We are here to help you, our customers!  We want you to be successful!  
 
SOME OF THE REASONS WE THINK THE PURPLE PAINTED LADY® CUSTOMER SERVICE IS THE BEST:
 
*  We love our customers and it shows!
*  Ordering online?  If you order before 3 pm EASTERN TIME any day Monday thru Friday – we will ship out your package that SAME day.   We ship orders out every since week day all over the US.  (THIS IS DIFFERENT than SAME DAY DELIVERY. We do not offer that)
*  We offer low flat rate UPS shipping cost so if you are one town away or 10 states away- the shipping cost is the same.
*  We have awesome follow up customer service, too!
*  We sell Chalk Paint® for $34.95
 
 
: )  And I will be here to help you as you progress through your future project!  And if I do say so myself- we offer the BEST customer service that you will ever experience!  Lastly- if I was helpful to you- ….please consider leaving a positive review on my Facebook business page sharing your positive experience or thoughts about The Purple Painted Lady®.  Here is a link to my Facebook page=> http://www.facebook.com/pages/The-Purple-Painted-Lady/291882785710    This really helps me!  (wink, wink!)
XO
Trish

The Purple Painted Lady® ~ the serial no. is 86/641,416 with the US Trademark Office

Old White Chalk Paint® Wash Over Exterior Brick

Before and After photos are always the best to showcase what is possible with a can of paint!  But not just any paint… we are referring to Chalk Paint® decorative paint by Annie Sloan because it is both an interior paint and exterior paint!

Anne, who is part of team at The Purple Painted Lady® has a young family and she and her husband Zack are serious DIYer’s.  From renovating their basement, to gutting their kitchen and bathrooms…they do not shy away from any project!  

This is Anne…isn’t she beautiful?

One smaller project she is currently in the process of doing – is giving her front entrance a face lift.  

Anne wanted to tone down the red of the brick.  She chose Chalk Paint® in the color Old White.

 Old White is the quintessential color to have in your painting pantry or toolbox! It is the perfect color, in that it plays perfectly with every other color! Old White out sells every other color in Annie’s suite.   NOTE though  – that  Old White is a very soft cream….. in my opinion. I think it looks literally like cream.  Something also to note….it does have the slightest hint of yellow.


If debating between this color and Pure White or Old Ochre Chalk Paint®, visit this link here => http://www.thepurplepaintedlady.com/2014/04/difference-between-annie-sloans-white-chalk-paint-colors/


Anne started with adding about 20% of water to a small portion of the Old White, but it wasn’t laying the way she wanted.  So, being that Chalk Paint® is an artisan paint- she started to dip her brush straight into the paint can, brushed it directly on the brick- and then dipped her brush into a cup of water and used the damp brush to spread the paint.  

Some things to consider when doing this project:

  1. If painting over concrete – place a drop cloth down.  If you drip paint on the sidewalk- it will leave a mess that you will not be able to wash away. (even with a powerwasher)
  2. I would suggest doing this project on a day that the temperature is reasonable.  Meaning in the 60’s, 70’s or low 80’s.  
  3. Check the weather forecast to make sure no major rainstorms are expected in the next 24 hours.  After that- you can have a Monsoon and not worry one bit about that paint!
  4. Start out with the paint thinned more versus less with water.  Remember – you can always apply another coat of the “wash” to make the white pigment heavier.
  5. Experiment with painting some random bricks in more of a solid to give dimension.  Or consider painting some random bricks using Paris Grey Chalk Paint®.  You could even use the  Paris Grey to cut in the mortar joints …if you have the patience.

Here is the “almost” finished outcome since Anne still has the top left corner.  Anne has not decorated her front stoop yet, but she always is working on different seasonal decorations to make her house a beautiful and inviting home!  Once she does- we will add a final photo.

DO I NEED TO SEAL IT?:

Chalk Paint®️ by Annie Sloan is also an exterior paint. Absolutely no topcoat is needed over the brick. Bricks are extremely porous and they pull that color in. As you know, chalk paint®️ sticks, grips and adheres to virtually any surface. Once it is dried and cured …..it is almost impossible to remove it. We just recommend checking the forecast before beginning a project like this and making sure that it’s not going to rain for 24 hours.

If you transform a project and would like to share it with The Purple Painted Lady® via your Facebook or Instagram page, please use our hashtag!!!  #thepurplepaintedlady   We love seeing what you are all working on!


BUY PRODUCT FROM …..THE PURPLE PAINTED LADY®:

First- if you have a local stockist- go visit them and build a relationship with them.  Go to them with your questions and project issues.  BUT- if you do not have a local stockist- we invite you to try our customer service!

As for buying any of the products we mentioned earlier in this post- I hope that you select The Purple Painted Lady® to be your one stop resource!  We have two locations in western NY.  Check out our Information tab and come and meet us!  Otherwise- if you are not located near me- the following information may apply to you.  
 
This information is directed to those who do NOT have a local stockist.  Because if you do – go and meet them, shop from them and build a relationship with them. The guidance, information and knowledge they share with you – will be invaluable.  Get inspired by their shop that they lovingly curated – just for you!   Enjoy that one on one experience!   But for those who are in a location where there is no one selling paint products- and you must buy on-line- consider us.  With that said, visit www.anniesloan.com to find a stockist near you.
 
We are here to help you, our customers!  We want you to be successful!  
 
SOME OF THE REASONS WE THINK THE PURPLE PAINTED LADY® CUSTOMER SERVICE IS THE BEST:
 
*  We love our customers and it shows!
*  Ordering online?  If you order before 3 pm EASTERN TIME any day Monday thru Friday – we will ship out your package that SAME day.   We ship orders out every since week day all over the US.
*  We offer low flat rate UPS shipping cost so if you are one town away or 10 states away- the shipping cost is the same.
*  We have awesome follow up customer service, too!
*  We sell Chalk Paint® for $34.95
 
 
: )  And I will be here to help you as you progress through your future project!  And if I do say so myself- we offer the BEST customer service that you will ever experience!  Lastly- if I was helpful to you- ….please consider leaving a positive review on my Facebook business page sharing your positive experience or thoughts about The Purple Painted Lady®.  Here is a link to my Facebook page=> http://www.facebook.com/pages/The-Purple-Painted-Lady/291882785710    This really helps me!  (wink, wink!)
XO
Trish

The Purple Painted Lady® ~ the serial no. is 86/641,416 with the US Trademark Office


Chalk Paint® by Annie Sloan is so easy! (Kitchen Cabinets)

I have been using Annie Sloan’s products for over 8 years…but the funny thing is that they have been around to close to 30 years!  People always ask me, “how did you create that shine?” or “get THAT look?”   My response is always the same and is so simple!    I used Annie Sloan!  Chalk Paint® requires no stripping, sanding or priming.  (I especially want my friend Rita M. to take note to the NO priming part there)

Anne, who is on The Purple Painted Lady team was walking her adorable daughter Olivia around their neighborhood recently, and lol and behold….she found these cabinets on the side of the curb.  (gasp!) 

Okay, I included a photo of Anne below who is one of our awesome paint extraordinaires who works as part of our team at The Purple Painted Lady.

I am not joking when I say, “gasp!” above.  Those cabinets that Anne salavaged from the curb are solid wood, nice styled cabinet doors.  They have a heaviness to them that you do NOT find in most new cabinets.  You know the kind – if you were go to a “big box” store and they would run you at least $12K to buy for a smaller average sized kitchen to buy and then have installed!  

Granted the cabinets Anne hauled from the curb were a bit filthy.  They had these shiny reflective spots on them, as if someone splattered polyurethane on them.  They were banged up and scratched….BUT….   Dirt can be cleaned and those splatter marks, that did not come off with cleaning, I rubbed slightly with a medium Sanding sponge, …then all of those “imperfections?” They created PERFECTION when you I used Chalk Paint® by Annie Sloan!

So, at a recent Kitchen Cabinet Painting Workshop I had time to paint a door myself.  And this was what I did, while Nancy, a teacher from Fairport, NY –  painted her kitchen door I painted Anne’s curb side find.  Here is one finished and unfinished side by side!

Pretty ….crazy…amazing!

All I want to do is go back to the home that Anne found these at with these two and show the homeowner this and say, “Crazy that someone gutted their kitchen and was throwing away these solid wood cabinets. Look at what Chalk Paint®️ by Annie Sloan in Old White and 90 minutes of time can achieve!”

MATERIALS USED: (click on the item and it will bring you to out on-line shopping cart)

Odorless Mineral Spirits

Scott Shop Towels

Annie Sloan Sanding Sponges

Painters’ Tripods

Annie Sloan SMALL Paint Brush

Old White Chalk Paint®

Annie Sloan SMALL Wax Brush

Annie Sloan Clear Wax

CONSIDER BUYING THE HANNAH’s KIT:

Note if you are going to buy a quart of Chalk Paint®,Annie Sloan wax, the Annie Sloan Small Paint Brush and the Annie Sloan Small Wax Brush- You should purchcase our Hannah’s Kit where you get all of these in a bundle and a FREE gift!  

STEPS TAKEN:

Okay- here is what I did (keep in mind, my cabinets already had the hardware removed. I suggest, you take yours off and lay cabinets flat.  You will achieve a nicer finish if you do this, if you ask me.  You do not have to remove the cabinet doors, but I feel it is worth it!  Also, if you plan on painting the backs (which I like to do) ….do the backs FIRST!   I just do two quick coats and wax, and then get on to the fun side…the fronts.):

  1.  Those splatter marks that looked like polyurethane that I mentioned about above, I slightly sanded them to knock them down using a medium grit sanding sponge.  I want to stress you do NOT need to sand when using Chalk Paint®, but this door had some markings that would not come off while cleaning and they required it.
  2. I then used a little bit of Low Odor Mineral Spirits (not the environmental green 
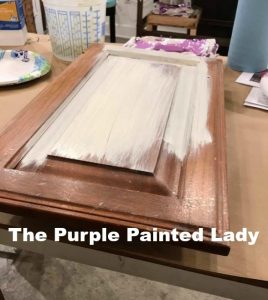
kind) on a  rag to wipe the doors off.  I literally, flip the bottle of Mineral Spirits over a couple times to moisten a rag (it is NOT dripping wet!)  You can use an old towel, Blue Scott Shop Towels to do this…it does not matter.Think like how you get a cotton ball moist when using nail polish remover.  Wipe the door down thoroughly.  This will help remove any grease, grime, dried splattered food, dog drool, kids greasy finger prints, crayon, etc.  (I could go on and on in regards to what I have scene on cabinets, but for the sake of your stomach and time- we will skip that!)
  3. Follow up with another cleaning using just fresh, clean water and a new rag.  Same deal, not dripping wet – just a moisten rag with fresh water. Wipe down the cabinets and then let dry.
  4.  Set up a painting area and create an assembly line.  The more cabinets you can paint at one time- the better.  Reason being, Chalk Paint® dries so quickly- by the time you get to the last cabinet door in the row- you probably can begin the second coat on the first cabinet.
  5. Place your cabinet doors once cleaned up on “painter’s tripods” or use little cut up spacers of 4×4’s, 
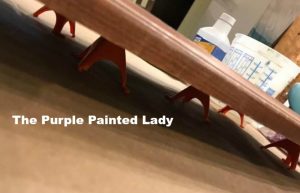
or old books. Anything that can lift the door up so you can get a clean stroke on the edges and the paint cannot pool and seal the cabinet to your flat work space.  I like one in each corner and one in the middle.


6. Next I applied a uniform thin coat of the Old White Chalk Paint® that I mixed with about 10% of water.  If you are a baker- I think of this first thin coat of paint as when baking a cake, and doing a “crumb coat” with frosting.


It is to get a base for my next coat.  It is okay if you can still see the door beneath a little – as shown in my photo below.  Less is more and I do not want a heavy coat, and never do I want paint pooling in the creases of my cabinets.   


While painting – here are some IMPORTANT TIPS!

  • Always paint in the same direction that the wood grain is.
  • Respect the seams where wood meets.  The outer frame of this cabinet..otherwise known as the stiles – paint in the same direction as the grain and do NOT cross over the seams.  You can see that I painted with a horizontal brush stroke below and also vertical strokes on the sides, respecting that seam.  See my image below that illustrates this with the arrows.
  • Keep the paint light and from pooling in the seams!  
  • After applying the paint in one section- I always do one continuous fluid stroke from end to end.  Note on how my cabinet door you do NOT see a bunch of short brush strokes!  I think this is a very important thing to achieving a nice smooth finish.


7. Once you have your first coat applied, and it has dried, you can begin your second coat.  I will still add a little water and I always use my Annie Sloan SMALL Paint Brush.  Only load your rush with the amount of paint you can control and manage.  Personally, I would rather do three uniform thinner coats, than two heavier coats, but you will determine what is nest for you and get a groove.

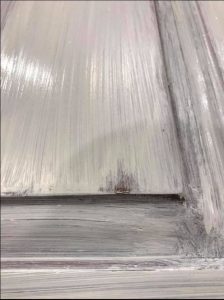
 8. Once the paint is dry, I then distressed my edges and corners.  (This is NOT required, but I wanted to do it.)  I used my Annie Sloan Medium and Fine sanding sponges.  Keep in mind- these are totally reusable, so when the sanding side accumulated dried paint in the crevices of the grit, I just rinsed them and then squeezed excess water out and continued using them.  I also used the FINE  Annie Sloan Sanding Sponge to lightly “polish” my Chalk Paint® in some areas.

9. Blow off any powder you created, and now you can begin the clear wax application.

CAN I PAINT THE LAMINATED (Faux Wood) ON END CAPS OF CABINETS?:

YES- you can paint the laminate end cap. But you will want to lightly sand in the same direction you will apply your paint- which should always be the same direction as the wood grain. (even if it is a faux wood grain.)

Then, clean the surface per the insructions we provide.

Thin your paint with a little water and paint a uniform, thin coat- making sure to “lay” your paint from top to bottom at the very end of every stroke- so you get rid of any small segmented brushstrokes. Then….WAIT 24 hours till you apply coat number two. Don’t try to scratch the paint with your thumbnail during this period…because you will be succussful.

There is a lot of chemistry in paint and you need to allow that chemistry to do it’s thing! Once all done painting, apply the wax top coat per the instructions and voila…..you will be amazed!


Indigo Blue Glaze over Textura…WOW!

The Purple Painted Lady loves this effect using Textura Paste from Wood Icing and their beautiful glazes. Visit our on-line shop for all of your needs to do this project. 

Textura Paste is a water-based acrylic product, which has the consistency of peanut butter.  NOTE that there are no nuts in this product!)

This may be spread with a spatula or trowel then impressions and designs are made with any number of objects or tools. Use foam rubber stamps, mesh, lace, and numerous other materials. Another option is to trowel Textura Paste through a stencil for a raised design.

You may also apply our Textura Paste through a stencil directly onto bare or unfinished wood. Once it has been stained it is hard to tell the difference of real carved wood and a Wood Icing design.

The Textura Paste should be allowed to dry overnight to a hard crispy surface, then sand to remove the high spots and clean up the surface. Stain, glaze or paint. Once the project is complete, apply two to three coats of protective polyurethane for the final finish. You may use oil-based or a water based polyurethane.

Clean up with soap and water .

Material List:

Textura   (what you use to create the texture on this piece)

Indigo Blue Glaze

Licorice Glaze

Poly-Acrylic by Wood Icing

Modern Masters Pale Gold

Color Shaper Tool

DIRECTIONS:

1. Use Mineral Spirits to clean the surface you plan on painting.  Get a rag and lightly moisten it and then wipe the surface.  Imagine that the Mineral Spirits is nail polish remover.  Flip the bottle over a couple of time and moisten the rag.  You do NOT want it dripping wet! Once done wiping down the surface…

2. Use clean water and a fresh rag and wipe the whole piece down again.  Let dry

3. Textura Wood Icing needs something to grip to. Chalk Paint® is perfect for this!   Shake your paint well and then paint a base of  Chalk Paint®. (two coats) Let it dry and cure for at least 12 hours.

4. Apply a liberal coating of the Textura Paste by Wood Icing. (spread it over the surface as if you are icing a cake.  Fairly liberal since you want enough to take a pattern or a relief but NOT so thick that it will take days to set)

4. Use your Textura Wood Icing.  Mix it up and then spread it on with the offset. Maybe an 1/8th inch thick or more. Always place the lid on top of it when there will be long periods of time between use.   Mist the Textura Wood Icing slightly with a little water.

5. Next, using a piece of lace, dip it into water and ring it out.  You want the lace to be moist but not dripping wet!   (pick up a piece at your local fabric store and make sure it is big enough to cover your hole project’s surface …or use partial pieces and patch work to get a cooler look ) ….. pressing the fabric with an embroidered lace pattern into the Textura Paste while the Textura is still moist,  then, gently peel the lace off ….leaving the relief without pulling the Textura off.  Allow the Textura to fully dry!
        ** NOTE: if you have drag marks it could be  an indication of pulling the lace too straight up.  Keep it low and peel it back.  It could ALSO indicate that the Textura paste is too wet.  If that is the case, pat the surface with a paper towel while the lace is still in place, then try peeling it off.  Remove lace immediately and allow that layer of Textura to dry completely.

6. Sand lightly over that layer to remove any areas that puckered up or pulled up like a stalagmite or if you have lumps or bumps that are not pleasing to the eye.

7. Stain the Textura with Indigo Blue glaze.  (apply it with either a brush or rag and then wipe off excess)

8. Let that dry and apply a barrier coat of our Poly-Acrylic Top coat – sold on our shopping cart. Use a brush and apply a uniform, thin coat.  Do not let it pool in the crevices.   Allow that to dry completely.

9. Then go over the top of that with Black Licorice Glaze. (again, apply it with either a brush or rag and then wipe off excess)

10.  Next, lay a stencil down of your choice and apply the Textura Paste to create a raised effect. Wait for it to completely dry!

11. Use our Modern Masters Pale Gold paint to brush over the raised stencil only. (in this example- the butterfly) Let dry.

12.  Then, apply Black Licorice Glaze for the shading around the raised stencil. Allow to dry.

13. Finish with three coats of Poly-Acrylic.  Allow each application to fully dry in between applications.


BUY PRODUCT FROM …..THE PURPLE PAINTED LADY®:

First- if you have a local stockist- go visit them and build a relationship with them.  Go to them with your questions and project issues.  BUT- if you do not have a local stockist- we invite you to try our customer service!

As for buying any of the products we mentioned earlier in this post- I hope that you select The Purple Painted Lady® to be your one stop resource!  We have two locations in western NY.  Check out our Information tab and come and meet us!  Otherwise- if you are not located near me- the following information may apply to you.  This information is directed to those who do NOT have a local stockist.  Because if you do – go and meet them, shop from them and build a relationship with them.  The guidance, information and knowledge they share with you – will be invaluable.  But, if you are in a location where there is no one selling paint products- and you must buy on-line- consider us.  With that said, visit www.anniesloan.com to find a stockist near you.
 
We are here to help you, our customers!  We want you to be successful!  
 
SOME OF THE REASONS WE THINK THE PURPLE PAINTED LADY® CUSTOMER SERVICE IS THE BEST:
 
*  We sell Chalk Paint® for $34.95
*  If you order before 3 pm EASTERN TIME any day Monday thru Friday – we will ship out your package that SAME day.
*  We ship orders out every since week day all over the US.
*  We offer low flat rate UPS shipping cost so if you are one town away or 10 states away- the shipping cost is the same.
*  We have awesome follow up customer service, too!
 
 
: )  And I will be here to help you as you progress through your future project!  And if I do say so myself- we offer the BEST customer service that you will ever experience!Lastly- if I was helpful to you- ….please consider leaving a positive review on my Facebook business page sharing your positive experience or thoughts about The Purple Painted Lady®.  Here is a link to my Facebook page=> http://www.facebook.com/pages/The-Purple-Painted-Lady/291882785710    This really helps me!  (wink, wink!)
XO
Trish

The Purple Painted Lady® ~ the serial no. is 86/641,416 with the US Trademark Office