Watch this video! ==> HOW TO DO A WASH? (WATCH THIS YOUTUBE VIDEO ON THE PURPLE PAINTED LADY CHANNEL) Jump to the 7 minute mark to skip all of my babbling! And..I have loss around 90 pounds since I made that video. Yay me! xo Trish ***and something that has changed- make sure to apply a coat of clear wax over your base coat of paint BEFORE applying your wash so that you do not wipe away any of the base!!!
Annie Sloan created amazing colors for her suite of Chalk Paint® decorative paint, BUT when you use them in concert with each other…then you can really create some magic!
Sadly- I cannot find a “BEFORE” photo of the painted piece below. Yes, even a veteran painter gets excited about painting a piece and sometimes- skips these important details. But I can say – this armoire that I bought off of Craigslist was very, VERY DARK wood. But not anymore!
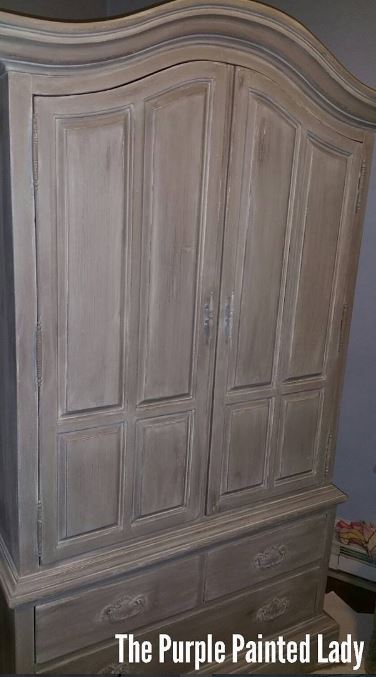
This armoire above was painted by our team at The Purple Painted Lady.
Anyway- to complete this look on this armoire- that is literally in the bedroom of The Purple Painted Lady, you need the following:
MATERIAL LIST:
Annie Sloan SMALL dome top Paint Brush ($27.95)
Click here to watch a YOUTUBE VIDEO SHOWING US CREATING A WASH
PROCESS TO FOLLOW:
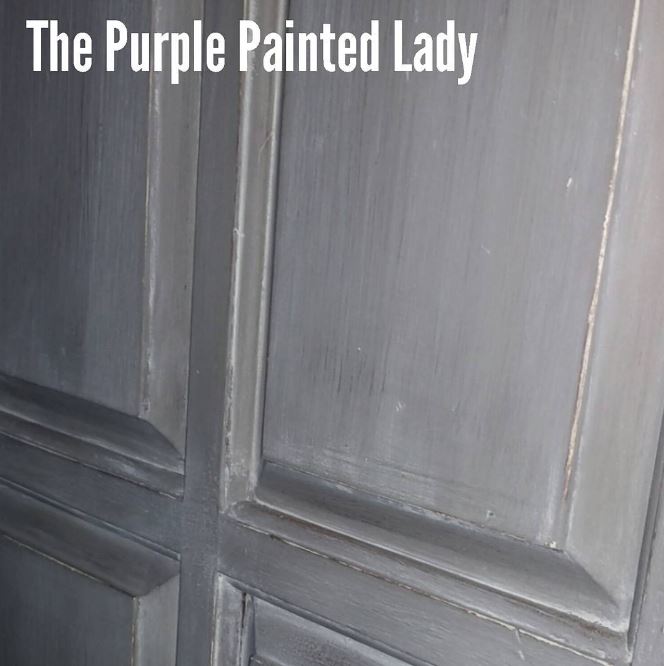
STEP 1. Using your Annie Sloan SMALL paint brush, paint the base color of your piece in Honfleur Chalk Paint® . Consider applying the paint in some various directions because you will be applying the French Linen over it and when you sand / distress in step 3, it will create a little extra interest and texture for the Old White Wash to cling to.
We like to describe Honfleur like it is the color of a MILK CHOCOLATE BROWN. ….a DARK BROWN. Think Easter Bunny Chocolate!
According to Annie, Honfleur is named after a seaside harbour town in Normandy and inspired by rich warm browns found in the rustic French countryside and mid-20th century design. This colour works brilliantly with the popular mid century modern style. It looks great combined with Scandinavian Pink, Barcelona Orange, Giverny, Provence, Greek Blue and Antibes Green. It’s also elegant and classical with pastel Louis Blue and pretty Antoinette.
You may need two coats of the Honfleur. Once all is dry…then proceed to step 2.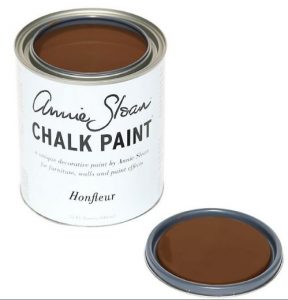 STEP 2. Paint a coat of French Linen Chalk Paint®.
Thin your paint with a little water if you feel it makes it easier to apply over the base color of Honfleur. You can add up to 20 to 25% water to your Chalk Paint® to thin it a bit if you feel it makes applying it easier. Just be careful if you ever add water directly to your quart. (I recommend to NOT do this) Because if you add too much water directly to your paint, unless you have another quart….you have no way to fix what you just did.
With this step…use your discretion. You may only need ONE coat of paint. You could apply this coat strategically- dry brushing in some areas so the French Linen is very thin. If you like the look, go for it! But – again- Annie’s paints are artisan paints and are meant to be experimented with. There are no rules when it comes to using it! (well, okay, maybe a couple….but go with your instincts on what you like!)
We describe French Linen as a taupey-grey…BUT more taupe! It is a classic color and very popular! But keep in mind- if you have a lot of green in a room- it can pick up very subtle green undertones. 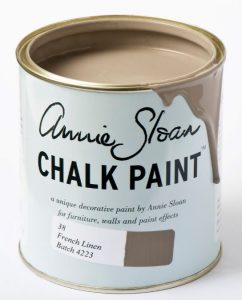 STEP 3. Once the French Linen is dry- then use Annie’s medium sanding sponge and distress some of the French Linen to show the dark milk chocolate color of the Honfleur beneath. be careful when you start distressing. it is a lot of fun and sometimes, you can take more pain off then you had in mind. The goal here is to just remove some of the French Linen, not to break through the base of Honfleur.
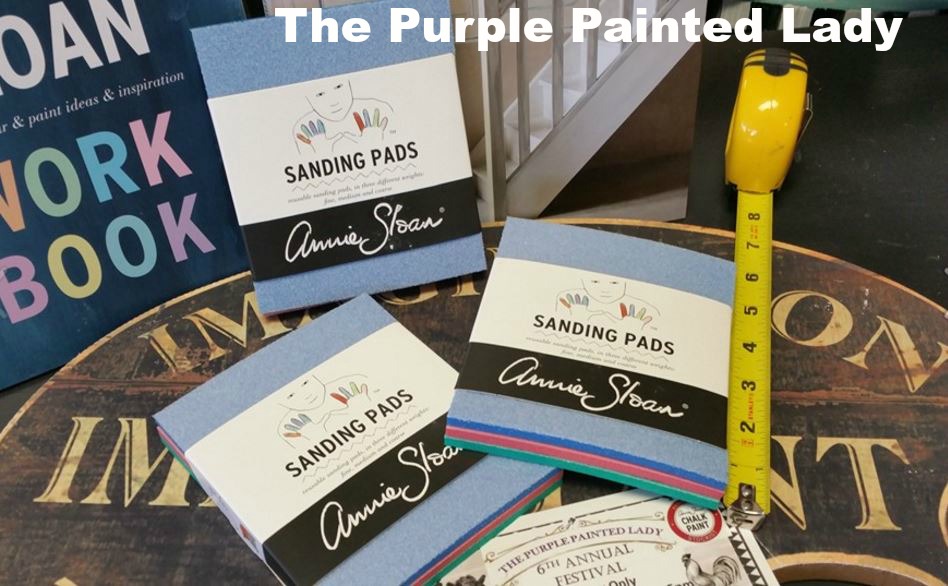 Also, the amount you distress is based on personal taste. Sort of like, how much salt you would like in your soup.
 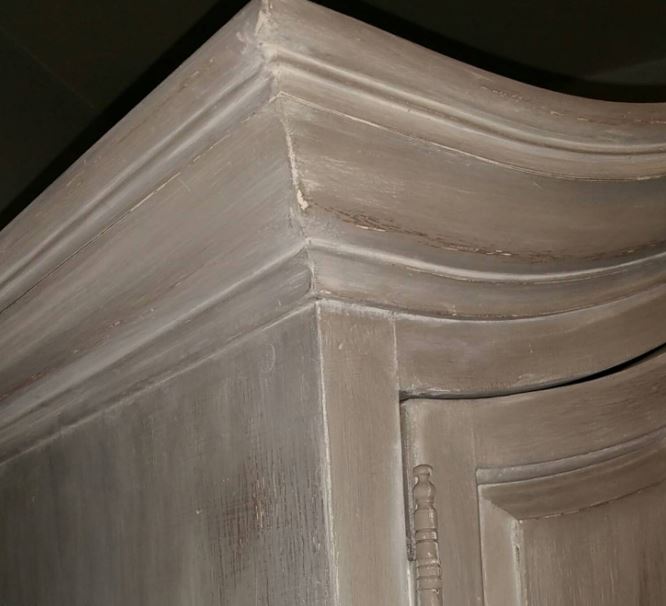 STEP 4. Once done with distressing, you will wipe off any loose dust. THEN……(modified instructions here in Jan. 2021 based on Annie’s new direction) APPLY A COAT OF CLEAR WAX and remove the excess.
THEN…….create a “wash” using Old White Chalk Paint®. Old White is the number one color that we sell! It goes well with practically anything!!!! It is a soft antique white. i personally think it is a cream. It does have a very – very subtle slight little yellow in it. BUT – it is the number one color that we sell! 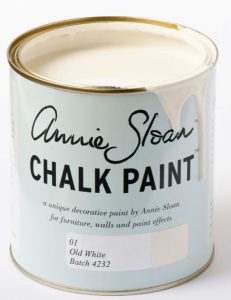 To create a wash with the Old White for this armoire project, pour about a 1/4 cup of paint in a plastic cup. Add equal amounts of water…so in this example, 1/4 of room temperature water and then, mix well. Work in sections. For example, apply wash over one whole door at a time. Use your Annie Sloan Small paint brush to apply. Then using a couple sheets from your Scott Shop Towels, wipe off the excess strategically. Wipe off in the same direction as your wood grain.
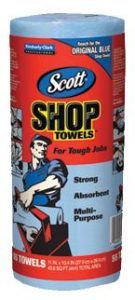
HOW TO DO A “WASH” USING CHALK PAINT®: There is the option of doing a wash prior to applying a coat of Clear Wax but Annie typically recommends applying a wash after a coat of clear has been applied.
- Always note the water to paint ratio for your wash in case you do not make enough to finish the whole project. (can I stress this anymore? But I learned my lesson once and ended up goofing up a piece over this simple rule! Learn from my mistake!) Often a 1:1 ratio of paint to water is used. It is important to stir your “wash” frequently as you are progressing thru your project to keep the pigments consistent.
- Never add the water directly to your actual quart of paint. You typically would NOT need that much paint mixed with water for a wash technique, unless you are applying the wash to literally to the outside of your whole house! So, always pour some paint in to a smaller container and mix your water with that. If you mistakenly add too much water, you need to counter balance it with more paint. Thus, why to measure.
- Brush on the wash in either strategic brush strokes–meaning keep your lines straight and clean. You can use any brush to do this. Depending on your project, a chip brushmay be best – OR if looking for a heavier veil from the applied wash, perhaps Annie’s small dome top brush. You do not have a lot of “play” time so be prepared to work after applying the wash.
- Be cautious not to drip the “wash” mixture on areas of the furniture you are not currently washing
- Put a drop cloth down if doing this in your home…if you are like me- you will drip some on the floor. And be careful not to flick any of the wash when applying to walls or items near you as you work.
- Place your cup with the wash on a paper plate to keep work surface clean
- WIPE OFF STRATEGICALLY or NOT. (this depends on the look you are trying to create) Apply wash in small sections BUT- if I was doing a dresser, I would apply it to the whole top and then wipe off excess. Then move on to the next section. During the wiping off process- be careful to not have “rag blotch marks” unless you are going for that effect. Start at the top and wipe off in clean, even pressured strokes all the way to the opposite side. Do not stop half way or go against the direction you want the streaks in. As long as you have dampened the surface with a mister bottle – you can wipe off the excess in circles with the rag. If your rag becomes too saturated- get a new one. ***LEAVE SOME of the wash heavier in the crevices for a cool visual effect!!! LIGHT with the pressure you apply when removing and actually- this is dependent on how much you want to leave behind BUT – be cautious- you do not wipe away the base coat being too strong!
- Plan twice, “wash” once. Meaning- know your piece and your plan on how you are going to approach the project…top first, then sides. I think starting at the top and working down to the floor is best.
- If you are just trying a wash for the first time – it is best to do this on a piece that is smooth across. Meaning- not raised panels. But keep in mind- if your piece has a lot of carved details…a wash is going to really show them off!
- Never place your rag down in the middle of a wash. Gently wipe from one direction to the other- otherwise you run the risk of leaving an imprint of the rag in the middle of your painted surface.
- If you get a wash in a spot that you did not want…don’t fret. Mist it lightly with some water and wipe it off or spread it out more. Just don’t dilute too much with water and be cautious not to impact the base coat of paint.
- If you are applying your “wash” over a wood piece versus over a layer of Chalk Paint®…meaning you had a wood dresser and just wanted to do a white wash over it….once the wash has dried, give it 24 hours before applying your top coat to allow the chemistry in the paint to do its job and adhere better.
STEP 5 Apply your Annie Sloan Clear Wax as our instructions state. Using a wax brush is best and easiest- so if you do not have one…consider buying one. These are our favorite!!!! 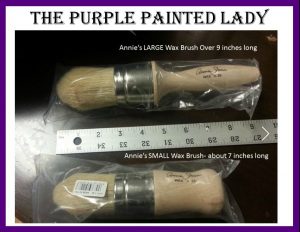
And voila! you should have something similar to my armoire!