DURABILITY OF Chalk Paint®????
Never doubt that Chalk Paint® Decorative Paint by Annie Sloan won’t withstand outside use.
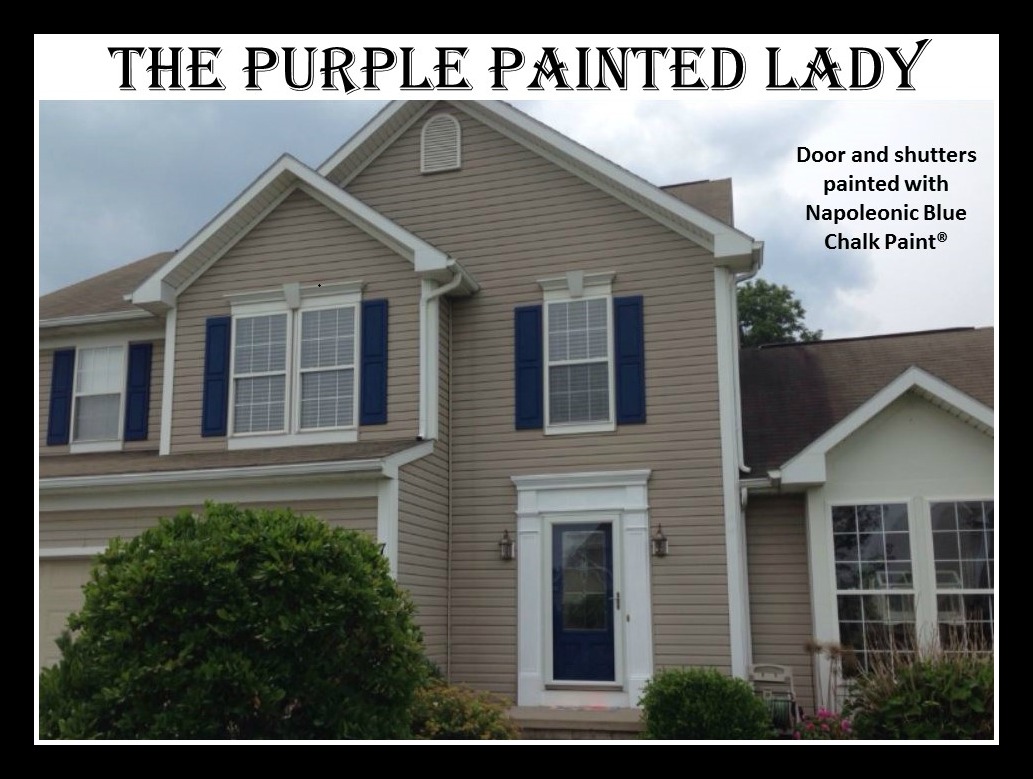
One of our amazing customer’s who owns a local consignment business near us called Lu’s Back Door painted her front door and house shutters in Napoleonic Blue Chalk Paint® a year ago. What do you think? She loves it!

So first, I want to state that Chalk Paint® decorative paint by Annie Sloan is amazing paint!…. but it is not a miracle.
What do I mean by that?
If you have an unstable surface you want to paint- meaning peeling paint. You need to remedy that issue. I often tell people that you cannot build a skyscraper on quick sand. You need a stable base. A good example of this may be someone’s deck.
However, with that said, below are a couple examples of how I have used (intentionally and not intentionally) Chalk Paint® and have been extremely impressed with the results! (especially with it’s use outside!)
This is a true story told by me- Trish, The Purple Painted Lady.

In July of 2012, I went to the Adirondacks with my husband Steve and daughter Danni.
While away, my side kick Adrienne covered the store for me.
I received a call from her, “Trish- we had an accident.”
Me: Uh oh.
Adrienne: “A customer dropped a sample pot of old white in front of the neighbor’s store. It opened and paint spilled.”
Me: “hurry and dump a bucket of water on it and clean up what you can.”
Well, the paint had sat there a bit already and had dried.
Now, keep in mind that every summer, the little village of Palmyra, NY where my shop WAS located has literally, tens of thousands of people visit since it is the home of the Mormon religion. Many, many people walk by my shop and right over that Old White spill…which has totally held up.
Side note- The Purple Painted Lady moved to 77 West Main Street, Macedon NY 14502 in May, 2013.
The shop next to me was repainted in September 2012 and they tried to have their painter power wash the spill off….and the spill has totally held up. Here we are…..almost 7 months later, snow shovel scraping the sidewalk and that Old White spill.. still looks like a brand new spill and we have done everything we could to remove it!
 Keep in mind- the store next to me had their facade painted in early September- and during prep- they “attempted” to power wash it off. But it is still there! My shop is on Main Street- we get a lot of foot traffic- bikes riding over it…and it is still there.
I painted my barn’s cupola with Chalk Paint®. No top coat- just Chalk Paint®. This was in the fall of 2012. Here is a photo a year later and it still looks amazing! Again- we live in New York…think snow! Check out that post HERE!

Next, I will be painting my little barn at my house shown below with it starting late August, 2013. Check back here or on my Facebook page for updates!

So, the moral of my story is….please do not doubt the durability or adhesion qualities of Chalk Paint® and make sure to not spill it!
Here are more ways to use Chalk Paint® outside:
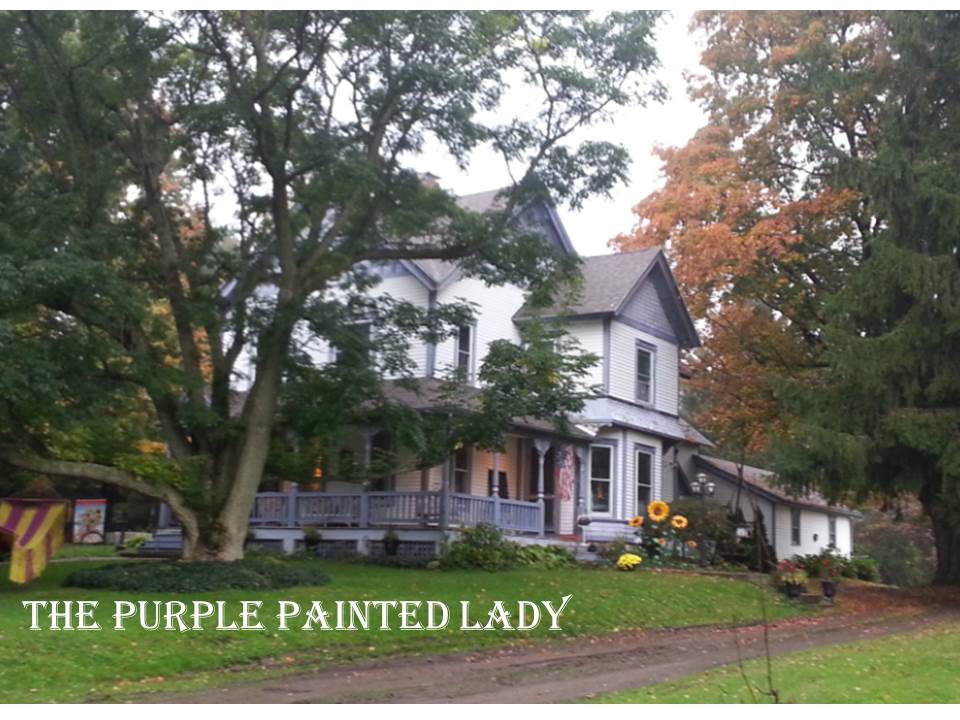
Living in a home that was built in the 1880’s – can be wonderful. And then on the flip side, it can also be very expensive and labor intensive. For example- since we moved in ten years ago, we have:
* Painted every room since the whole house was white inside.
* Pulled out the big old-oil furnace that looked like an octopus and installed a high efficiency gas furnace. But before we could do that- we had to run the gas line about 700 feet from the road to the house.
* Then, we changed out the electric hot water heater to a new gas one.
* We had concrete walk ways added to three entrances to our home, cement aprons in front of the garage, barn entrance and had a patio poured.
* Next was the roof ..yep, it needed a total tear off – all FIVE layers! Fortunately (VERY fortunately) for us- we have a an incredible friend who is a commercial roofer and he stepped in to help us with this project. I do not think we could have afforded to have had this done if he hadn’t. (Thank you John S!)
* And lastly, about a month ago, we had all the old, drafty windows on the second and third floors replaced with new vinyl windows by Wonder Windows. What a difference that made with noise control and drafts. I am excited to see what a difference the new windows will be this winter.
We have also changed out the 30 year old appliances, put in new toilets and sinks, and …well, I don’t want to bore you with everything else we have done, but again….if you are thinking about buying an old house…heed my warning. Plan on spending some money.
Anyway, my “to do” list of smaller chores for our house is pretty long and does not get addressed often. It is not that I procrastinate in getting these chores done, but rather finding the time to do them is really impossible. But today I found myself with the luxury of having a little time where I did not have to be anywhere and thought I would tackle one of my many “to do” items!
If you live in a home that was built over 100 years ago, peeling paint is no surprise. We have two porches that both need painting. But the floor on the porch off of our kitchen had been screaming to be painted for at least the last four years now- and today it was going to be silenced!

To prep the porch, I used a big bristle broom and swept it really well- to remove any of the remaining loose paint. I had washed it about a week ago after I hosted my Barn Sale & Junk Jubilee due to the dirt that was all over it, so I knew it was still fairly cleaned. (you should consider washing off the surface of what you are painting outside, but give it a few days in dry weather to make sure there is no moisture left prior to painting. Moisture in what ever you are painting is one sure way to cause the paint to fail on you!)
Like I said, the porch has needed this for a long time- so the good thing about that was practically all of the paint that could peel off – has peeled! After aggressively sweeping it, I used the leaf blower and removed any dust or Hollyhock seeds I accidentally got on it while working in my garden that is directly in front of it.
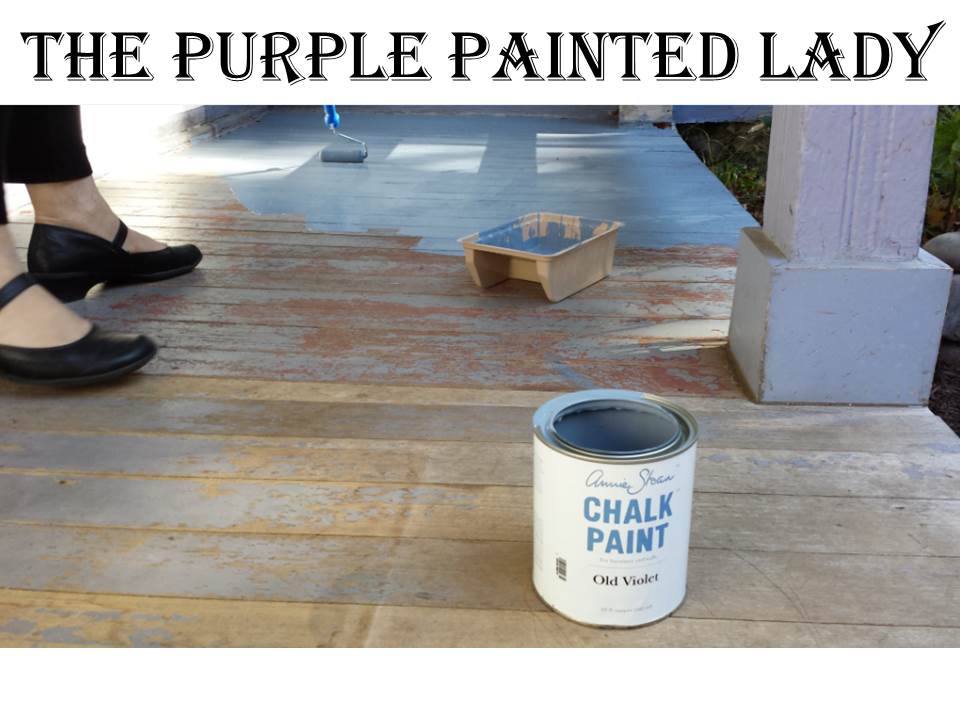
Choosing which paint to use was the easy part. Chalk Paint® decorative paint by Annie Sloan is incredible paint. Besides creating luxurious finishes on furniture and cabinetry- it performs hard core for uses outside of your home. The important thing to keep in mind though, is that although Chalk Paint® is amazing, it is not a miracle! It will certainly work well if whatever you are painting is exposed to sun and the Chalk Paint® is able to dry really hard. Annie Sloan said, “I have painted many things outside and they are incredible but some don’t work that well because they have too much water on them and have been done when it is too damp I think. As long as that wood is not teak, then it should be fine.” For me, The Purple Painted Lady – not needing to strip, sand or prime are also a few additional bonuses when it comes to choosing Chalk Paint®. And if you live in an old home and have plaster walls versus dry wall- Chalk Paint® will provide an incredible beautiful finish to the plaster. (and it also works wonderful on dry wall too!)
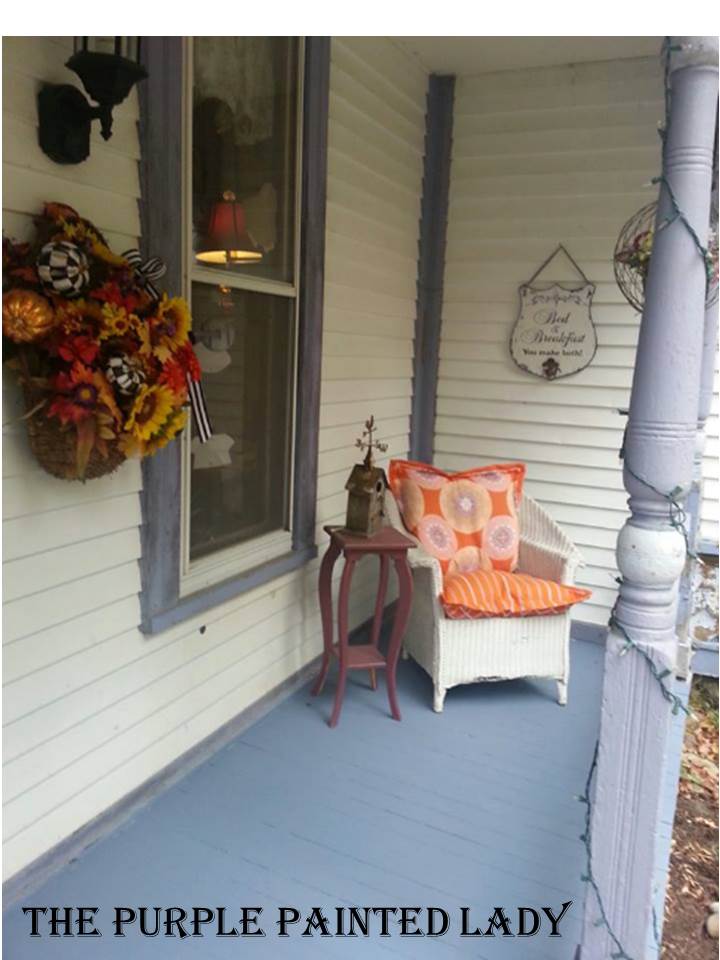
Steve (my hubby) and I chose to use Old Violet. I love this color which is like a periwinkle in my opinion. Old Violet definitely has a blue hue to it – but works well with the various shades of purple and white that already are on my house. Oh, and this is how I named my business by the way. I started my painting/mural business about 10 years ago- and one night when I was sitting around with Steve brainstorming a name to call the business- he came up with “The Purple Painted Lady.” Since we live an old “Victorian” farmhouse- and Victorians are often referred to as “painted ladies” – “The Purple Painted Lady” was born!
You may recall that I painted the cupola for the top of my barn last year with Pure White Chalk Paint®. It has been over a year now and my cupola – that is exposed to New York winter’s, changes between the hot and humid summers and the freezing cold months- and it looks amazing!

For the kitchen porch, I used a foam roller, the 4 inch kitchen cabinet roller (Whizz brand) and added an extension to the roller handle so I could paint the floor without straining my back. Since the end of all rollers typically have a universal thread, so the extensions found at Lowes, Home Depot or Walmart can be used. Get one of these and I guarantee you the next time you paint a room or floor, you will cut your project time in half!
I painted two coats of the Chalk Paint® today and I think the porch looks amazing! Quite frankly, I could have done just about anything and the porch would have looked better. But most importantly, I wanted whatever I did- to last more than just a season.
TOP COAT?:For exterior use – there is no need to add a top coat to the paint since Chalk Paint®. Chalk Paint® cures and is very durable.
I realized this quickly after we had a Chalk Paint® spill outside of my old shop. A sample pot of Old White was dropped in July of 2012 on to the cement walkway outside my store. That splatter of Old White- endured – even after we attempted to power wash it off. So, I figure a protected porch should be a piece of cake! Keep in mind that Chalk Paint® is a flat, matte finish. It will show scuffs and serious dirt, but you can rinse the dirt off- and I am good with that. If however, this was an interior floor- I would have chosen to use Annie’s Lacquer that is made for interior use only- specifically high traffic areas. It is water resistant, but not water proof. So, do not use the Lacquer if the space gets exposed to lots of water- especially if it is standing water (meaning where it is not wiped down.)
COVERAGE WITH CHALK PAINT®: My porch is about 16 feet wide and 6 feet deep. (that equates to 96 square feet) A quart of Chalk Paint® is noted on the quart label to cover approximately 150 square feet. I was able to get 2 whole coats completed out of one quart.
I am now excited about painting that little side table in the photo above in Annie Sloan’s Arles. Arles is a golden sunflower color that will compliment the Old Violet floor and the white and orange chair perfectly!

If considering using an alternative top coat – always do a test in an /inconspicuous spot. Often very strong protectants have the ability to cause crazing, crackling, or even pull tannins from the substrate…even over after a month.
If you are wondering if Chalk Paint® would be a good fit for your project, don’t hesitate to contact me. I am here to help you. And if you know me- I am not afraid to lose a sale if I feel what you want to do is crazy and not a good fit. For example, I had someone ask if they could paint the inside of their bathtub. My answer- NO! Or, how about your boat? NO! I am here to help you and when it comes to my customers- I am always available to answer project questions! So, with that said – did you know that I sell Chalk Paint® and other supplies? We sell all our products at the lowest price we can and we offer the lowest flat rate shipping! We also ship same day and ALWAYS have everything in stock! Visit our on-line store HERE if interested in placing an order.
Now, with this side porch done~ I just have to hope this incredible warm spell continues so I can get the front wrap around porch done next!
Thanks so much for visiting my blog!
XO
Trish ~ The Purple Painted Lady
—————————————————————————
Tips & reminders on painting unconventional surfaces:
1. Chalk Paint® is amazing- but it is not a miracle. Be realistic in what you are painting. Decide if you are looking for a “season or a lifetime” and get feedback on if it will perform to your expectations.
2. Slippery surface? Chalk Paint® does not require stripping, sanding or priming, however, if you are covering something that is super, super slippery- it would not hurt to scuff it up with some rough sand paper. Again, Chalk Paint® is amazing- but it is not a miracle. I have people write me about painting wall tile. Annie’s does not promote that, but I have a customer’s who have and they are elated. I would clean them really well. Use a little Mineral Spirits on a ScotchBrite scrubbie. Clean and then rinse with plain ole’ water. Make sure to wait a day or two to allow any moisture in the grout to dry. Scuff them up with some 180 grit sand paper. Blow off dust.
3. Apply initial coat of Chalk Paint- thinning it just a little. WAIT 24 to 48 hours hours before applying a second coat. I am incredibly impatient- but this allows the paint to “do it’s thing” – basically scientifically – to let the molecules settle, connect and really adhere and grip to the surface. Once done- clear wax over your paint or lacquer.
4. If choosing to use Chalk Paint® outside, it needs to be on a surface that will not be saturated with water all of the time or under water. Most products will fail in this environment.