How To Clean Your Ultimate Wax Brush VIDEO and WAX Information

Hi all! We have the Ultimate Wax Brush available here on our site and if you need one- click here).

SHORT CUT to VIDEO! Click here to watch it.

If you have ever met me in person or talked with me on the phone regarding wax- you will know that I feel an Ultimate Wax Brush is worth its weight in gold when it comes to applying furniture wax. I feel it helps you to apply a uniformed application of wax, and guides you to push the wax into the paint. Often, those who are beginners and use a rag will have issues such as streaking due to uneven application. Since this post is about how to maintain your Ultimate Wax Brush, if you would like to read more about how to apply wax- jump to the end of this post. : )

With all shipments of product that you purchase from The Purple Painted Lady – you will receive an instruction sheet on everything! Not just a page with some high level itemized notes, but typically 2 pages worth of information! When it comes to cleaning your Ultimate Wax Brush- it is only a 1 page sheet because it is quite simple. I also have a quick video if you would rather hear me talk about it, click here to watch it. Please pardon my lack of “hair & make up.) We filmed this after working 13 hours at the shop last Thursday.

Here is some other “WAX” information & posts that I hope are helpful to you:
Wax seems to cause the most confusion for customers… So, I hope the following is helpful for you!:

How Much Wax Do I apply?
If all you take away from what I say and do is this…you will be ok! We are not icing a cake! We are waxing furniture. So, very thin – uniform coats are best. Just like when you put moisturizer on your skin- you do not put a thick coat on, but rather a THIN coat and rub it in- so that it will be absorbed into your skin. OR when you use hair conditioner…you apply it and then do what? Rinse it off. That is because your hair will absorb what it needs. Annie’s Chalk Paint will do the same thing in regards to the wax! And you should never have so much wax on your brush that it is “caked” up the sides. You are using too much wax and more importantly- wasting your wax.
CLEAR WAX- this is how The Purple Painted Lady uses it:

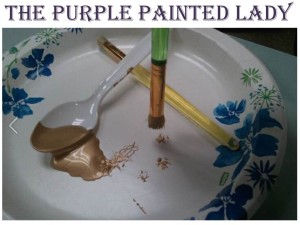
1. I take a plastic spoon and a paper plate. Using the backside of the spoon- I take a good tablespoon amount of wax out of the tin and put it on the paper plate. (Place the cover back on the tin of wax until you need more)
2. I use my wax brush and pull some of the wax from the glob (for lack of better words.) Only the tips of your wax brush bristles should have wax on them- there should not be wax “gobbed” up the side of the brush. A little goes a long way! Again- you are not icing a cake where you want a generous amount of thickness. We are applying the wax very thin- pressing uniformly with steady pressure- but not so much that you are bending the bristles on the wax brush. I like to use the analogy that this is similar to waxing your car…you apply the wax- BUT NOT SO MUCH that when it is time to wipe it off or buff- you need a power tool to do it! So- apply a thin layer of wax and GET IT IN THE GROOVES OF THE PAINT.
3. APPLY WAX IN SECTIONS: I work in about 1 foot sections … I use a circular motion when applying the Clear Wax. Then after applying the wax, I rub the wax into my piece and wipe the residual wax off with a lint free cotton rag or piece of cheese cloth. I ALWAYS finish with a few clean straight wipes with my rag in the direction I painted. If I was doing a dresser top- I would start at the back reaching across while standing in front of the piece and as I apply the Annie Sloan wax – I work my way toward the front as so I don’t lean into a previously waxed area. You will see where you waxed prior because it does deepen the hue of the paint a slight amount but be aware of where you just waxed. 4. WIPE OFF WAX: After applying the wax to one section, I will notice when the wax is not covering as much- that is my queue I need more wax. But before reloading your wax brush….use a lint free cotton t-shirt (an old one from my husband or an old sheet) and I wipe off the residual wax with a couple wipes ..circular or in the same direction as I just waxed. (I am not buffing the wax at this stage! Merely just removing or incorporating any small wax “crumbs” that may be present.) Again- a few uniformed swipes or circular rubbing – and that is it.
5. Resume waxing the next area- I wax strategically – meaning in an organized direction so I do not miss a spot. And I overlap my last “section” just a smidge so I don’t miss any of the surface.
6. The wax will dry (meaning no longer be tacky to the touch within a short time….maybe within an hour) However a variable in the dry time is the temperature and humidity where you are located. Is it is humid and cooler- cure time will be longer. If it is taking a long time and your wax is still tacky and you are not in the rain forest- reread my warnings above regarding applying the wax thin!

Number of Coats of Wax?
Depending on the piece I am finishing- I may have different amounts of wax coats. For instance…..a dresser. I may have 2 – 3 coats of wax on the top, but only 1 coat of wax on the sides and front.

7. Once the piece is no longer tacky- if you want to have a shinier finish- buff your piece. If you like it as is- then you are done! It does not take much rubbing and the piece will be quite shiny- so pay attention and have good lighting so that you do not over do it.
8. Remember NO WAX when painting pieces for outside.

Be careful in regards to “touching up” an area of paint after the wax has been applied and dried. Even if you rewax- spot painting always shows in certain lighting. I have found that when I “touch up” areas with paint once waxed- you either need to do the whole surface or don’t do it at all. OR, if you are distressing your piece, see if you can strategically blend an area to make it deliberate.

9. Surfaces that will get serious use (wear and tear) like tops of dressers and tables – should receive 2 to 3 coats of wax. Follow the procedure above – always allow wax to dry between additional coats.

I will always lead my customers on a path to get the best value from their purchase. If a person walks in and is describing an application where another product would be better- I let them know! Now when it comes to tools- in the sense of brushes – I strongly believe that wax brush is a necessary purchase if you plan on doing multiple pieces. I understand that they are not inexpensive, but if you maintain them- they will last forever and will make your waxing process much faster and from a cosmetic perspective- will significantly improve your application! I always say- this is similar to applying make up. I honestly don’t think the applicator you choose for putting on eye shadow is a big deal- but try putting blush on with a skinny brush versus a nice big soft brush and you are going to look ridiculous. Invest in a wax brush and get a professional quality finish. You will not regret it.

WHY IS WAX IMPORTANT?

The wax is important to protect the paint – like polyurethane does when using Latex. Also – in regards to water protection, especially in kitchens and bathrooms. In that case- you need something made from wax and or oil….ie.oil and water don’t mix. (and not to be too odd here- that is why when you install a new toilet- they set the piece on a very THICK wax ring) I have tested waxes that are water based and they just don’t work as they come off when you wipe them with a cloth! Petroleum wax, also known as paraffin wax, is a by-product of the petrochemical industry…it is a residual from another manufacturing process. Annie Sloan Wax upcycles… in that the petroleum by-product is used in our wax versus of it being disposed. It is a good and economical base for Annie Sloan’s wax and besides that- there is also bees wax (which comes from bees!) added to make it soft and carnauba wax (from a plant) to make it very water repellent. The paint because of its particular structure allows the wax to soak in- like quality skin lotion will on your body. This is why Annie Sloan Chalk Paint and Annie Sloan waxes marry each other perfectly- they were created to do so and no other mixing of products will produce the same results.

BUFFING:
I would like a shine to my piece…. The equation of how much sheen you get is simple…the more you buff the wax once dry/cured- the shinier the surface will become! It does not take much rubbing- we are talking a minute or two – at most!
WANT YOUR PIECE TO BE SUPER SMOOTH? HIGH grit Sandpaper! Purchase some sand paper from an Autozone or a car supply place. Sandpaper like 400 to 800 grit and up, is great to use to polish the whole piece after all of your painting is complete. I also like to polish the wax after it has dried with sandpaper like this. This will give you a finish like the side of a new corvette! Seriously- this is where you can take advantage of the incredible finish Chalk Paint™ Decorative Paint by Annie Sloan can produce. The finish will feel as smooth glass! This is my favorite finish!

WILL THE WAX PROTECT THE FINISH?

Annie Sloan also wrote-
Yes the wax does completely harden! It’s hard and is water repellent.
I have never known it to melt in the sun and I have had pieces in the hot sun in the window of my shop – yes…. I know its England but with the sun on it through glass it must hit pretty high temps and we have been selling it in the South of Spain for years and years where it is more or less tropical!

No a glass will not leave a water mark. Sometimes a coffee cup leaves a ring and I just wipe it off with water or something like (Clorex Wipes) or at the very worst a spray kitchen cleaner. You don’t want to use anything too strong or the wax will come off too much. Once I left a vase on a table and it leached water so when I took the vase away the paint and wax had sort of lifted. I just left it and it all settled back and was fine. When it dried I just wiped some wax over it. Annie

Click here if your Wax is still tacky

Click here if you think you Applied too much wax

I recommend painting and waxing inside at room temperatures, Click here to learn why =>Wax inside

Click here if you are wondering, How durable is wax

Click here if interested in Dark Wax Info

Annie Sloan’s New Video- Up Close & Personal

Annie Sloan is the artist behind the famous and trademarked Chalk Paint™ Decorative Paint! She is a REAL person! See her, hear her- know that she creates GREEN – environmentally safe Chalk Paint™ with rich, luxurious colors that are durable to paint the outside of your home with!

Please view her video and leave a note saying The Purple Painted Lady in NY sent you. Then leave me a message on my Facebook page saying you did it- and on August 7th one of you will be selected to receive a container of gorgeous gilding wax!

Brilliant…just absolutely brilliant Annie is!

Now please go watch her video and be inspired!

SHELLAC – when to use it! What To Do About Water Stains or Wood Grain Bleeding Through Paint? Raw wood? Or musty smelling pieces too. VIDEO

Painting and having issues with:

Water stains bleeding through
Wood grain showing
Wood tannins bleeding
Painting with a “white” or light colored paint over Mahogany or Pine

Painting kitchen cabinets that have a lot of grain and it is causing tannin to bleed through?  Or, even though you cleaned the cabinets well and rinsed off any cleaning products, you are still getting “grease” stains coming thru?  Keep in mid, we promote Chalk Paint® as a minimal prep paint, but you have to be realistic and it is not a miracle.  Especially when it comes to kitchen cabinets- where – personally I like to say, some people use their cabinets and some people abuse their cabinets.  If the doors have a heavy grain, or are oak, or perhaps the pre-existing top coat has worn away …….especially on doors near the kitchen sink, or the cooking area near the stove or above it, next to the dishwasher where the door opens and hot steam is released or doors that get handled a lot like where you keep your drinking glasses – the pre-existing top coat may have been worn away.  Keep in mind too, if using “white” colored paints…all of these issues above are a concern, but even more so – because again, “white” does not contain as much color blocking pigment.

Painting RAW WOOD and the paint is getting sucked up
Issues with the paint cracking or not adhering in a certain spot?
Painting a piece that you have sanded and now have different finishes visible
Planning on painting Pure White or Old White over a wood piece and concerned with stain or wood grain bleeding?
You used wood filler on a section and the paint is taking to it differently?

The piece stinks really bad of either cigarette smoke, a musty basement…or who knows what!

Painting kitchen cabinets and you are concerned of bleed through?  Personally, I do not apply shellac – UNLESS I have to. It is extra work. If I get bleed through after my 1st coat of paint dries- then I will apply my 2 coats of shellac based on my instructions below. Shellac can be applied over chalk paint but not wax. So, wait and see what happens. And – you may only have bleed through on a couple of doors.

Please read this post:


Real quick- if you need to use shellac- typically you would do it in this order:
1.Apply Shellac  …..Most importantly- remember with this solution – that you cannot “spot treat” a water mark or “issue” areas- rather you must do the whole section. For example- water marks from a glass on top? Shellac the whole top, not just the water mark.  Have a section on a kitchen cabinet door that keeps getting a stain bleeding though?  Shellac the whole door!


Apply TWO uniform thin COATS of Shellac

2. Lightly sand after using to prevent paint from crackling.

3. Paint with Chalk Paint®

4. Wax

If you realize you need to shellac after applying Chalk Paint®- that is okay…go ahead and apply the shellac. Just remember you cannot shellac directly over wax!

If you have applied wax already, then you will need to lift the wax using mineral spirits.

Lightly moisten a rag and wipe your furniture. Wipe edge to edge- not circular. Also- make sure to NOT drip mineral spirits on to your floor. The rag should be moist, not dripping wet. The piece should feel almost like it did prior to waxing after removing the wax.

SHELLAC APPLICATION DIRECTIONS:

I prefer to use shellac in a container. Reason being- even with two applications using an aerosol can- I cannot guarantee that your coverage (thickness) is adequate.

Do not shake the shellac but rather stir it or roll the container in your hands prior or use a stir stick.

I use a lint free, cotton rag to apply the shellac. I usually take a rag and fold it into four’s. The I dip an edge into the shellac and wipe it on the piece in the same direction that I will be applying the paint. (usually the same direction as the wood grain.)  By using a lint free rag- folding it like a hankerchief, then dipping the edge in- and wiping the shellac on – starting the farthest away from you. and wiping from one edge to the opposite side- you should have better coverage.  The analogy I use – is that this is similar to washing your kitchen table.  But always wipe in linear lines- not circular.

You will need two coats.  And note- too thick of an application of shellac can lead to other problems also- so a uniformed thinned application is best.
 
Once done applying the two coats- waiting 15 to 20 minutes in between applications- then you will lightly sand!
 
Never shake the shellac in the can, but rather use a stir stick and mix well and note that shellac has a shelf life of about a year to 18 months.

I prefer to use THESE RAGS (click here to link to the “better Than Cheesecloth” rags.)

Give the surface about 15 minutes to dry, and then repeat with a second, (uniform and thin) coat of shellac. Never apply it thick. That can lead to problems too. But – I often use the analogy, “Measure twice, cut once.” So, two uniform coats is best.

Having to apply shellac when painting with a “white” Chalk Paint® is sometimes necessary over certain surfaces – like raw wood, mahogany, heavily exposed grain.

WATERMARKS:

Ahh- the dreaded problem when you finally decide to paint a piece of furniture or even worse yet….kitchen cabinets and then……stains are bleeding through the primer and paint you have painstakingly applied. Or- what about that amazing piece you picked up at a garage sale for next to nothing- but OH BOY! It stinks! Either that musty smell from sitting in a damp basement, or the owner was a cigarette smoker. Or, did you use wood filler to “fix” some damage or did you decide to go from a “handle” to just a knob in regards to hardware and – you filled in the holes on the drawer fronts? Or, you have a hutch that your hubby built for you out of raw wood that has not been top coated? (that one is for you Laura!!) OR…you painted your piece with Chalk Paint™ and you now see bleeding coming through. Now what do you do?

Here is a story true story of the progression of this issue with a trestle table that I recently painted for my shop, The Purple Painted Lady. A photo of her is below. Doesn’t she have great lines? I saw her and was in love and knew immediately how much potential she would have once she received a little TLC.:

First of all, at my shop I use and prefer specific products. Yes…I have used many products over the last decade, but just like make-up or soda pop, we are creatures of habit and usually stick to the brand that we like the most and that does the job for what our needs are. Now before I go on…here is a little disclaimer I wanted to add regarding this post. I am not endorsed or sponsored by this particular brand/company I am going to write about. But I can say that I always have a bunch of cans of this product in my shop for sale and for my personal inventory because it has been a life saver…and also a money and time saver for me. I do sell Annie Sloan Chalk Paint™ Decorative Paint Products, and that is because I love it and believe in all that it can do. I am passionate about what I do and will never link my name to a product that I don’t use myself and love! So AMEN to all of that!!!

OK…with that out of the way- let me get back on track! So, you can see in the photo above a beautiful trestle table- but look close at the top if it. Now check out the image below and you can sadly see the water stains that bled through after beginning painting it. Foolish me…even “experts” (and I use that term very loosely) make mistakes. Again- if you look closely at the top of the unpainted table- it was quite obvious this was going to be an issue!

I totally knew I should have taken precautionary steps – but perhaps I was in denial. I don’t know, but either way- after that first coat of paint- reality hit me quickly and I did what I needed to do.

Ok, are you ready? Here it is…my secret to covering up water stains, that red stain wood that was popular in the 1930’s &, 1940’s , Mahogany colored stains or preventing wood tannins from bleeding through my painted pieces of furniture or cabinets. This is especially important if using a light hued color of paint…like white! It is…ta-dah…..using a spray shellac. Just like the one I have shown here.


Please click here to watch a video about Zinsser Shellac.
This “miracle in can …or quart” also works great when dealing with knotty pine or if painting kitchen cabinets that were manufactured and installed in the 1980’s or 1990’s that have that yellow maple look to them or if you are painting a red stained piece and want it to be white. I typically recommend only getting the CLEAR shellac versus the white. This is especially important if you want to distress your piece after being painted and would not want a white sealer being revealed. And- sometimes we start a project thinking it is going to be painted in one color- and then change our minds. Once you use the white sealer- you have sort of committed yourself to a white paint if you are going to distress the piece.


As for the cabinets I referenced- you know the ones that have that yellowish wood stain color and you can see the grain of the wood. The wood tannins bleed through your paint like the photo above shows. To prevent the bleeding some people approach this problem by using multiple (meaning many!!!!) coats of a serious excellent covering primer (adding more expense to their project.) And keep in mind- that primer is NOT needed with Chalk Paint® Decorative Paint by Annie Sloan products! Lastly- just want to clarify- there is a functional difference between sealers and primers. So….here is something you can consider- my secret weapon using Zinsser.
Make sure when using any product to read the manufacturer’s usage and safety directions first. Like most spray paint, polyurethane or shellac – this stuff has some serious smell to it. I always recommend- when possible to use this in an outside area or ventilated garage. Wear a mask and even safety glasses. (do I wear safety glasses? NO! But I should probably tell you due to some legal mumbo-jumbo!) But you do not want any wind or dust happening when using this stuff- or any spray paint, shellac or polyurethane. Because – like Murphy’s Law- if there is a breeze and dust….the dust or dog’s hair will end up on your piece. Also, (and I do this) …remember to take off that sparkly diamond ring you might be wearing or any other jewelry or watches, so you do not accidentally over spray them. When you spray your piece – use common sense “Spray Painting” techniques. Meaning- don’t hold the aerosol can in one place- you will get drips. Don’t hold the can too close to your piece either. Even movement, uniform coverage – and you will be just fine! After you have sprayed the piece (or brushed on the shellac) ….once the piece is dry – which is very quickly (like 5 minutes)- reopen the front and back garage door to get a cross breeze to air out your work space. It doesn’t take much time and the smell dissipates quickly and in the end- this will be all worth it!!

When you have stains and need to spray your piece, always spray the whole surface that contains the stain- do not just spot treat. Just to reiterate some important points: Get uniform coverage – do not just target the stain section. You wouldn’t think just a quick spot treat spray of shellac in only a small targeted area could be visible once painted, but it is! I am going to repeat that because this is important! Make sure when you spray the whole area of the piece! So in my example- I sprayed the whole top of the table. And feel free to do this twice. First, spray it once and let it dry which only takes 5 minutes. And I love the quick drying time because even the most impatient people will be impressed with this stuff! Next- spray another full second coat! When done using spray paint or a spray shellac- go outside and holding the can, flip it upside down and spray. You will see the spray in a few seconds will disappear and this ensures you that you cleaned out the nozzle and won’t have a clogged can next time you need to use it. Always do this before placing your spray paint or spray shellac away and you will never have a plugged nozzle!

Again, play it safe! Do this step outside if using the spray shellac since the shellac has a serious strong odor- but the smell goes away quick and dries in minutes.

And just to reiterate this- when you have a piece of furniture made out of different types of wood- keep in mind – that when you paint- the color can appear differently. For instance… a wonderful customer of mine, Laura McGarrahan Koppelmann has a husband who is very skilled. he built her – from scratch a hutch! He used bead board and pine, and some other types of wood when constructing it. When she began painting it she had two issues:

1. The raw wood was just sucking up the paint!!

2. There was an obvious difference in the shade of the paint depending on which surface you looked at. The pine sides took the paint differently than the back bead board.

So, I emailed her this post regarding shellac. Laura applied the shellac right over her existing Chalk Paint® and repainted- and loved the outcome. She wrote to me, “My beautiful, finally complete hutch! I LOVE IT! Shew, it was a lot of work, but so worth it…thanks for all your help to make this work. I learned a lot in the process. It is now “priceless” hutch ; )”

Lauras Hutch

YOUR PIECE REALLY SMELLS BAD!!!:

And although- I am mentioning this near the end here- this stuff is amazing for blocking out odors that may be coming from a piece of furniture. It seems when I spot the most amazing piece of furniture with incredible detailing at a garage sale, it always happens when I get next to it- IT STINKS! LIKE, “make you gag” stink. Either that musty smell from sitting in a damp basement, or the owner was a HEAVY cigarette smoker. I like to use the analogy that spraying the piece with Zinsser is like laminating a piece of paper. Water cannot penetrate through and get the paper- and that smelly odor – will be totally contained. ***Just make sure to spray inside the drawers and any surface you can…like underneath, inside drawer pockets, and inside cabinets.

I don’t think it matters what you use to clean or air out something that has been permeated with nicotine….. On a damp day- it will smell all over again. The only thing I have found to really work- is encapsulating the entire piece of furniture with Shellac. If it is a dresser- spray the Shellac in the cavities. Smoke gets everywhere!

Below is the same table after one coat of Zinsser Spray Shellac and a coat of Old White- which is a paint that does not require a primer to stick to the shellac. Doesn’t it look better? Again- what I did was spray it with the Zinsser. Then repainted using Chalk Paint®. And then – waxed.

Whenever I have to sand a piece of furniture due to damage of some sort. It could be due to a scratch, a dent, chipping. After sanding, the piece will have a variation of materials on one surface- like the dresser shown below. You can see the raw wood where we sanded. In this case- I also always spray that whole section with Zinsser Shellac. So in the example below- I would spray the whole top.:<br?

Again, this is wonderful stuff and if you paint lots of furniture… I recommend always having a can on hand. Or two, or three….!

Imagine when you go to paint those old kitchen cabinets that you cannot stand the color of. Save yourself time- just take the precautionary step and spray shellac all the doors after a good cleaning- and spray them twice. And don’t forget to brush on the shellac to your kitchen cabinet frames too.

The Purple Painted Lady just completed painting 40 cabinet doors for a home in Penfield, New York. We sprayed the cabinets outside prior to using Chalk Paint™ Decorative Paint by Annie Sloan. Sometimes with kitchen cabinets- even though they have a top coat of their own from the factory – after over 20 years of use…that breaks down. The stain from the cabinets in certain places can then bleed through. (It is interesting to paint cabinets- as an experiment prior to shellac. You will notice the stain that bleeds through is in a shape of a streak as if something splattered on the cabinets and then dripped down the front and it is the shape of a splatter or spot) You will often find this most near cabinet doors located near the dishwasher or kitchen sink where there is more water movement from washing dishes or emptying the dishwasher.


Another reason to use shellac: Painting Chalk Paint® over a previously painted surface that has some type of effect – will most likely pass through to the Chalk Paint®. This would happen no matter what type of paint you were using.

So for example—–

If you paint Chalk Paint® over a previously crackled surface- it will cause the Chalk Paint® to crackle.

If you are painting Chalk Paint® over chipping Milk Paint- that will still cause the Chalk Paint® to chip since the foundation beneath …the “Milk Paint” is still chipping since it has not “bonded” with the base surface.

In this case- I recommend that you sand back the milk paint or crackle lightly to accelerate any loose paint to come off or to remove the crackled surface. Then- blow off the surface of all dust and use Zinsser Clear Shellac (again, I like the aerosol cans- but you have to use it outside) and applit in a thorough coat over the whole piece. Possibly two coats. Shellac is very inexpensive and can be a life saver depending on the piece you are working on. I have a post on my website noted below you may want to read.

Anyway- I think this trestle table looks lovely now! Tomorrow this gorgeous table will receive a mix of Dark & Clear wax to showcase the “crocodile” textured surface around the front and sides.

Okay- now here is a spin to all of this information! I personally think that I use shellac on about 20% of my jobs. If I am painting cabinets in a kitchen a=or a bath- they almost always get shellac. But using shellac is a necessity for many jobs and something to consider- is what color Chalk Paint® are you using in your project. Reason being – colors with more pigment will have better coverage. Below is a bunch of photos that are an example of that!

I picked up an old dining table for free. But it had a large burn mark on the top of it.
Slide2

I thought I would need to apply Zinsser Shellac over it as so the paint would cover it, but thought I would experiment first and just try the Duck Egg Blue Chalk Paint® directly over the burn mark to see how it covered.

Slide3

shop table TLC cover burn mark Duck Egg Blue

After rolling one coat over the table with a foam/sponge roller I knew that I did NOT need to use shellac since the Chalk Paint® covered the burn mark 100%. I am pretty sure though, if I had used Old White Chalk Paint® or Pure White Chalk Paint® this would not of been the case.

After I painted the table it looked so much better, but I thought it was a little plain. So I played around with a large stencil.

Slide4

Slide5

Slide6

Slide7

I think the table looks so much better now and learned quite a bit regarding coverage when using Chalk Paint® on this little project!

Well, I hope you enjoyed this not-so-little article- but isn’t that typical of me? Please write to me, “Dear Purple Painted Lady” with questions and you may be featured right here online! Any painting questions, color selection issues, or even design issues- send them on in. Please just write me at takuntz@rochester.rr.com and note in your subject, “Dear Purple Painted Lady.”

Until next week…. in the words of St. Francis of Assisi:

A woman who works with her hands
is a laborer.
A woman who works with her hands
and her head is a craftsperson.
A woman who works with her hands.
her head and her heart
is an artist.

Stay well!

Tricia Migliore Kuntz ~ aka…The Purple Painted Lady