This post is in honor of Dave DeLuca and the question I received from him today!
Here is his question:
I just finished painting this piece with Old White Chalk Paint® decorative paint by Annie Sloan. I forgot to purchase the wax when I ordered paint from you so now, I need to go ahead and do that. Do you think that would be best for a coffee table that will get tons of use, feet, sticky toddler finger etc.
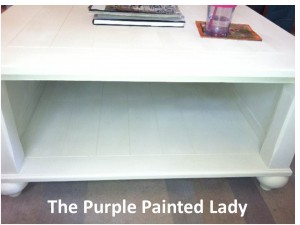
First off- I love your coffee table. Great job with painting it!
Now- to my response on if I feel Annie Sloan’s wax is a good option for you:
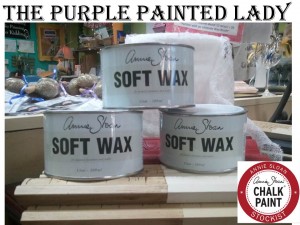
YES! I think Annie Sloan wax as a top coat is a great protective choice and here is why:
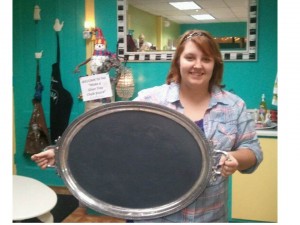
I painted my workshop table here at my shop with Chalk Paint® decorative paint by Annie Sloan and then did the wax as a top coat. I did 2 coats total. I beat this table up every day with placing whatever I am painting on it; metal chairs, side tables, – you name it- it goes on here. We also use this table for workshops. Paint splatters on it, the metal when dragged across sometimes leaves a grey line. But what I love about wax for a top coat- is that it is very forgiving. So- to show this- I took a photo of a section of my table right now. It has paint spilled on it and some scuffs from unloading a delivery on it.
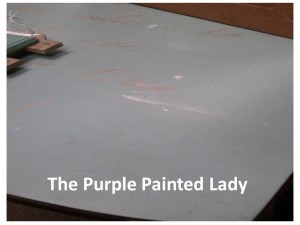
Using my finger, I scratched off the paint on the table that was not suppose to be there. In this case- it is the Old White that spilled on my Provence table.
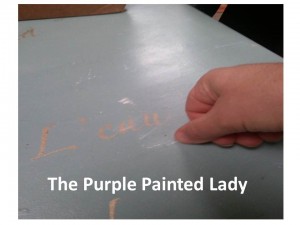
Then I took an old t-shirt (rag) and buffed the area I just removed the paint from:
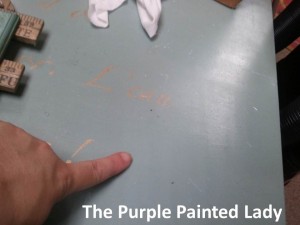
Annie Sloan’s Soft Wax is very durable. In fact- the name “soft wax” to me, is an oxymoron since the wax cures to become very hard and durable! Within relative normal wear and tear on it – it is a great choice! (although I feel what I do to this table is much more than “normal” wear & tear)
Does this mean you can bake chocolate chip cookies- take them straight out of the oven and then, place the hot cookie directly on this?
NO! I would not do that to my wood tables with factory finish. Can you spill nail polish remover on it and expect it to be fine? NO! Also, wax is susceptible to anything that is acidic…so if you love grapefruit, make sure to use a place mat. And the wax is perfect for your kitchen cabinets too! We have the best of the best in regards to experts in the industry at Annie Sloan Unfolded – this applies to product knowledge in the kitchen cabinet industry also. In fact- our technical trainer has been a guru in the furniture capital of the USA for years- she shared with me that “when wax is first “harvested” it is in a hard form … so hard that it can rarely be used that way. So it is softened with a solvent (ours is white spirits) that allows the wax to be easily applied. Once the wax has dried and cured (meaning the solvents have evaporated), the wax is very hard again. Is it durable? Yes, under normal wear and tear. Can it be scratched? Yes, but just like any other durable clear finish (think of your car)- if abused – will show it. Can it be repaired? Yes, and much more easily than a varnish or lacquer finish.”
And- something to note about a wax top coat that I (The Purple Painted Lady) personally loves – is if the cabinets or coffee table top gets scuffed, let’s say by the black rubber bumper around a vacuum for the cabinet, or a scuff mark from shoes on the coffee table top, or filthy finger prints – just put a little wax on a rag and wipe the scuff off. It is that easy!
Do I have to rewax annually?
Applying wax to furniture and having to schedule regular maintenance to rewax – would be a pain in the derrière! Once you have applied a couple of wax, having to rewax in a year or two is not necessary. I will often say, :some people use theor furniture and some people abuse their furniture.” For those of you who USE it….a thorough wax application should last you for years! For those of you who have 6 children under the age of 8 who play on your furniture with match box cars, crayloa crayons, markers paint, and climb on it with their sneakers….YES! You bet, you will need ragular maintenance.
For me and when we paint kitchen cabinets for clients, I always give my kitchen cabinet painting customers a tin of wax once the job is done for things like if the black, rubber bumper on your vacuum scuffs the kickplate of your cabinets. Or, someone with driveway asphalt grease leaves a handprint. OR, your little Picasso draws on the cabinets with crayons. Then, take a little fresh wax on your pointer finger and rub it over these areas and then wipe away. This fresh wax will rejivenate the older wax beneath and the stain from any of the examples above, will be lifted away. For regular maintenance, just a little soap and water on a rag is totally sufficient. But otherwise- you do not need to re-wax for years!
DURABILITY OF WAX:
So the wax cures to be strong- does this mean you can complete the NY Times crossword puzzle on your table?
NO! Just like any fine piece of furniture- use a place mat if you are going to write on the table top. Wax cures to be quite strong, but the force from the tip of a pen or pencil is quite strong and you can leave an impression or indention possibly.
But again, in general, to maintain your table -you can wipe it clean with a damp washcloth and for scuff marks, just buff them. Again, I always give my clients that I paint kitchens for a new tin of wax because I have found that often to remove bad smudges or scuffs, especially the ones that come from the black runner on shoes…I use a little clear wax on a rag and it erases the marks as soon as I wipe them.
I hope that this information was helpful!!!
Basic Wax Application Information
If you are brand new to waxing, before starting your whole project – do this! => Take a small amount of Annie’s wax on your pointer finger. (like the amount you would use if putting lip balm on) Then, take your finger and rub the surface of your painted piece. Make a circle about the size of a quarter. once done- wipe that area with a lint free rag. Now….look at the difference between the waxed area and the unwaxed area. This is how you want you whole piece to look after waxing.
When you wax Chalk Paint® – one of the amazing instructors for all retailers has shared this analogy with us to help in the understanding of how thin to apply it. Barb said, when you wash your hair and put conditioner on it- what do you do next? You wash it all off. Why is that? Because your hair absorbs only what it needs. If you leave extra conditioner on thinking it is going to make your hair better, what does it actually do? It gives you a lousy hair day. This same concept applies to the wax.
And in case you still are not grasping how thin to apply the wax….you know you have too much wax or uneven was when you see streaking in the wax. First- always try to rub or buff a bit more. Make sure that all the wax is dry and that the streaking is not due to do to premature buffing before all of the wax has dried or too much wax.
However- if you do have too much wax on your piece…..all is not lost in this situation! But we want you to LOVE your piece and want to prevent using too much wax because it causes more work for you and wastes your product. So… take a clean lint free rag (an old undershirt works great) Then grab your low odor or odorless mineral spirits (I have found that the “GREEN” mineral spirits do not work well for this application) and put your cloth on the mouth of the container and get 2 dabs of it on the rag. DO NOT SATURATE the rag with mineral- we do NOT want a wet rag dripping mineral spirits. Next- “wipe” the excess wax off your piece. Do not scrub- and do not work in a small circular motion- you want to remove the wax evenly. So wipe from side to side. Another option- in case someone has a smaller piece and does not want to bother with this- is to let your wax totally dry and then re-paint with Chalk Paint® right over what you have done! No stripping or priming necessary! But- let’s try to avoid this since you are wasting product and your money spent! : )
Additionally- I often receive the question- what is in the wax?
Linda asked, Is mineral spirits in the wax? Is it wax (like a pure candle wax) and mineral spirits mixed together. Just curious. Not wanting to make my own just curious to know what is in it.
Here is what I wrote back:
Annie’s wax is a composition of various components- and her total formula, ratios and ingredients are proprietary….just like every other product on the market ranging from make up to Kentucky Fried Chicken or Coca-Cola. But I can share that there is Bee’s Wax- which is pretty self explanatory.
There is also Carnauba Wax …which did- you know ….is used in the coatings of M&Ms. Carnauba wax has a very high melting point of 82-86 °C. It is harder than concrete (which makes it wonderful when it comes to protecting your finished piece) and is nearly insoluble in water and ethanol. (another great characteristic since we do not want a glass of water dissolving the top coat) Now here is what I think is quite astonishing about Carnauba Wax….it is non-toxic and hypoallergenic. The combination of properties leads to many applications, including use in food, cosmetics, automobile and furniture wax, molds for semiconductor devices, and as a coating for dental floss. You use products that contain carnauba wax every day, though you may not have known what the ingredient was or where it came from. It is one of those extremely useful natural chemicals and renewable resources that doesn’t have a synthetic equivalent. As for my car smelling like candy… the wax does have a distinctive sweet scent. It might be more accurate to say many car waxes and candies smell like carnauba wax. (Click here to see more information.)
And then there is also a petroleum by-product in it. The petroleum by-product is a bit vague – but keep in mind that these are specific residual materials left over from other manufacturing processes. Many are used to make wax or even are used in the food industry. (link to more information= http://en.wikipedia.org/wiki/Petroleum_product)
There are a lot of furniture waxes on the market…but Annie’s wax has over two decades of perfecting the composition and usage of her wax with her paint. Be rest assured- that whatever you are painting and waxing- has already been done using Annie Sloan’s products! So there is nothing nicer out there in the marketplace to use on furniture than Annie Sloan’s Soft Waxes! I hope that this was helpful.
