Update on the IOD Transfers on our Shop’s Front Glass Door (How is it holding up?)

We really love using Iron Orchid Design Transfers. So much so, we are game to try them anywhere. So much so, when we saw others using them on their shop’d entrance doors, we thought…..we need to do that too!

So, I wanted to do an update regarding the Iron Orchid Design Transfers that we have on our glass doors in the front of our Macedon, New York shop. Below are photos of when we first applied the transfers and then, photos I took last week.

Click HERE to watch a YouTube Video showing us applying the transfers.

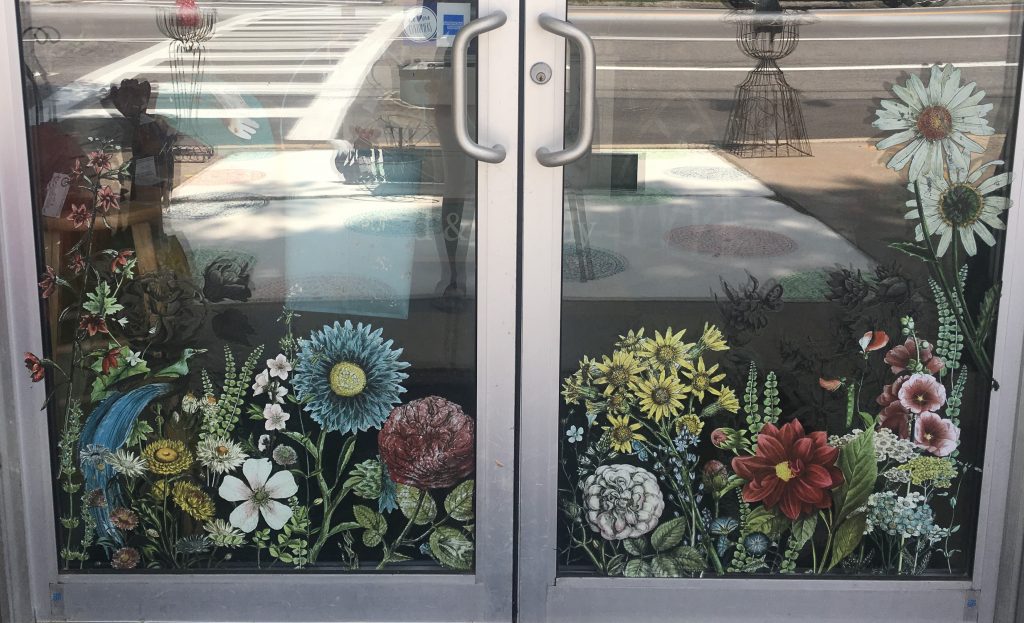
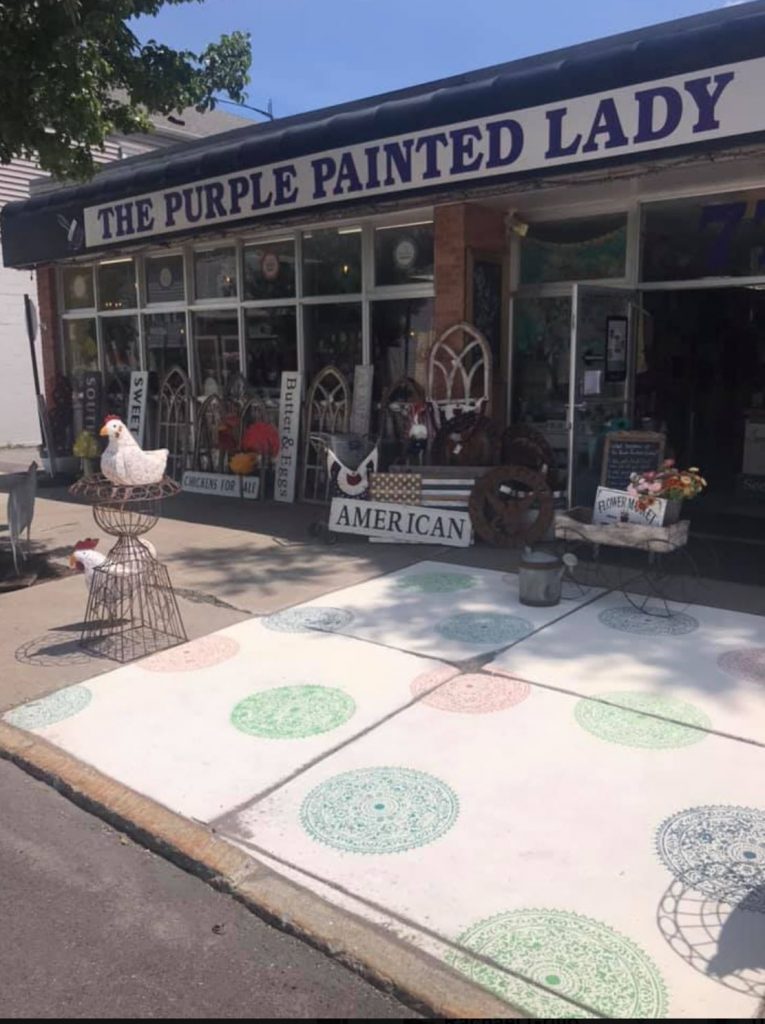
I have to look back at exactly when we applied these but it must’ve been some time in early May of this year…2019. Below is a photo taken on the day we did the windows. Notice how vibrant the colors are on the glass.

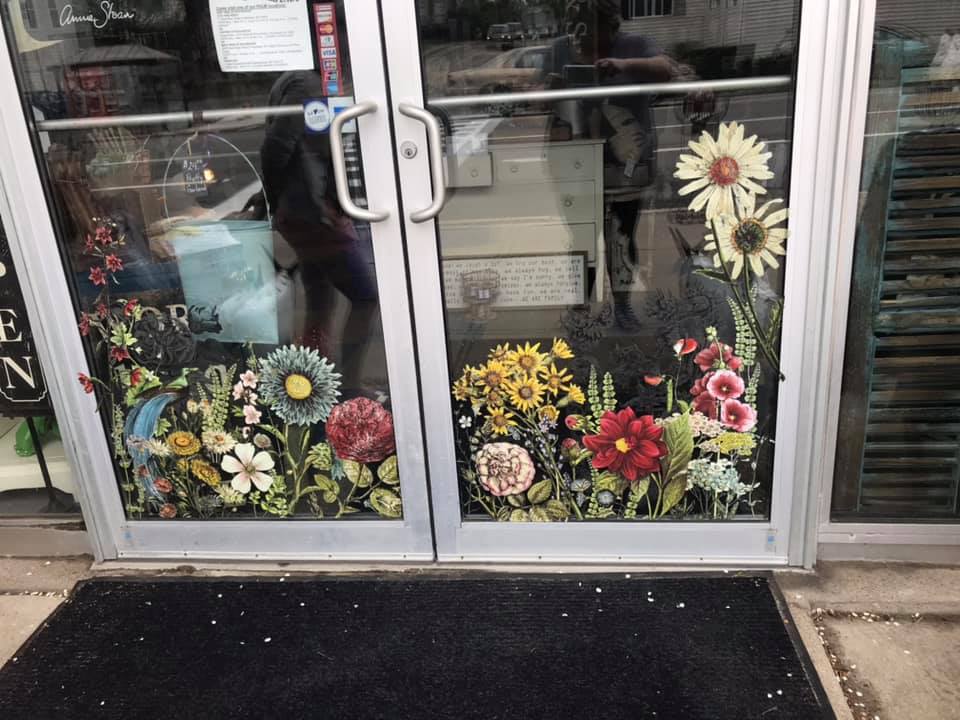
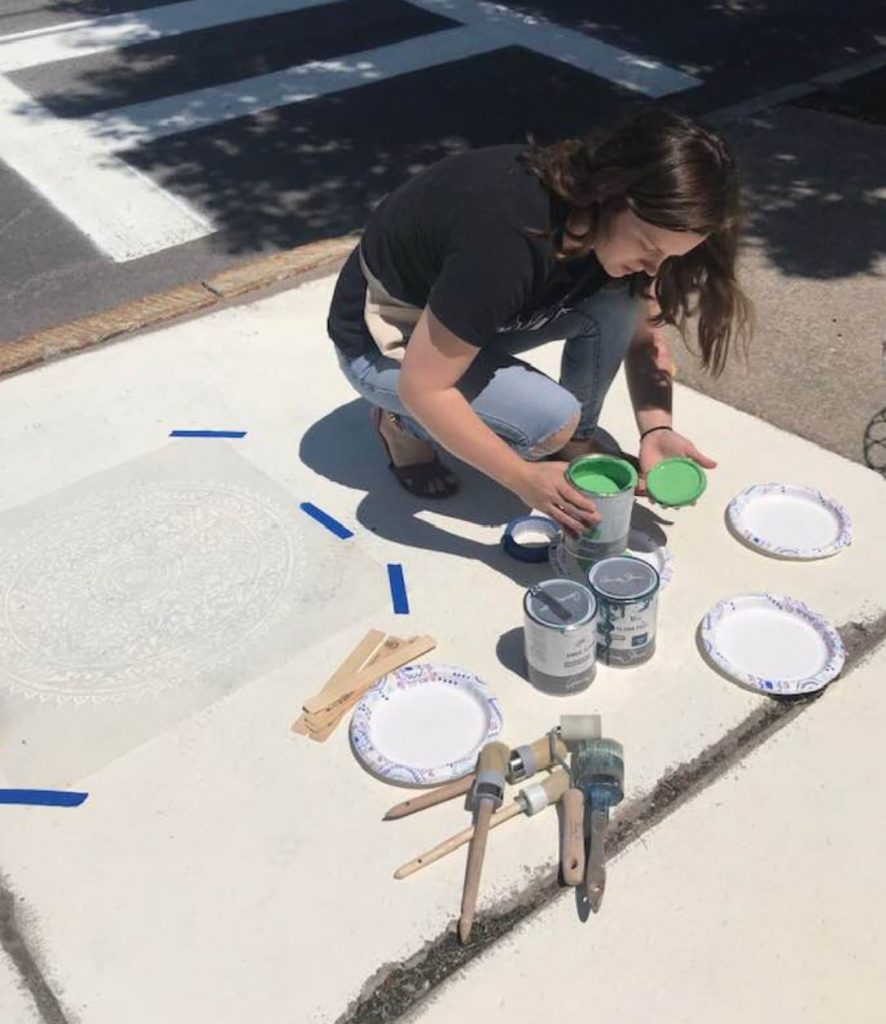
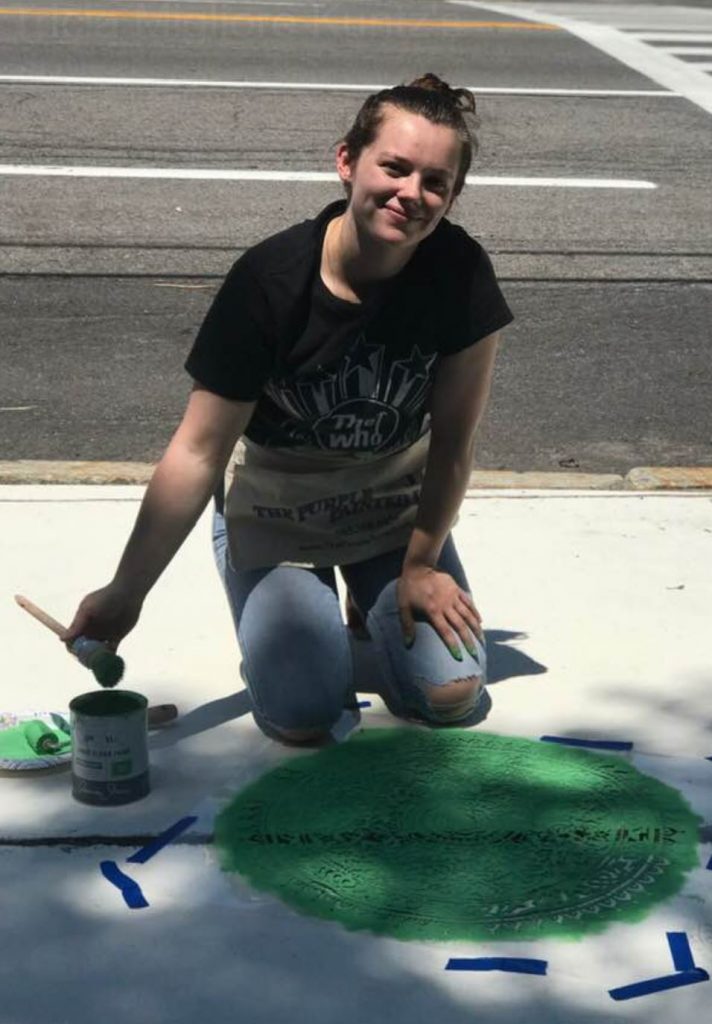
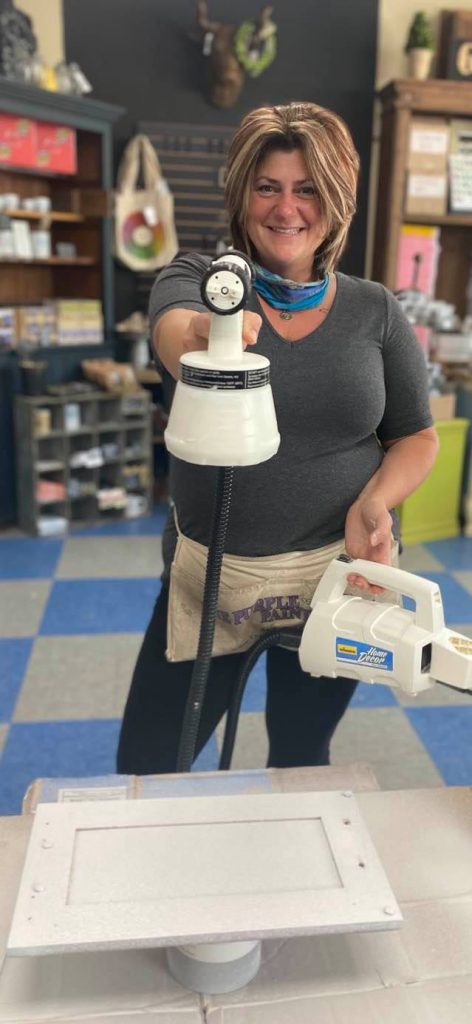
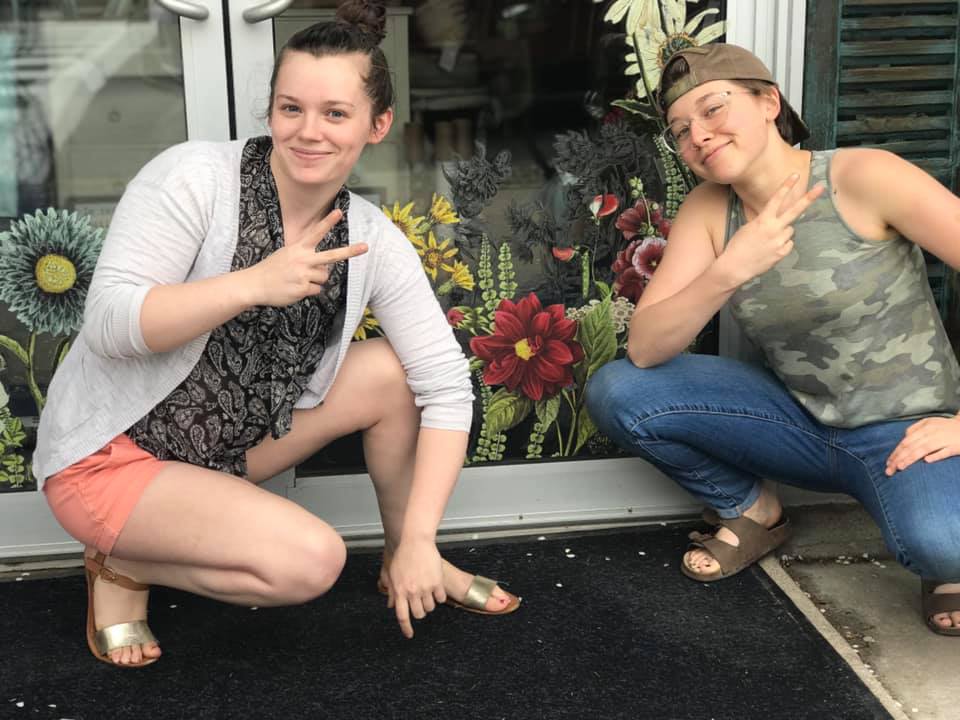
Courtney and Hannah applied the transfers to the glass on the exterior side of the doors. That is Hannah on the left and Courtney on the right. Two crazy women – who fit right in at The Purple Painted Lady. (side note here- I (Trish) am so grateful for everyone who is on our team. TPPL would not exist without each and everyone of them!)

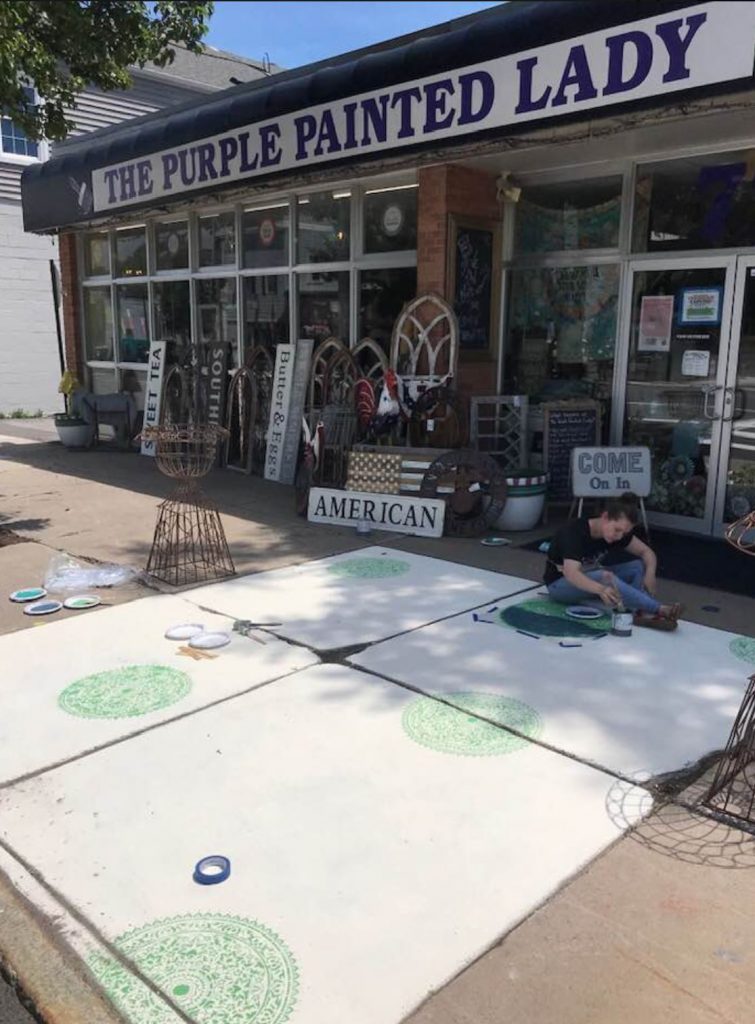
Normally, I would think most people would apply the transfer on the inside pane of glass, but it actually works out best for us on the outside because we bring a lot of different items …including metal artwork out from our store every morning and set them up on the sidewalk ……we then bring it all back in at night. (Yes…it’s a hassle but it creates cute curb appeal~LOL) The side of the door that gets the most “WEAR & tear” would’ve been the interior side. We have an overhang in our entrance so the doors are fairly protected from direct weather. The adhesion of the transfers has held up awesome. In fact, I don’t have any doubt that there would ever be an issue regarding that. The only caveat I will share is that the color of the transfers have faded.

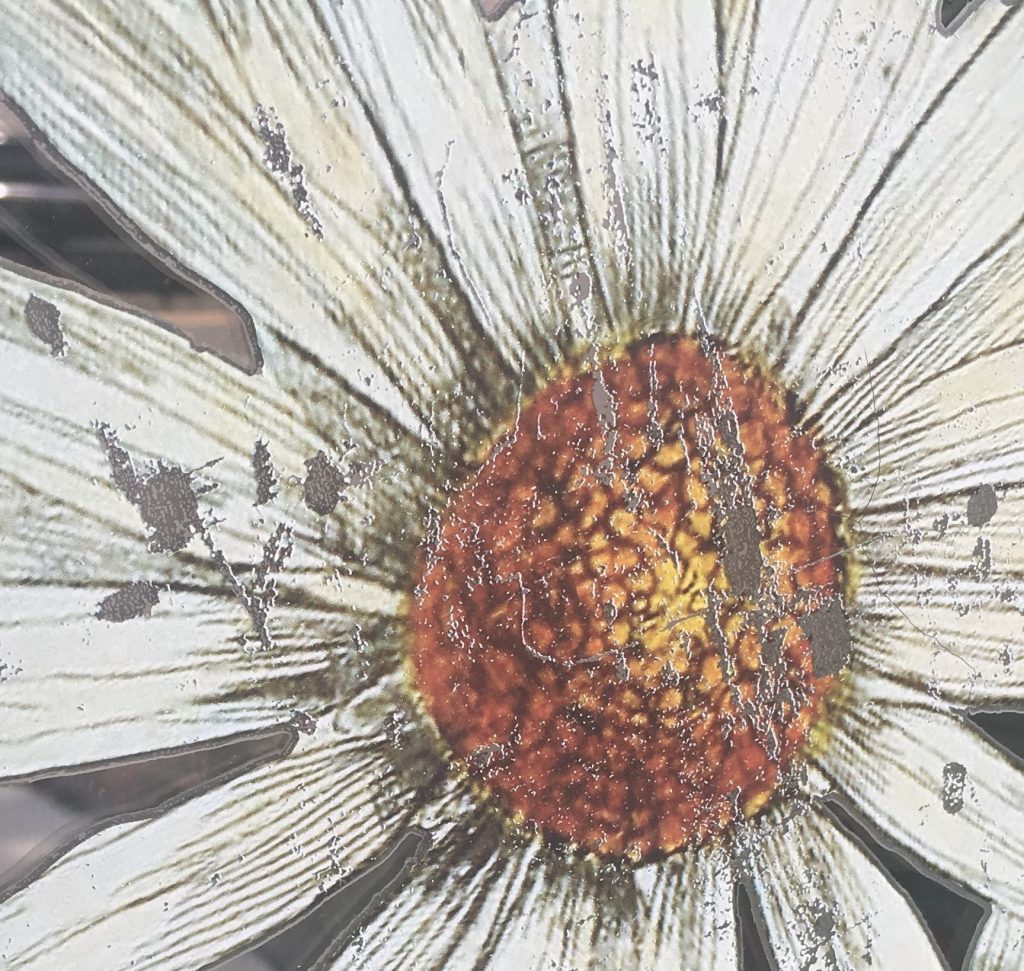
Below is a photo that I took in late July of 2019. Can you see how the bright red and colors have faded?

Again…keep in mind- the transfers are meant to be used on furniture or walls or mirrors or any home decor….inside your home.

Of course, many others push the envelope and put the transfers on the exterior of their entrance doors and we thought that was a great idea and followed suit. I just want to make sure that you’re aware that if you try to do this also, you’ll still be impressed but that the color….. if vibrant in the transfer, will ultimately fade because of the UV rays of the sun. I would not let this discourage you because the design In images are beautiful and still make a big impact. At the purple painted Lady, we sell all of the IOD products and transfers. And, we are always available to answer your questions. If you ever stop at the store or write us and don’t get a response, please don’t take it in a negative way. We are fairly busy and try to help as many people as possible. Please just send another message or text or call our store number. If you’re in the shop, just wave and say I need help. We are always available!

BUY PRODUCT FROM …..THE PURPLE PAINTED LADY®:

Trish always shares, “first- if you have a local stockist- go visit them and build a relationship with them.  Go to them with your questions and project issues.”  BUT- if you do not have a local stockist- we invite you to try our customer service!As for buying any of the products we mentioned earlier in this post- I hope that you select The Purple Painted Lady® to be your one stop resource!  We have two locations in western NY.  Check out our Information tab and come and meet us!  Otherwise- if you are not located near me- the following information may apply to you.   This information is directed to those who do NOT have a local stockist.  Because if you do – go and meet them, shop from them and build a relationship with them. The guidance, information and knowledge they share with you – will be invaluable.  Get inspired by their shop that they lovingly curated – just for you!   Enjoy that one on one experience!   But for those who are in a location where there is no one selling paint products- and you must buy on-line- consider us.  With that said, visit www.anniesloan.com to find a stockist near you. We are here to help you, our customers!  We want you to be successful!   SOME OF THE REASONS WE THINK THE PURPLE PAINTED LADY® CUSTOMER SERVICE IS THE BEST: *  We love our customers and it shows!*  Ordering online?  If you order before 3 pm EASTERN TIME any day Monday thru Friday – we will ship out your package that SAME day.   We ship orders out every since week day all over the US.  (THIS IS DIFFERENT than SAME DAY DELIVERY. We do not offer that)*  We offer low flat rate UPS shipping cost so if you are one town away or 10 states away- the shipping cost is the same.*  We have awesome follow up customer service, too!*  We sell Chalk Paint® for $34.95 SHOP ON LINE HERE  : )  And I will be here to help you as you progress through your future project!  And if I do say so myself- we offer the BEST customer service that you will ever experience!  Lastly- if I was helpful to you- ….please consider leaving a positive review on my Facebook business page sharing your positive experience or thoughts about The Purple Painted Lady®.  Here is a link to my Facebook page=> http://www.facebook.com/pages/The-Purple-Painted-Lady/291882785710    This really helps me!  (wink, wink!)
XOTrish

The Purple Painted Lady® ~ the serial no. is 86/641,416 with the US Trademark Office

Applying IOD Transfers to Our Shop’s Glass Front Doors

One of our sister stockists inspired us to spruce up our shop by applying Iron Orchid Designs Decor Transfers to our front doors! This was such an easy way to totally transform the first thing our customers see in our shop. Typically, transfers are used over a painted, or even unpainted, piece of furniture, and then sealed. The IOD Sisters say they prefer using wax to seal their transfers…and so do we! On glass, however, no sealant is required! We are eager to see how the transfers will hold up through the New York winters, seeing as how they are applied on the exterior of our glass doors. So far, they have been on for a couple months and they look just as good as the first day they were applied!

One of the great things about IOD Transfers is they do not have to be used exactly how they are printed. That means, you can cut the piece of acetate the designs are on and place different areas in different orientations, which is exactly what we did on our doors! We used multiple transfers in multiple different ways….Here is a list of the transfers that were used:

Midnight Garden Decor Transfer (24″x33″) :
https://shop.thepurplepaintedlady.com/Midnight-Garden-Decor-Transfer-24×33-_p_987.html

The main transfer we used was Midnight Garden. We cut this transfer right down the middle, and placed one half on one side of the doors, and the other half on the other side! Then we used the other two transfers, Wildflower Botanicals and Ladies in Waiting as “fillers” for the remainder of the empty space on the doors. These transfers are great because multiple people could use the same transfer, but each project would look totally unique!

Applying Transfers to Glass: This application can take a little more patience than applying a transfer onto a painted surface. Glass is not as porous of a surface, so we had to apply a bit more pressure to allow the transfers to fully adhere to our doors!

Here is a photo of the finished product! See below for the full video on how we completed this project.

NOTE – some transfers, like the close-up shown below, are already slightly distressed! This allows for a naturally distressed look without having to sand….In those areas your glass, or paint color, will show through.

Stenciling Our Shop’s Front Concrete Sidewalk Using Chalk Paint®

It was such a beautiful day and our sidewalk in front of our Macedon. NY shop, is anything but – we decided to try what we could to give it a facelift. So, we broke out the
Old White Chalk Paint® by Annie Sloan and painted a section of it. Chalk Paint® is an indoor and outdoor paint- so I can use it on my kitchen cabinets and ~ I can paint my front walkway. In fact, notice in the photo below the rectangular shaped black section near the curb? As a testament of how long Chalk Paint® will last outside- that was from a container of Graphite Chalk Paint® that fell from a shipment during being unloaded and leaked – like over THREE years ago. Although you can seal the Chalk Paint® with Annie’s Lacquer that is for both inside and out- I do not plan on doing that – and quite frankly- not sure I would recommend it on concrete slabs because moisture will be coming from the bottom up – and the Lacquer on top outside on the slab- I do not believe will fair well. So, leave the Chalk Paint on a sidewalk or outside concrete slab without Lacquer because of that.

PREP THE OCNCRETE: It needs to be clean. I did not power wash prior- although that is a great idea and if you do, let the concrete have a few dry days to really dry out. I did however, broom sweep the space to remove as much of the dirt and debris that was there.

PAINT: We then shook our can of Old White Chalk Paint® and applied a nice liberal coat using our Annie Sloan LARGE Paint Brush. Keep in mind- we normally recommend thinning the Chalk Paint® with water prior.

THINNING CHALK PAINT® WITH WATER: This is most important during your initial application of Chalk Paint®. You may ask why we recommend this. Concrete or cement is porous. That is why if you spill something on it – often- you cannot remove all of the stain since it has been absorbed into the concrete. Chalk Paint®- when thinned with some water – will permeate the concrete and get absorbed….. this will give you a better concentrated color and stretch your paint some. With a second coat – thinning is beneficial for ease of application too – but perhaps use less water.

WHAT TOOL TO USE FOR APPLYING CHALK PAINT®? The answer depends on what you are doing. If trying to cover a large surface area…I would use a foam roller. If doing these super large stencils- then I would recommend Annie Sloan’s Oval Brush. This brush is perfect for a big project like this because we wanted to cover quite a bit of surface area and it holds paint really well. Because of the architecture of the top of the bristles, it gets into the nooks and crannies of the concrete really well. I sort of cheated- I literally poured paint out on the concrete and then, spread it around. I made sure to paint within the lines…LOL I wanted to look crisp on the edges.

Painting is therapeutic and a lot of fun- so Hannah joined in on this. This project took about 40 minutes to do total and we used about 1 container of paint. The concrete is quite porous and did drink up the paint.

The crazy thing, was the following day we were hit substantial rain. The amount of rain we received was noted as 10 inches per hour by the newschannel and it rained for a solid 30 minutes. Somewhat unusual to have that much rain in such a short time in NY. Good news was- the rain did not hurt our Old White Chalk Paint® at all.

We had been waiting for a good time when we could add some additional color to the walk- so Hannah grabbed a large stencil we had by Cutting Edge Stencils. So far, we have decided to use Antibes Green, Florence and Aubusson Blue.

Using a little painter’s tape to hold the stencil in place- we applied the paint using a roller, a paint brush by Annie and also a flat head round brush (all are shown in photo above.) Personally, on the concrete – I liked the flat head round brush, but if we were painting on linoleum or smooth tile…I think I would have love the Annie Sloan 2″ Sponge Roller.

Placement for the stencil is something you should think about prior to starting- and since we are using multiple colors, think about where you want colors located.


BUY PRODUCT FROM …..THE PURPLE PAINTED LADY®:

Trish always shares, “first- if you have a local stockist- go visit them and build a relationship with them.  Go to them with your questions and project issues.”  BUT- if you do not have a local stockist- we invite you to try our customer service!As for buying any of the products we mentioned earlier in this post- I hope that you select The Purple Painted Lady® to be your one stop resource!  We have two locations in western NY.  Check out our Information tab and come and meet us!  Otherwise- if you are not located near me- the following information may apply to you.   This information is directed to those who do NOT have a local stockist.  Because if you do – go and meet them, shop from them and build a relationship with them. The guidance, information and knowledge they share with you – will be invaluable.  Get inspired by their shop that they lovingly curated – just for you!   Enjoy that one on one experience!   But for those who are in a location where there is no one selling paint products- and you must buy on-line- consider us.  With that said, visit www.anniesloan.com to find a stockist near you. We are here to help you, our customers!  We want you to be successful!   SOME OF THE REASONS WE THINK THE PURPLE PAINTED LADY® CUSTOMER SERVICE IS THE BEST: *  We love our customers and it shows!*  Ordering online?  If you order before 3 pm EASTERN TIME any day Monday thru Friday – we will ship out your package that SAME day.   We ship orders out every since week day all over the US.  (THIS IS DIFFERENT than SAME DAY DELIVERY. We do not offer that)*  We offer low flat rate UPS shipping cost so if you are one town away or 10 states away- the shipping cost is the same.*  We have awesome follow up customer service, too!*  We sell Chalk Paint® for $34.95 SHOP ON LINE HERE  : )  And I will be here to help you as you progress through your future project!  And if I do say so myself- we offer the BEST customer service that you will ever experience!  Lastly- if I was helpful to you- ….please consider leaving a positive review on my Facebook business page sharing your positive experience or thoughts about The Purple Painted Lady®.  Here is a link to my Facebook page=> http://www.facebook.com/pages/The-Purple-Painted-Lady/291882785710    This really helps me!  (wink, wink!)
XOTrish

The Purple Painted Lady® ~ the serial no. is 86/641,416 with the US Trademark Office

Painting a Porch with Chalk Paint® (and Milk Paint too)

We love it when we can share customer testimonials. This one is especially nice from Carrie, who lives in Western NY. We literally copied her write verbatim- so I hope you enjoy all that she has done. She has photos showing the projects after one year of being done too!

Painting Porches with Chalk Paint® (and Milk Paint too!)
Three years ago, I wrote a post about painting the walls of our house with chalk paint.  Since then, my love of chalk paint has continued, so much so that sometimes when I am talking to people they say, “Wait, are you the Carrie who visits The Purple Painted Lady?”  Indeed, I am! When you live in Fairport village (located in NY state), a front porch-friendly community, you feel a certain responsibility to have a friendly, welcoming porch.  Our little 1930’s cedar shingle house has many features that I adore; however, one of them is NOT all of the latex paint on the porches that peels and flakes with the slightest touch.  Two years ago, my husband and I started working on the porches, not realizing quite how much work we were getting ourselves into at the time, but I can honestly say the results have been worth every bit of the work.  
Front Porch Before:

The original plan was to scrape the flaking paint off the porch and then apply Honfleur Chalk Paint® by Annie Sloan.  Once we started scraping, we noticed that a large quantity of paint was being removed and that the stair treads were not worth saving.  When we replaced the stair treads and had bare wood to work with the plan changed. We considered Curio Milk Paint instead.  As milk paint applies evenly to raw wood, we knew that one big step that we would now need to complete was stripping and sanding the other front porch surfaces.  
Front Porch Preparation Stage:

We scraped and sanded for 3 days until we decided that the treads were not worth saving.  At the end, we removed each of them and replaced the treads with new wood.  

We used a “green” chemical stripping agent to remove no fewer than 12 layers of paint from the ledge.  It took many applications!

We tested the paint for lead, and even though it came back negative, we still took extra precautions when removing the paint.  

We rented a floor sander for a day but soon discovered that sanding off several layers of porch paint takes double that.    

Removing all of the debris was an ongoing process.  After sweeping throughout the project, we used a shop vac.  

After the shop vac, we wet a paint pad with plain tap water, wiped the surface dust from the porch, and let everything dry for a few days.  
Front Porch Painting Stage:

We chose Louis Blue Chalk Paint® by Annie Sloan for the ceiling.  As you can see, we chose to paint the ceiling before removing the paint from the other surfaces of the porch.  

Glass jars work perfectly for mixing large quantities of milk paint.  

The raw wood of the new treads absorbed the paint more quickly than the older wood on the porch; however, by adjusting the number of coats that we applied, we made the finished appearance look very similar.  

Before painting the floor, we primed and painted the old beadboard.  
Front Porch Oil Stage:

We used Miss Mustard Seed’s Hemp Oil to seal and protect the porch.  It is hard to predict how many coats 90 year old wood will take.  After 3 coats, we started oiling spots that seemed to soak the oil in and dry very quickly until they seemed saturated as well.  After applying the oil, we let the porch and stairs sit undisturbed for 2 weeks to allow the oil to cure. The result is a warm, rich color that still allows some visibility of the grain of the original tongue and groove floor.
Front Porch Extras:

This enamel top table was found in an antique store.  Although the enamel surface was in terrific shape, the painted part of the table needed some help.  We noticed that the color of the blue on the table perfectly matched the original Napoleonic Blue Chalk Paint® that we already had in our paint supply.  We used Pure White Chalk Paint® on the rest of the painted part of the table to complement the enamel top.  

This bench was my grandmother’s organ bench.  I can still remember her sitting at this bench and stretching to reach the pedals of the organ as she played.  (She was 4’11” at her tallest.) Although the organ is long gone, I saved the bench. Her favorite color was blue, and I think the Louis Blue Chalk Paint® on her organ bench would make her smile.  

This stool was my husband’s grandmother’s piano stool.  He can still remember sitting (and twirling) on the stool for Wednesday night dinners with his family at Grandma’s house.  Although the piano is long gone, we saved the stool. His grandmother’s favorite color is also blue, and I know that seeing this stool in Louis Blue Chalk Paint® makes her smile.  She has visited our house and sat on our porch.  She is 96 years young; bless her heart.  

The front door is original to the house.  It was painted with red latex paint, and it was peeling, of course.  After removing the hardware and scraping off the loose paint, we painted it with Honfleur Chalk Paint®.

The spindles, railings, and risers of our stairs are all painted with the previous version of Old White Chalk Paint®.  With a lot of elbow grease as well the paint from The Purple Painted Lady, our front porch is far more welcoming.

Here is the porch 1 year after painting.  It still looks wonderful. Please excuse the layer of springtime pollen that has settled over the floor and furniture.    
Back Porch Before:

When we purchased our house, the back porch was also painted in latex paint that was, you guessed it, peeling.  
Back Porch Preparation and Results:

Unfortunately, I did not take as many photographs of the back porch project.  For the old beadboard that covers 3 walls, we scraped, primed, and painted. For the cedar shingles, we scraped, spackled holes, and painted.  All of these were painted with the original Napoleonic Blue Chalk Paint®.  For the beadboard ceiling and trim, we again scraped, primed, and painted using the previous version of Old White Chalk Paint®.  Please notice the red jelly cupboard.  It is one of the first items that I painted using Chalk Paint®.  You may have already guessed that it is Emperor’s Silk Chalk Paint®; the color is the version that was available in the quart containers.  
Back Porch Extras:

To add some of the warmth of wood to our back porch, we covered an existing support piece with cedar boards.  Our patch collection now hangs on it. We also replaced the old red door with this 1930’s solid wood door. We used Clear Shellac as that is what was already on the door when we received it.  The color of the trim around the cedar covered support and the door is the previous version of Old White Chalk Paint®.

This tin quilt square is made of 9 ceiling tiles that we purchased from The Purple Painted Lady.  The tiles were first coated in a layer of Clear Shellac, then they were painted using the previous version of Old White Chalk Paint® and Emperor’s Silk Chalk Paint® from the quart containers.  My husband hand painted the tiles with both colors on them.  
Thank you to all of the helpful, cheerful workers at The Purple Painted Lady.  They have answered all of my questions and problem solved with me many times through the porch projects.  You might think that after all of that painting, I might be ready for a little break from painting. However, I am already making a list of new projects and the new colors that I would like to try.  After all, summer is here, and what would summer be without many trips to my favorite store? ~ Carrie

BUY PRODUCT FROM …..THE PURPLE PAINTED LADY®:

Trish always shares, “first- if you have a local stockist- go visit them and build a relationship with them.  Go to them with your questions and project issues.”  BUT- if you do not have a local stockist- we invite you to try our customer service!As for buying any of the products we mentioned earlier in this post- I hope that you select The Purple Painted Lady® to be your one stop resource!  We have two locations in western NY.  Check out our Information tab and come and meet us!  Otherwise- if you are not located near me- the following information may apply to you.   This information is directed to those who do NOT have a local stockist.  Because if you do – go and meet them, shop from them and build a relationship with them. The guidance, information and knowledge they share with you – will be invaluable.  Get inspired by their shop that they lovingly curated – just for you!   Enjoy that one on one experience!   But for those who are in a location where there is no one selling paint products- and you must buy on-line- consider us.  With that said, visit www.anniesloan.com to find a stockist near you. We are here to help you, our customers!  We want you to be successful!   SOME OF THE REASONS WE THINK THE PURPLE PAINTED LADY® CUSTOMER SERVICE IS THE BEST: *  We love our customers and it shows!*  Ordering online?  If you order before 3 pm EASTERN TIME any day Monday thru Friday – we will ship out your package that SAME day.   We ship orders out every since week day all over the US.  (THIS IS DIFFERENT than SAME DAY DELIVERY. We do not offer that)*  We offer low flat rate UPS shipping cost so if you are one town away or 10 states away- the shipping cost is the same.*  We have awesome follow up customer service, too!*  We sell Chalk Paint® for $34.95 SHOP ON LINE HERE  : )  And I will be here to help you as you progress through your future project!  And if I do say so myself- we offer the BEST customer service that you will ever experience!  Lastly- if I was helpful to you- ….please consider leaving a positive review on my Facebook business page sharing your positive experience or thoughts about The Purple Painted Lady®.  Here is a link to my Facebook page=> http://www.facebook.com/pages/The-Purple-Painted-Lady/291882785710    This really helps me!  (wink, wink!)
XOTrish

The Purple Painted Lady® ~ the serial no. is 86/641,416 with the US Trademark Office

Spraying Chalk Paint® by Annie Sloan with a Paint Sprayer

INTERESTED IN USING A SPRAYER FOR YOUR CHALK PAINT® in Liters?: Seriously- if you are planning on painting your kitchen cabinets and are looking to get a smoother finish- using a sprayer is a great option. Or, painting furniture but especially wicker or dining room chairs and again, you want a smooth finish – this sprayer is a total game changer and will expedite the process!

And we have the Wagner Home Decor Paint Sprayer for sale HERE.

The Purple Painted Lady likes to use the Wagner Home Decor Paint Sprayer. We retail it for $90. A cool feature that makes this accessible for anyone, is that you do not need an air compressor and this little tool is the bomb! The learning curve is not bad and it is really super easy to use.

Before using the sprayer – make sure to thoroughly clean your cabinet doors. We like to wipe the cabinet surfaces down using Krud Kutter and a paper towel or a Scotchbrite Scrubbie. After cleaning the door, use a fine mist spray bottle and spray the surface with fresh water and wipe away any residual cleaner with a rag or paper towel.

Once the surfaces have been cleaned and you have given them enough time to thoroughly dry, then you can begin painting. This is the fun part!

If painting cabinets, I like to remove the doors from the cabinet and also – remove the hardware. Put the hardware from each door into its own plastic baggie and label it so you know door which they coincide with.

  1. Prepare your surface you want to paint by cleaning as described above.
  2. Prepare your paint for the sprayer by warming the paint can in a hot bath – literally while the paint container. This actually helps a lot. See our photo immediately below. Fill the container with super hot water and then place the container in it but make sure that the water level stays at least an inch below the top of the can.
  3. Next, pour some paint into the Wagner container – it is important to thin your paint with very, very warm water or use paint extender will also work.

AGAIN- you should use very – very warm water for both the bath and thinning your paint!

So, pour some the paint in to the pot of your spray gun….. but do not fill more than 50% because you still need add to water and/or XIM. There is not a set recipe ….most will be around adding about 10% to 20%.  (start with the less water, because you can always add more paint if you add too much water, but try not to waste your paint!)

You know you have the right consistency when the “worm casts” fall from a stir stick and just blend in to the paint versus leaving textured ribbon on top. What are “worm cast?” Think about when you have cake batter and it is thick. If you pick up your spoon and the batter that drizzles off, sits on top of the batter ….that ribbon of batter is a worm cast. You know you have the right mix of paint to XIM or water when you do not have worm casts. You must make sure also- the consistency is the same all through out the pot so mix it well! The tricky part is NOT making it too thin- so experiment with less paint to not waste it in the beginning.

4. Having your work space and the cabinet doors (or whatever it is you are painting) heated to about 70 degrees is important. Work in a reasonably warm space.  And this is not while you are just in it painting. Meaning- you heat your garage while you are working in it and then – turn the heat off when you are done but leave your painted piece and sprayer there.  The space should be kept at this temperature consistently prior and for the entire cure time!

5. We suggest playing around with the sprayer’s spray pattern settings.  We like to go back and forth horizontally. If painting cabinet doors, we will paint all four sides of the door, then do the flat top surface.

6. Start with a Test spray on a wall. Hang a drop cloth up or use large sections of cardboard.

7. Begin painting with super thin coats. We will actually apply 5 or 6 coats of paint with the sprayer overall, but keep in mind- we build the coverage up gently. Each application is super fast and again- is applied thin.

8. The paint will self level quite a bit! You will be surprised at how it does this. But if you apply it too heavy- you can get an orange peel look. Give each application ample time to thoroughly dry. I would suggest to be safe- wait an hour between coats.

8. Start with a Test spray on a wall. Hang a drop cloth up or use large sections of cardboard.

9. Hold the gun anywhere from 6 to 12 inches from your surface.  (Play with this distance based on your sprayer)

10. Once you begin spraying your cabinets, get a line of paint sprayed down and then start your second row and cover the previous about 50% to have a uniform outcome.

In the video below we are using Chalk Paint® by Annie Sloan in the color named Original. It is Annie’s warmest “white.”

11. The paint will look a little stipply.  But since it has been thinned- it will settle and smooth out.  After about an hour or two (if you are in a damp area time may take longer)….you can apply a second coat.

12. Finish your cabinets by sealing them with Annie’s Clear Wax or Lacquer. (by the way, Lacquer can be sprayed too!)

WATCH THIS VIDEO by Annie Sloan showing how to spray Chalk Paint®.

Additional IMPORTANT Sprayer Information for Chalk Paint® by Annie Sloan:

Experiment to get the right results when spraying with your particular model. The most important thing to know is that there is no ‘magic’ ratio of paint to water and you will need to tweak it every time you spray, as site specific conditions mean that results can vary.  With that said, Annie Sloan Interiors recommends that you add 10% to 20% warm water as a starting point. 

ADDING A PAINT EXTENDER OR WATER:

An extender will thin your paint and by adding it, it will assist to get a smooth finish.  The Purple Painted Lady reached out to Annie Sloan Interiors and they shared that they have used XIM Latex Extender with good results in the past.  Don’t let the name
XIM Latex Extender fool you – since the word “Latex” is noted. Although there is no Latex in Chalk Paint®- this product is meant to work with any water based paints and Chalk Paint® is water based.   The container in the picture below is the brand Annie Sloan Interiors referred us to use, but others are available. Their spray consultant guys tell them that the main ingredient of these extenders is propylene glycol and that you can effectively make your own extender using this ingredient.  Personally, I would just suggest purchasing the product pre-packaged and ready to go.  

Even though you have added water as stated in the previous step – you still dilute with water AND add the extender – if you find it’s too thin to spray you can always add more paint. Don’t get too hung up on the amounts – the spray guys we work with just eyeball it!   Using an airless sprayer is not recommended – the high solids content in Chalk Paint® will damage the nozzle.  You will want to warm your Chalk Paint® because it will spray and settle better.  Place your container of paint in a bain marie of very hot water for 15 minutes.  Bain Marie is a container holding hot water into which a pan is placed for slow warming. After 15 minutes, When we have taught this in workshops in the past, we used a large crockpot as a bain marie. It doesn’t really matter how much water is in there just make sure it is not too high that when you set your containers in- that the water overflows into your paint!

CONNECTING THE AIR COMPRESSOR TO THE SPRAY GUN and TIP ORIENTATION:

When connecting the air compressor tube to your spray gun, make sure tube from the air compressor bows in a direction that makes sense. So, if you are right handed – have it bow away from your hand. The hose should not be bowed down toward the ground.down. Also, make sure the tip of your spray gun is in the right setting. You want your paint to come out spraying wide versus condensed. Think about using a garden hose and water flowers. You spray them versus having the water come out in a solid, florcefull stream.

BUY PRODUCT FROM …..THE PURPLE PAINTED LADY®:

First- if you have a local stockist- go visit them and build a relationship with them.  Go to them with your questions and project issues.  BUT- if you do not have a local stockist- we invite you to try our customer service!As for buying any of the products we mentioned earlier in this post- I hope that you select The Purple Painted Lady® to be your one stop resource!  We have two locations in western NY.  Check out our Information tab and come and meet us!  Otherwise- if you are not located near me- the following information may apply to you.   This information is directed to those who do NOT have a local stockist.  Because if you do – go and meet them, shop from them and build a relationship with them. The guidance, information and knowledge they share with you – will be invaluable.  Get inspired by their shop that they lovingly curated – just for you!   Enjoy that one on one experience!   But for those who are in a location where there is no one selling paint products- and you must buy on-line- consider us.  With that said, visit www.anniesloan.com to find a stockist near you. We are here to help you, our customers!  We want you to be successful!   

SOME OF THE REASONS WE THINK THE PURPLE PAINTED LADY® CUSTOMER SERVICE IS THE BEST: *  We love our customers and it shows!*  Ordering online?  If you order before 3 pm EASTERN TIME any day Monday thru Friday – we will ship out your package that SAME day.   We ship orders out every since week day all over the US.  (THIS IS DIFFERENT than SAME DAY DELIVERY. We do not offer that)*  We offer low flat rate UPS shipping cost so if you are one town away or 10 states away- the shipping cost is the same.*  We have awesome follow up customer service, too!*  We sell Chalk Paint® for $37.99 SHOP ONLINE HERE  : )  And I will be here to help you as you progress through your future project!  And if I do say so myself- we offer the BEST customer service that you will ever experience!  Lastly- if I was helpful to you- ….please consider leaving a positive review on my Facebook business page sharing your positive experience or thoughts about The Purple Painted Lady®.  Here is a link to my Facebook page=> http://www.facebook.com/pages/The-Purple-Painted-Lady/291882785710    This really helps me!  (wink, wink!)
XOTrish

The Purple Painted Lady® ~ the serial no. is 86/641,416 with the US Trademark Office