Milk Paint comes in a powdered form and has only 5 simple ingredients. It is fun to use and a lot easier than you think. You mix water with the Milk Paint- which – will create a thinner consistency from traditional paints, but you will be pleasantly surprised at how extremely well it covers!
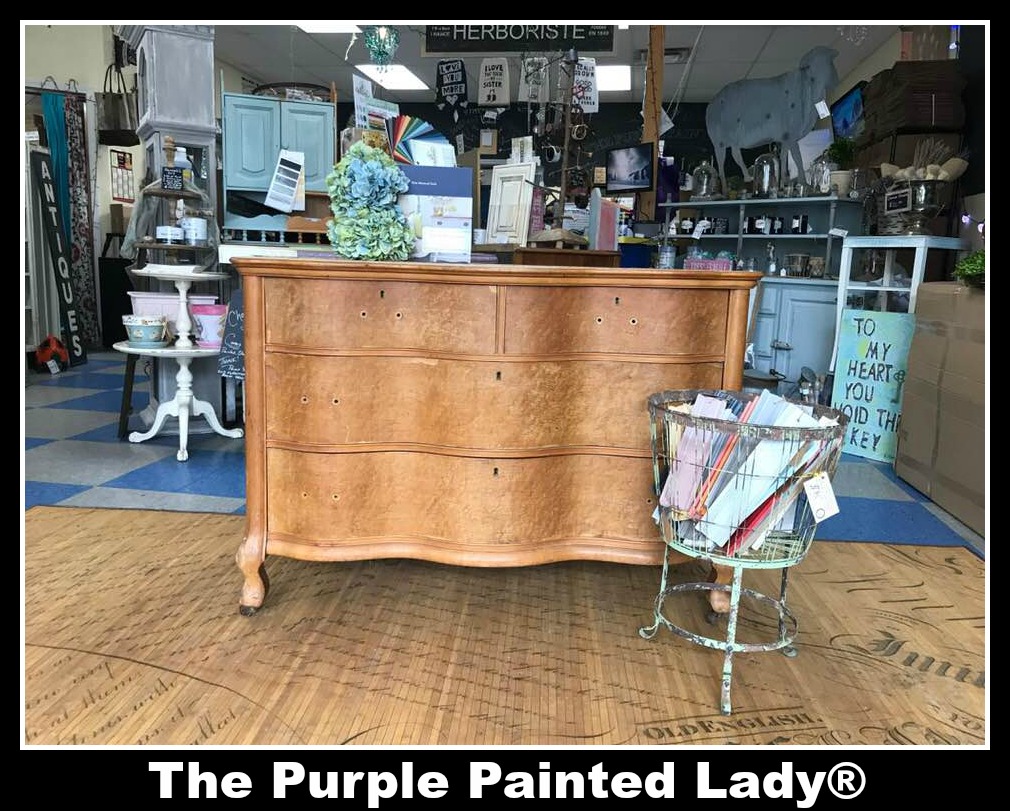
This old serpentine style dresser was begging for some attention after sitting in our large barn for a bit. The veneer on the top was peeling off and was chipped on the drawers. The old oak finish was worn and tired and in need of a face lift. What a better way to add more character to an old piece than use Miss Mustard Seed Milk Paint and we were hoping for a chipping effect!
Cleaning The Dresser
To start, the dresser needed to be cleaned. We cleaned the dresser inside and out with Odorless Mineral Spirits. After wiping it down twice for good measure, we followed it with wiping it again with new rags moisten with fresh water.
Removing Old Veneer
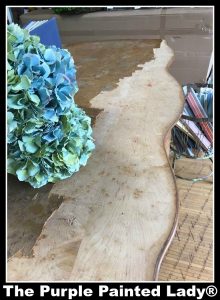
Once it was all clean, we focused on removing the peeling veneer top. Using an old iron, filled with water and set to the hottest steam setting, a cotton towel and a putty knife, we slowly heated up the old veneer and peeled it off bit by bit. The cotton towel we set between the iron and the actual wood surface. We worked in small sections. Be careful if you try this at home because the steam gets super hot! The towel was to prevent any glue from adhering to the iron itself, but use an old iron, since some still got on there. Once we had most of the veneer
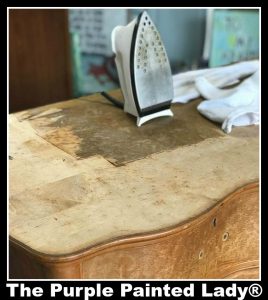
off, we sanded the top with an Annie Sloan Sanding Pads(we used the Medium and Coarse grit) that had a little Odorless Mineral Spirits moistening them, to remove the remaining minimal amount of veneer adhesive that we could still feel was on the finish. Once we were finished- the top of the old serpentine dresser looked amazing. It was back to the original raw wood and looking pretty!
As for the drawers, we decided to keep the original chipped veneer. The chips were around only some of the edges and we decided it will only give the final piece more character.
Color Selection
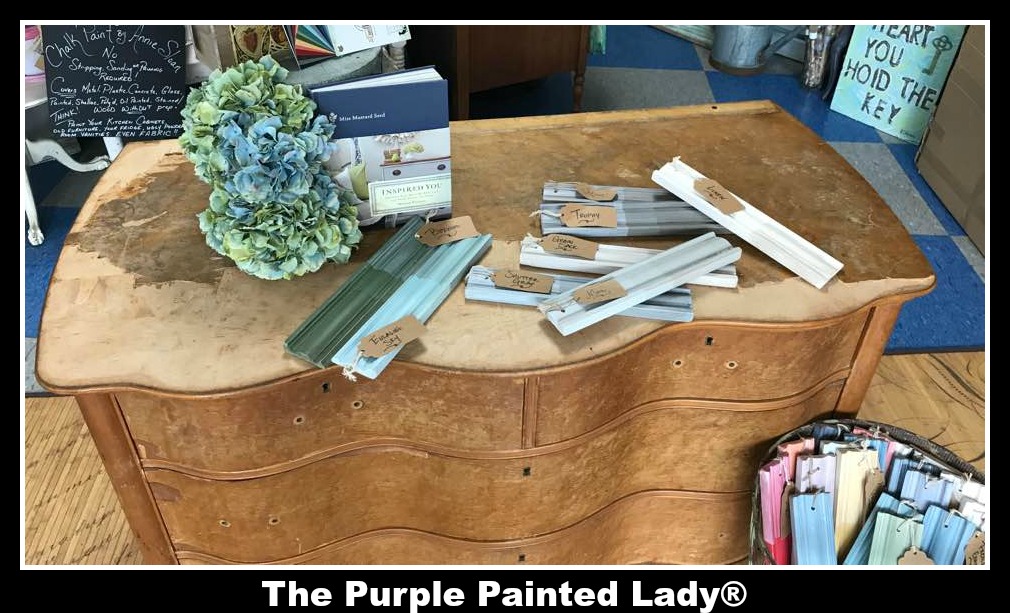
Next was the fun part. We debated and stewed on three or four colors for a few days. Finally, we decided to paint the base of the dresser with Miss Mustard Seed’s Milk Paint in the color Boxwood. Boxwood is a rich, dark grassy green color. In fact- it is more like a muted olive. Paired with the light wood top that we had restored, we knew it would be a gem.
Characteristics of Milk Paint
Milk Paint has existed for centuries. Basically, this is what people once painted their barns and homes with. It has amazing coverage, great adhesion especially over raw wood, and a truly unique finish. Over a sealed or finished surface, Milk Paint may crackle or have some chippiness to it- but this is not guaranteed. Over a raw wood surface, it tends to soak in like a stain but yet, still have an opaque finish.
If working with a piece that had a previous finish to it, and you did not want the Milk Paint to chip it all- you can use Miss Mustard Seed’s Bonding Agent to mix with your Milk Paint to give better adhesion. However, for this serpentine dresser, we wanted to see what the Milk Paint would do all on its own.
Mixing Milk Paint
Mix your Boxwood Milk Paint in a one to one ratio with water. You only mix the amount
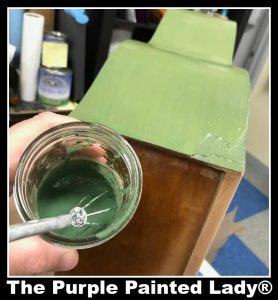
of paint that you will be using since it has a short life once mixed with water. For example, mixed Milk Paint in an air tight container will begin to dry in about 36 to 48 hours. So, remember- do not mix the whole bag at once unless you are going to use it all up.
For this dresser, we used about 1 cup of Milk Paint powder and 1 cup of water. When
mixing Milk Paint, it is important to note that, it is a mineral based paint. That means that the color may vary from batch to batch. If you are painting a large project and need to mix more than one package of Milk Paint, we recommend that you mix or batch the bags of the dry powdered Milk Paint together before starting. This will ensure that you have an even color throughout. For our dresser, this was not necessary. However, shake your package of Milk paint and get all of the ingredients mixed up well. Then, measure out the amount of powdered Milk Paint you need for your project, mix with
water stirring for 1 minute, then let it rest for about 15 minutes. That rest time is crucial. It allows the pigments in the paint to be absorbed into the water completely. After the 15 minutes, mix your paint again. You will want to test the consistency by holding up the spoon or wisk –whatever you used to mix the Milk Paint. If the paint comes off in a thin ribbon or string, it is the correct consistency. Unlike Chalk Paint® by Annie Sloan, this is a thinner paint and will not have the thick consistency of Chalk Paint. It will still have great coverage, though! Another way to test your paint consistency is by checking for clumps. Milk Paint is a powdered pigment, it may be clumpy if you do not have enough water added to it. Remember to test your paint on a sample board before painting to ensure that you have the correct consistency.
Start Painting
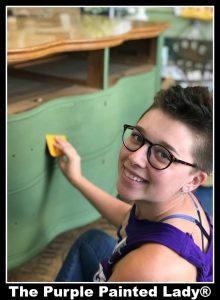
You do not need any fancy paint brushes for Milk Paint. In fact, we like to use a nice quality Chip Brush. Natural bristles seem to work especially well with Milk Paint.
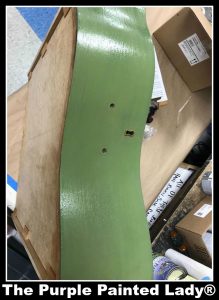
It only took two coats to completely cover the original finish.
Dry Time
The Milk Paint took about 30-45 minutes to completely dry. The dry time may vary depending on temperature and humidity in the area. DO NOT ACCELERATE THE DRY TIME. If you try and accelerate the dry time with a blow dryer or fan, you could end up with Milk Paint chipping off your project more than you might like.
After the Milk Paint had dried, we checked for crackle. Sometimes Milk Paint will chip on its own, sometimes it will just crack, and sometimes it won’t do either! Luckily for us, we had some cracking here and there around the edges of the piece. With a small plastic spatula, we ran it over the crackle and lifted some of the paint, achieving a chipped appearance.
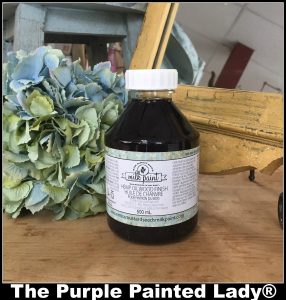
HEMP OIL TOP COAT: When it comes to Milk Paint, either wax or an oil top coat is fine. For inside use, Hemp Oil is wonderful since there are no petrochemicals or solvents in it. For outside use, Miss Mustard Seed recommends Tung Oil. After some debating between Miss Mustard Seed’s Clear Wax and the Hemp Oil, we chose to use the Miss Mustard Seed Hemp Oil. This wonderful, all-natural topcoat without any petrochemicals seals from the inside out. It soaks into the paint and almost sandwiches it in protection. It also provides a wonderful luster and enhances the color. As the top needed a bit of protection, we opted to brush the Hemp Oil into that surface as well.
Using an inexpensive chip brush, we brushed a good amount of Hemp Oil over the surface and let the paint and wood soak it up. The direction of your brushstrokes for applying the Hemp Oil does not matter compared to how you apply paint, where we often want smoother linear strokes. For this piece, we applied 2 coats of the Hemp Oil.
For indoor uses, Marian recommends 2-3 coats. For outdoor use, Marian either recommends 3-5 coats of Hemp Oil or the Tung Oil – which is better suited for exterior use.
After 12 hours, we came back with a rag and wiped away the excess Oil.
The Finished Piece
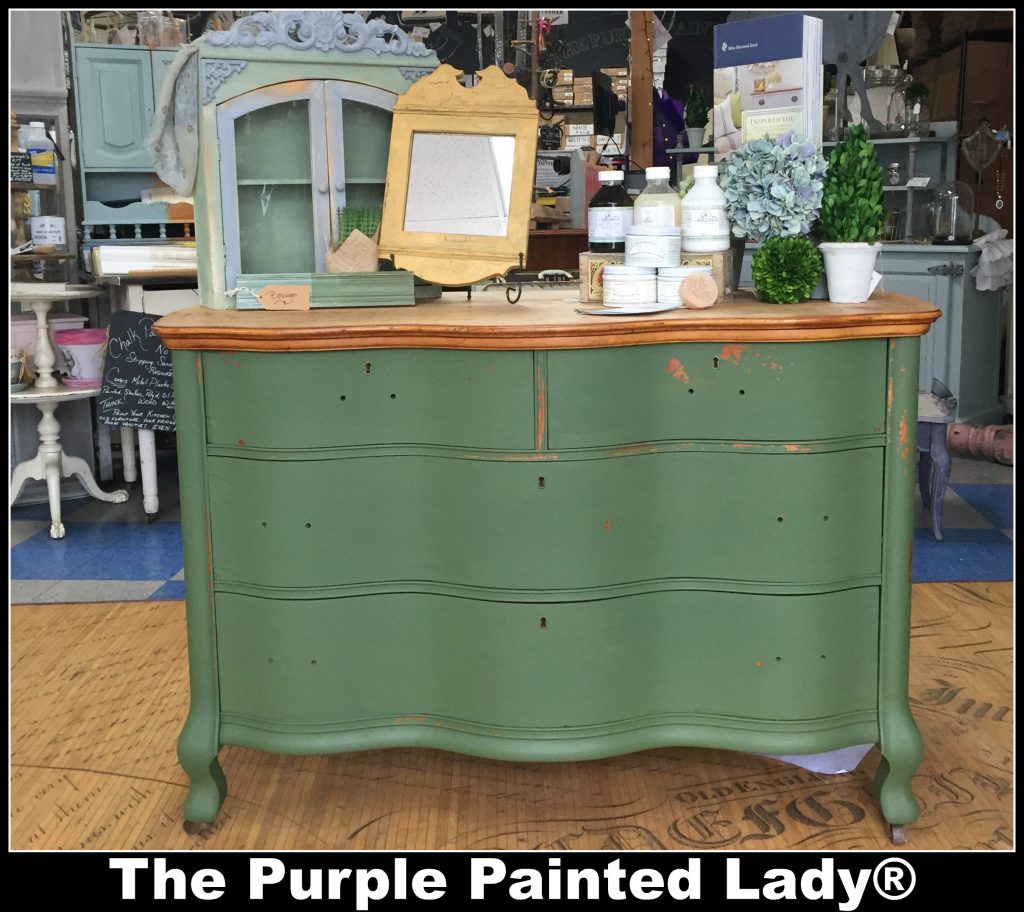
This dresser was brought back to life and now is the star of our front display. Miss Mustard Seed’s Milk Paint is a lot of fun to use. You will be surprised in how well it covers! Have you used Milk Paint before? If no- you should really consider trying it!